Here we are explaining the project of a Touch & Knock sensitive smart soldering iron timer. The purpose of this circuit is to automatically switch on the soldering iron for a specific time period when it detects a knock, touch, or vibration. You can adjust this circuit to switch on the soldering iron when you’re working and switch it off automatically when you are not working. This can be done by putting the piezo sensor on maximum sensitivity and placing it on your table or on the soldering iron stand.
To operate the soldering iron with touch, you have to put the circuit at its low sensitivity. At low sensitivity, the circuit will work as a touch sensor and activates the soldering iron when you touch the soldering iron or its stand and switch it off in intervals when it’s not needed.
The circuit is a power saver so it will save your electricity and the life of your soldering iron will be extended. The sensitivity of the sensor is increased or decreased by the 1M variable resistor connected at the base of the transistor Q1. For low sensitivity remove the 1M resistor connected between the 1M variable resistor and positive rail.
Hardware Components
The following components are required to make Smart Soldering Iron Circuit
| S.no | Component | Value | Qty |
|---|---|---|---|
| 1. | Input Supply DC | 4.5-12V | 1 |
| 2. | IC | NE555 Timer | 1 |
| 3. | Transistor | 2N4401 | 2 |
| 4. | PZT Sensor | – | 1 |
| 5. | LED | – | 1 |
| 6. | Resistor | 1MΩ, 10KΩ, 1KΩ | 2, 2, 1 |
| 7. | Electrolytic Capacitor | 2.2µF/35V, 470µF, 0.1µF | 1, 1, 1 |
| 8. | Variable resistor | 1MΩ | 2 |
| 9. | Relay | – | 1 |
| 10. | Diode | 1N4148 | 1 |
NE555 IC Pinout
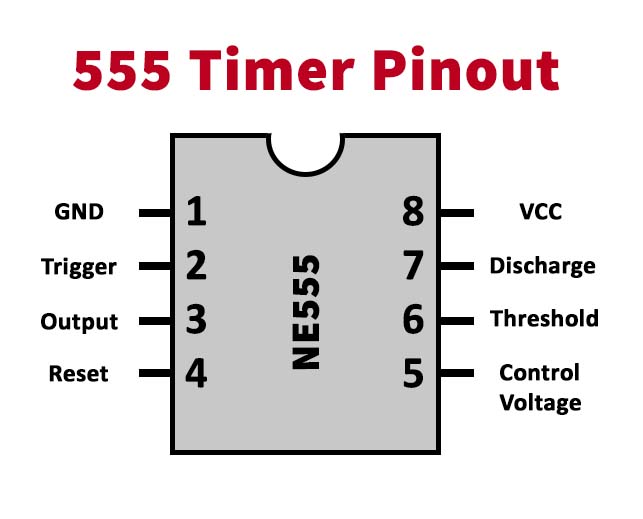
For a detailed description of pinout, dimension features, and specifications download the datasheet of 555 Timer
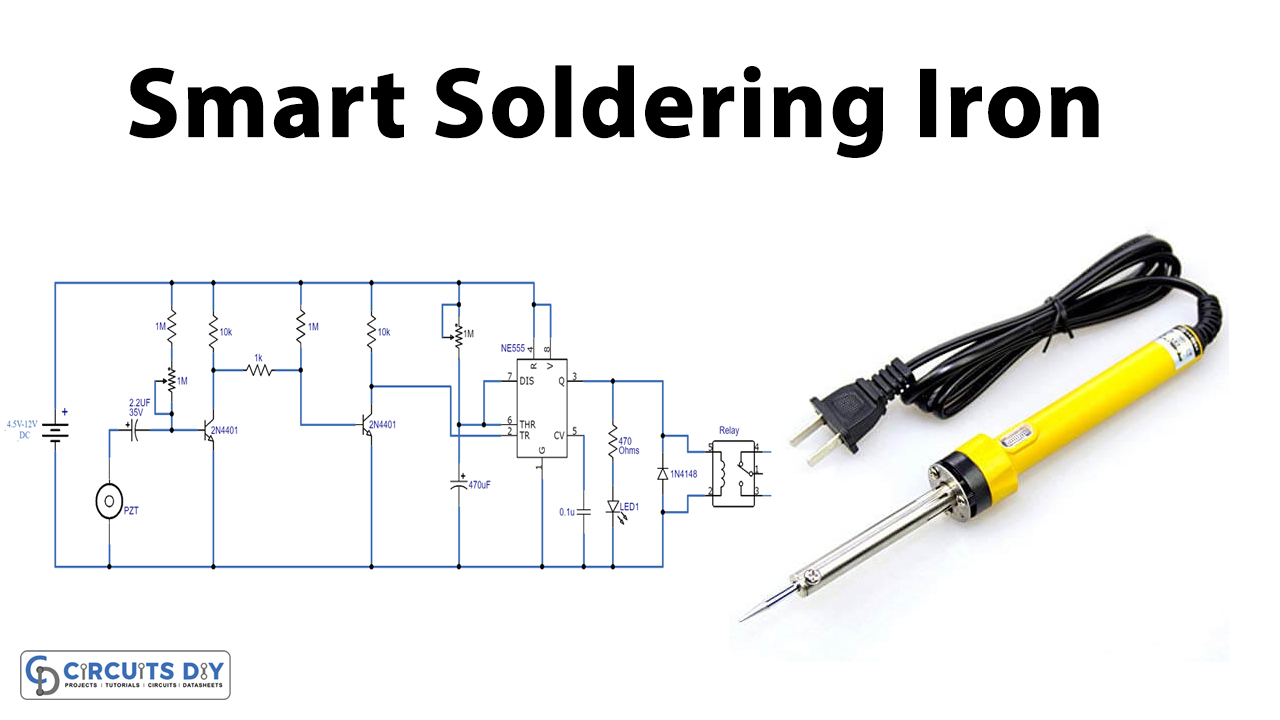
Smart Soldering Iron Circuit
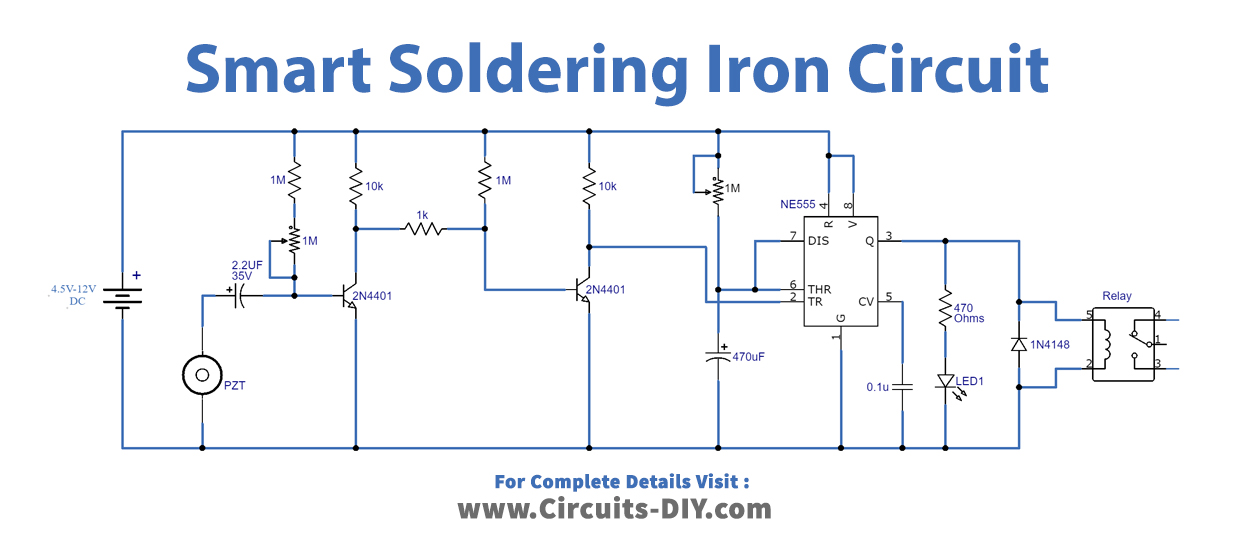
Working Explanation
When the sensor detects vibration, touch, or knock it will activate the circuit, and the relay switch at the output of this circuit is activated as well. So, the soldering iron that is connected with the relay switch will be activated too, for 10-15 minutes and after this time the circuit will be deactivated and the soldering iron too until the circuit senses the next vibration, touch, or knock. The time period of activation depends on the 1M variable resistor marked as Timer Selector.
For best performance place the circuit in a suitable enclosure and attach the blank side of the piezo sensor inside the enclosure, to properly fix the piezo use glue.