Introduction
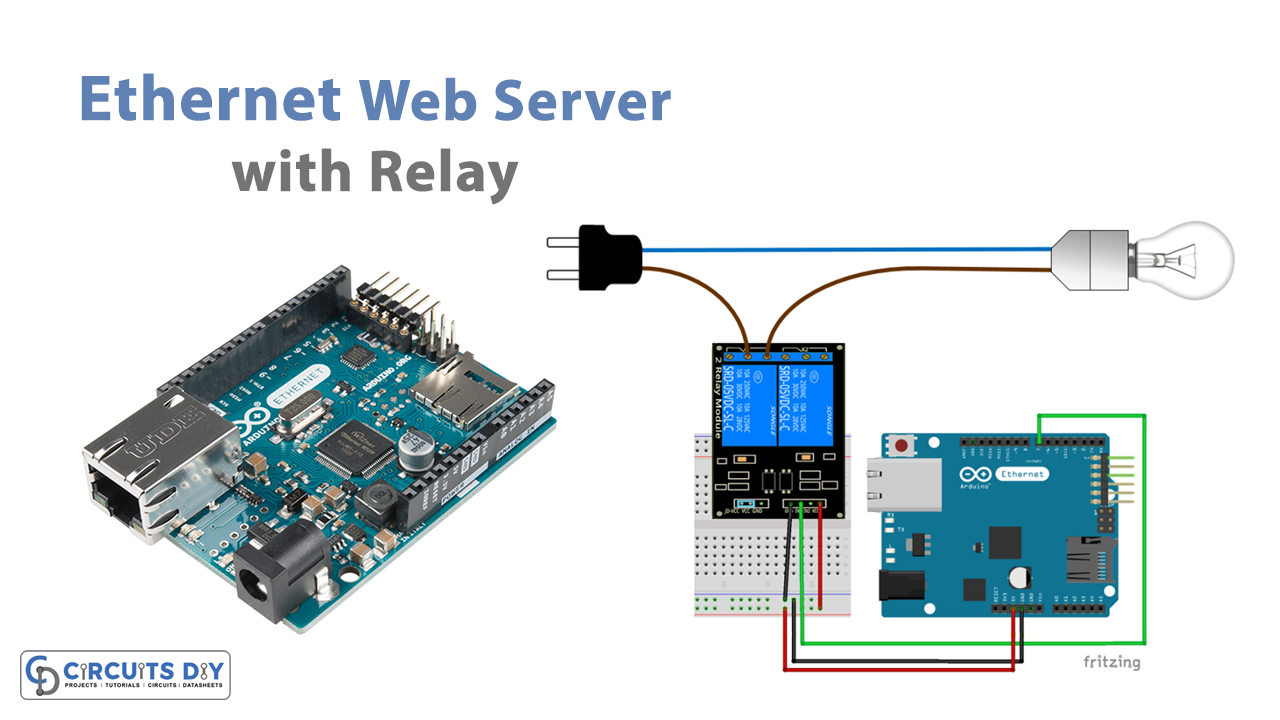
In this tutorial, we are going to interface ” Ethernet Web Server with Arduino UNO & Relay”. You can transform an Arduino into a basic web server by attaching an Ethernet shield to it, and you can access that server with a browser operating on any computer/laptop connected to the same network as the Arduino. This tutorial will teach you how to make an Arduino Ethernet web browser that operates a light relay. The circuit uses the Arduino ethernet shield and relay. So, before jumping into the circuit and its programming, let us discuss the ethernet shield and relay module.
Arduino Ethernet Sheild
An Arduino board can connect to the internet via the Arduino Ethernet Shield. It can connect up to four sockets at the same time. We utilize the Ethernet library to create programs that use the shield to connect to the internet. Long wire-wrap headers that extend through the shield link the ethernet shield to an Arduino board.
This shield is designed to work with practically all Arduino boards. It connects our board to the internet, allowing it to transmit and receive data from anywhere on the planet. It also has an SD card option, which we can use to write to and read from using the SD library. Enabling your project or device to connect to the internet opens up an infinite number of options.
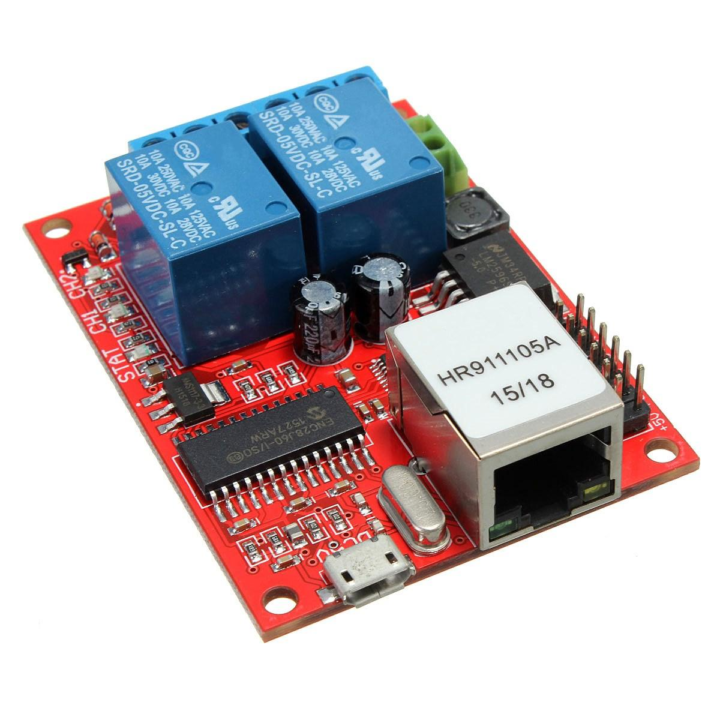
Relay Module
The relay module is an electronic control switch that may be switched on or off, allowing or disallowing current flow. They’re made to run on low voltages like 3.3V (like the ESP32, ESP8266, and others) or 5V (like your Arduino).
Hardware Required
| S.no | Component | Value | Qty |
|---|---|---|---|
| 1. | Arduino UNO | – | 1 |
| 2. | USB Cable Type A to B | – | 1 |
| 3. | Jumper Wires | – | – |
| 4. | Arduino Ethernet Web Server with Relay | – | 1 |
Circuit Diagram

Arduino Code
// Circuits DIY
 // For Complete Details Visit -> https://circuits-diy.com
#include <SPI.h>
#include <Ethernet.h>

// Enter a MAC address and IP address for your controller below.
// The IP address will be dependent on your local network:
byte mac[] = {
  0xDE, 0xAD, 0xBE, 0xEF, 0xFE, 0xED };
IPAddress ip(192,168,1, 111);

// Initialize the Ethernet server library
// with the IP address and port you want to use
// (port 80 is default for HTTP):
EthernetServer server(80);

// Relay state and pin
String relay1State = "Off";
const int relay = 7;

// Client variables
char linebuf[80];
int charcount=0;

void setup() {
  // Relay module prepared
  pinMode(relay, OUTPUT);
  digitalWrite(relay, HIGH);

  // Open serial communication at a baud rate of 9600
  Serial.begin(9600);

  // start the Ethernet connection and the server:
  Ethernet.begin(mac, ip);
  server.begin();
  Serial.print("server is at ");
  Serial.println(Ethernet.localIP());
}

// Display dashboard page with on/off button for relay
// It also print Temperature in C and F
void dashboardPage(EthernetClient &client) {
  client.println("<!DOCTYPE HTML><html><head>");
  client.println("<meta name=\"viewport\" content=\"width=device-width, initial-scale=1\"></head><body>");
  client.println("<h3>Arduino Web Server - <a href=\"/\">Refresh</a></h3>");
  // Generates buttons to control the relay
  client.println("<h4>Relay 1 - State: " + relay1State + "</h4>");
  // If relay is off, it shows the button to turn the output on
  if(relay1State == "Off"){
    client.println("<a href=\"/relay1on\"><button>ON</button></a>");
  }
  // If relay is on, it shows the button to turn the output off
  else if(relay1State == "On"){
    client.println("<a href=\"/relay1off\"><button>OFF</button></a>");
  }
  client.println("</body></html>");
}


void loop() {
  // listen for incoming clients
  EthernetClient client = server.available();
  if (client) {
    Serial.println("new client");
    memset(linebuf,0,sizeof(linebuf));
    charcount=0;
    // an http request ends with a blank line
    boolean currentLineIsBlank = true;
    while (client.connected()) {
      if (client.available()) {
       char c = client.read();
       //read char by char HTTP request
        linebuf[charcount]=c;
        if (charcount<sizeof(linebuf)-1) charcount++;
        // if you've gotten to the end of the line (received a newline
        // character) and the line is blank, the http request has ended,
        // so you can send a reply
        if (c == '\n' && currentLineIsBlank) {
          dashboardPage(client);
          break;
        }
        if (c == '\n') {
          if (strstr(linebuf,"GET /relay1off") > 0){
            digitalWrite(relay, HIGH);
            relay1State = "Off";
          }
          else if (strstr(linebuf,"GET /relay1on") > 0){
            digitalWrite(relay, LOW);
            relay1State = "On";
          }
          // you're starting a new line
          currentLineIsBlank = true;
          memset(linebuf,0,sizeof(linebuf));
          charcount=0;
        }
        else if (c != '\r') {
          // you've gotten a character on the current line
          currentLineIsBlank = false;
        }
      }
    }
    // give the web browser time to receive the data
    delay(1);
    // close the connection:
    client.stop();
    Serial.println("client disonnected");
  }
}
Working Explanation
To o Interface, Arduino Ethernet Web Server with Relay, make connections according to the connection table. Then write the above code in Arduino IDE. In the code You may need to update the necessary IP address settings for your network, otherwise, your Arduino will not be able to connect to it. Now, open your Arduino web server which will look like this:

You can easily ON/OFF the load connected to the relay using this web server.
Code Explanation
- First, we need to add libraries. Microcontrollers utilize the SPI library to communicate with one or more peripherals in synchronous serial data exchange. The Arduino Ethernet Shield is supported by ethernet library.
- After that, define an array that has Mac address for your controller. Also, define the IP address for your controller.
- Then, initialize the ethernet server library by giving the function EthernetServer server(80). Then define the string realay1state that stores the relay value. And, define the pin at which the relay is connected. Define the variables linebuf[80], char count as a character, and integer respectively.
- In the void setup, declare the relay as output, and by using digitalWrite function keep the relay state high. Initialize the serial monitor by Serial.begin. By using Ethernet.begin(mac, ip) initialize the ethernet. Then initialize the server by using Server.begin. Then to obtain and print the IP address of the ethernet shield, use Serial.println(Ethernet.localIP()).
- Now coming towards dashboardPage(EthernetClient &client), void indicates that your function returns nothing, dashboardPage() is the name of the function you’ll use to call it, EthernetClient &client – where you put your code to run when you call that function (in this example, it sends the HTML page/dashboard to the connected client. The function client.println() is used to convey data to a specified client. The code has the condition, If the relay is turned off, the button to turn the output on is displayed, and if the relay is turned on, the button to turn the output off is displayed.
- In the void loop, first, the program Keeps an ear out for incoming clients., we have added the server.available function, Retrieves a client that is connected to the server and has data to read. When the returned client object moves out of scope, the connection survives. If a client connection is detected, the program evaluates the request, checking for a blank line at the end with a new line character. If this is the case, it will respond. To handle each character sent from the client, we utilize a while loop. It examines the character value stored in the char variable c to see if it is a newline character. If true and the line contains no characters, we set the variable currentLineIsBlank to true. The while loop provides a response when it detects a newline character and currentLineIsBlank is true. When the answer is complete, the while loop is stopped, and the connection is closed.
Application and Uses
- This project can have a wide range of applications including home automation, and weather station applications. Thus, this can connect any simple device to the internet.