Introduction
Interfacing a two-pin I/O switch with an Arduino Uno microcontroller is a fundamental building block in the world of electronics and microcontroller-based projects. A switch is a simple device that allows for the detection of user input or physical events, and the Arduino Uno is a powerful microcontroller that can read, process, and respond to this input.
This interfacing provides the ability to read the state of the switch, whether it is closed or open, and use that information to trigger events or control other devices. This opens up a vast array of possibilities for automation, control, and monitoring projects.
Hardware Components
You will require the following hardware for the Interfacing Switch with Arduino.
| S.no | Component | Value | Qty |
|---|---|---|---|
| 1. | Arduino UNO | – | 1 |
| 2. | USB Cable Type A to B | – | 1 |
| 3. | Power Adapter for Arduino | 9V | 1 |
| 4. | Wires | – | 1 |
| 5. | ON/OFF Switch | – | 1 |
| 6. | Jumper Wires | – | 1 |
Switch with Arduino
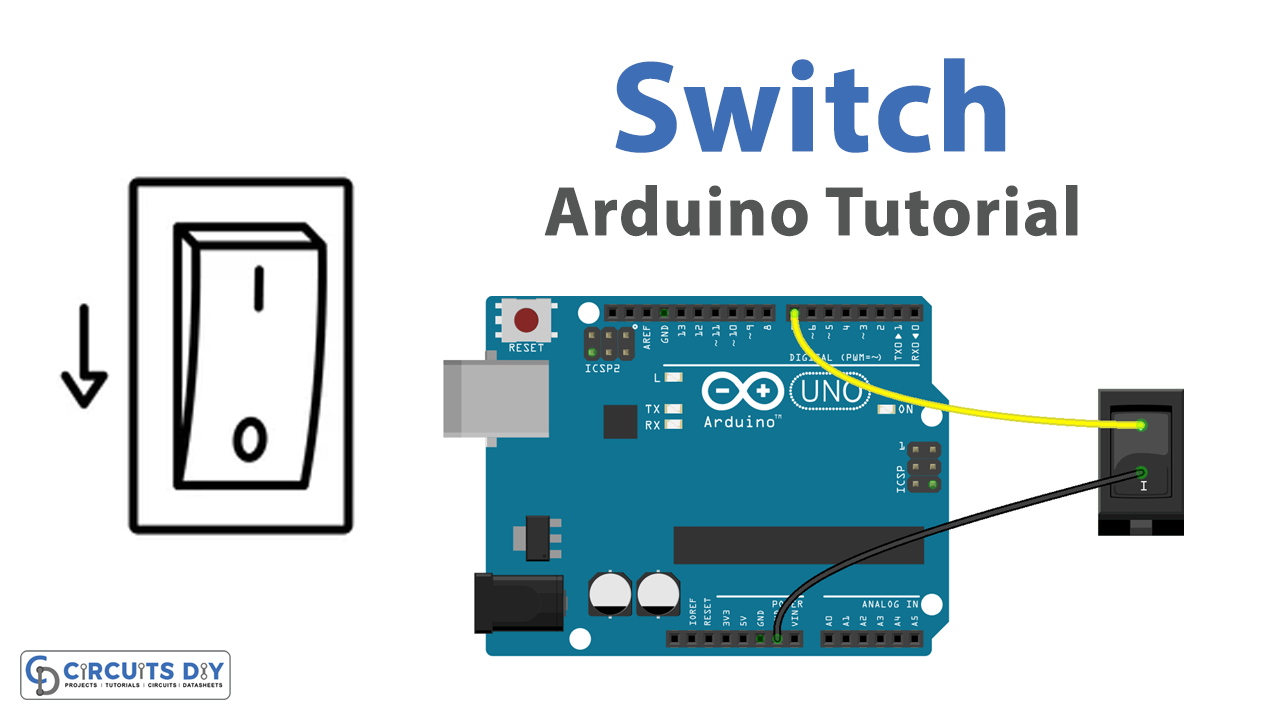
- Connect one pin of the switch to a digital input pin on the Arduino board (let’s say pin 2) and the other pin to GND.
- In the Arduino IDE, open a new sketch and include the necessary libraries, such as the “Serial” library, to communicate with the serial monitor.
- In the setup() function, configure the digital input pin as an INPUT using the pinMode() function, and initialize the serial communication using the Serial.begin() function.
- In the loop() function, read the state of the switch using the digitalRead() function and store the value in a variable (let’s call it “switchState”).
- Use an if-else statement to check the value of “switchState”. If the switch is pressed (i.e. if switchState == LOW), send a message “Switch is On” to the serial monitor using the Serial.println() function. If the switch is not pressed (i.e. if switchState == HIGH), send a message “Switch is Off” to the serial monitor.
- upload the code to the Arduino board and open the serial monitor in the Arduino IDE to see the switch status.
Schematic
Make connections according to the circuit diagram given below.
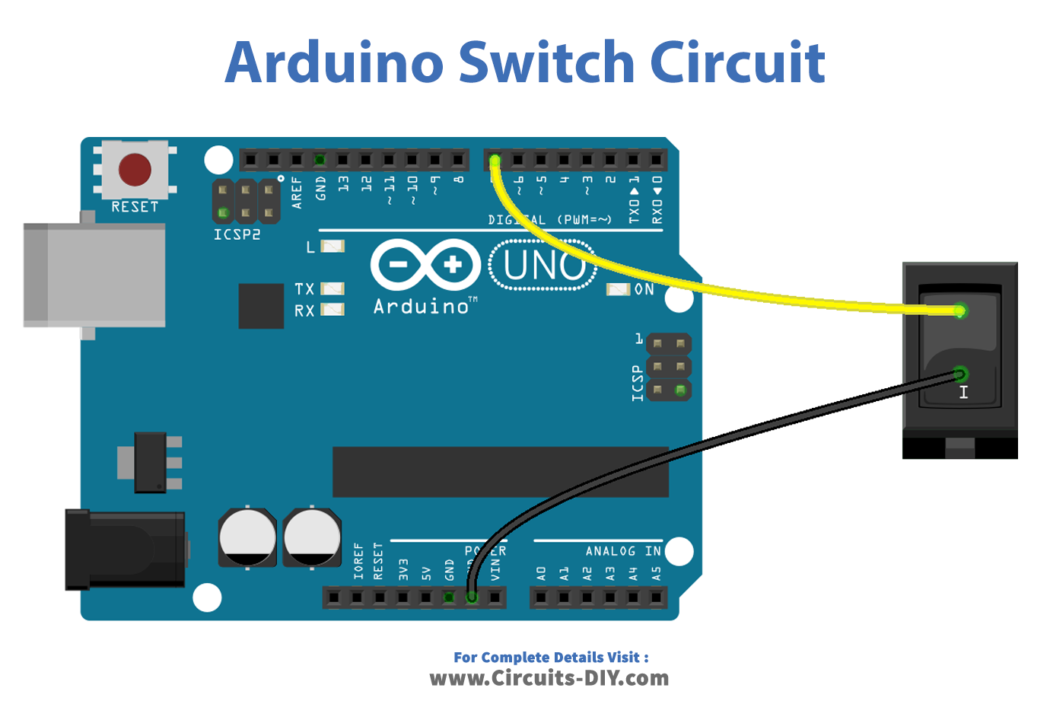
Wiring / Connections
| Arduino | Switch |
|---|---|
| D7 | 1 pin |
| GND | 2 pin |
Installing Arduino IDE
First, you need to install Arduino IDE Software from its official website Arduino. Here is a simple step-by-step guide on “How to install Arduino IDE“.
Installing Libraries
Before you start uploading a code, download and unzip the following libraries at /Progam Files(x86)/Arduino/Libraries (default), in order to use the sensor with the Arduino board. Here is a simple step-by-step guide on “How to Add Libraries in Arduino IDE“.
Code
Now copy the following code and upload it to Arduino IDE Software.
#include <ezButton.h>

ezButton toggleSwitch(7);  // create ezButton object that attach to pin 7;

void setup() {
  Serial.begin(9600);
  toggleSwitch.setDebounceTime(50); // set debounce time to 50 milliseconds
}

void loop() {
  toggleSwitch.loop(); // MUST call the loop() function first

  if (toggleSwitch.isPressed())
    Serial.println("The switch: OFF -> ON");

  if (toggleSwitch.isReleased())
    Serial.println("The switch: ON -> OFF");

  int state = toggleSwitch.getState();
  if (state == HIGH)
    Serial.println("The switch: OFF");
  else
    Serial.println("The switch: ON");
}
Working Explanation
In the setup() function, the code configures the digital input pin as an INPUT using the pinMode() function and initializes the serial communication using the Serial.begin() function, this way the arduino can communicate with the serial monitor.
In the loop() function, the code reads the state of the switch using the digitalRead() function and stores the value in a variable (in the example, “switchState”). Next, it uses an if-else statement to check the value of “switchState”. If the switch is pressed (i.e. if switchState == LOW), the code sends a message “Switch is On” to the serial monitor using the Serial.println() function. If the switch is not pressed (i.e. if switchState == HIGH), it sends a message “Switch is Off” to the serial monitor.
Applications
- Control Systems
- User Interface
- Security Systems
- Robotics
- Industrial Automation
Conclusion.
We hope you have found this Arduino Switch Circuit very useful. If you feel any difficulty in making it feel free to ask anything in the comment section.