Introduction
To understand the environmental activities and to protect humans from any unfavorable environmental conditions, environmental sensors are used to aware. These kinds of sensors estimate the gas, pressure, humidity, and temperature of the surroundings. To measure the gas, they detect the VOCs present in the air.VOC is a volatile organic compound that contains greater vapor pressure at normal temperature. The higher the VOCs, the lower would be the sensor’s resistance. The lower the VOCs, the higher will be its resistance. BME680 is one of the sensors that monitor environmental conditions. So, In this tutorial, we are going to interface “BME680 Environmental Sensor with Arduino UNO”.
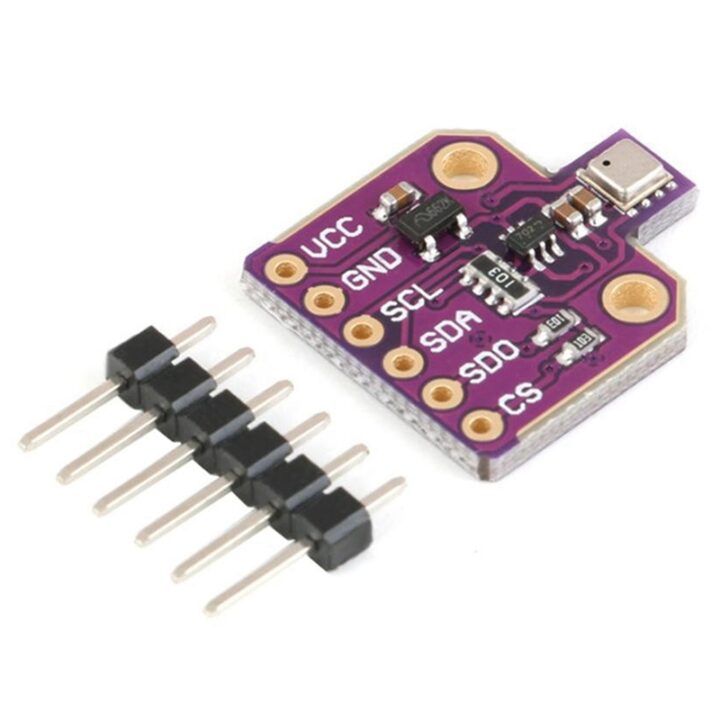
Brief Overview about BME680 Sensor
The BME680 is a remarkably compact device used to measure temperature, pressure, gas, etc from the environment. Further, the sensor contains four pins for SPI communications. Moreover, this portable, tiny sensor targets smartphones, smartwatches, and wearable devices as its applications. The operating range of the device for temperature is -40°C to 85°C. Remember, that calibration of the sensor is crucial to measure precise values. Therefore, before collecting the real data, run the sensor for at least 48 hours. Also, to get the best gas readings, run the sensor for 30 minutes before getting the readings.
Hardware Required
| S.no | Component | Value | Qty |
|---|---|---|---|
| 1. | Arduino | UNO | 1 |
| 2. | USB Cable Type A to B | – | 1 |
| 3. | Jumper Wires | – | 1 |
| 4. | Environmental Sensor | BME680 | 1 |
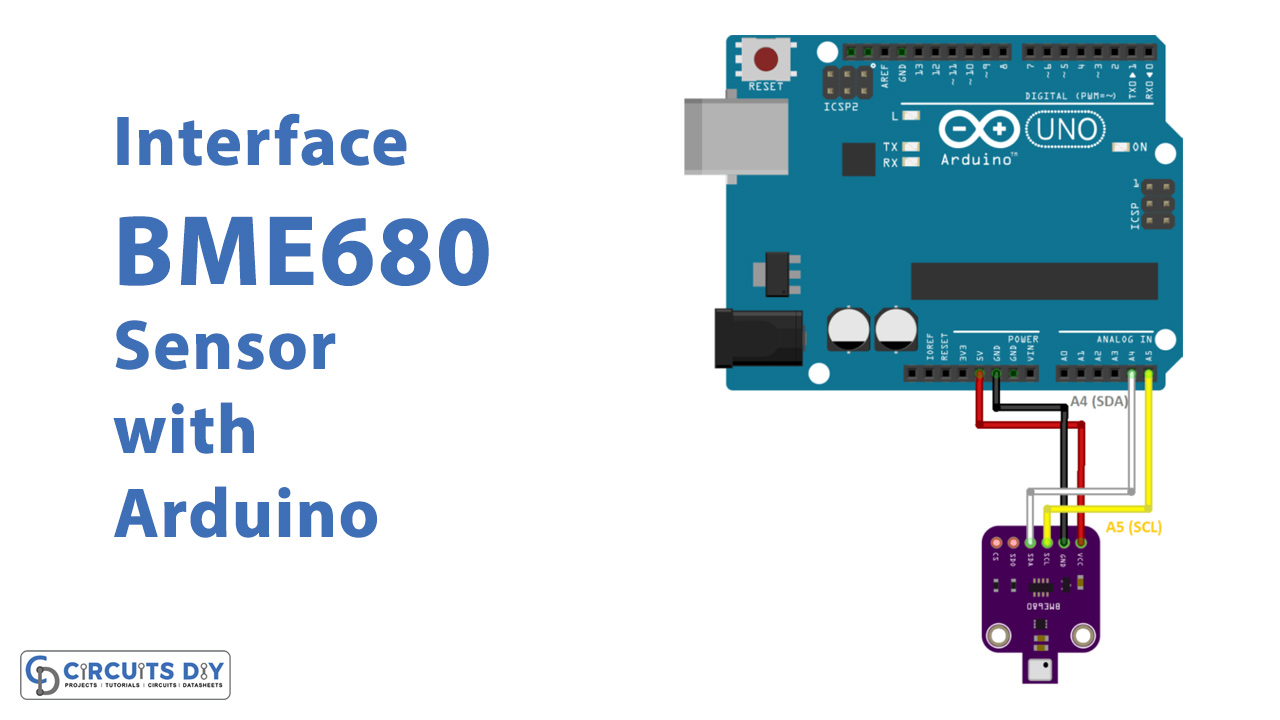
Circuit Diagram

Connection Table
| Arduino | BME680 |
|---|---|
| D13 | SCL |
| D12 | SDA |
| D11 | SDO |
| D10 | CS |
Arduino Code
// Circuits DIY
// For Complete Details Visit -> https://circuits-diy.com

#include <Wire.h>
#include <SPI.h>
#include <Adafruit_Sensor.h>
#include "Adafruit_BME680.h"

/*#define BME_SCK 13
#define BME_MISO 12
#define BME_MOSI 11
#define BME_CS 10*/

#define SEALEVELPRESSURE_HPA (1013.25)

Adafruit_BME680 bme; // I2C
//Adafruit_BME680 bme(BME_CS); // hardware SPI
//Adafruit_BME680 bme(BME_CS, BME_MOSI, BME_MISO, BME_SCK);

void setup() {
  Serial.begin(115200);
  while (!Serial);
  Serial.println(F("BME680 async test"));

  if (!bme.begin()) {
    Serial.println(F("Could not find a valid BME680 sensor, check wiring!"));
    while (1);
  }

  // Set up oversampling and filter initialization
  bme.setTemperatureOversampling(BME680_OS_8X);
  bme.setHumidityOversampling(BME680_OS_2X);
  bme.setPressureOversampling(BME680_OS_4X);
  bme.setIIRFilterSize(BME680_FILTER_SIZE_3);
  bme.setGasHeater(320, 150); // 320*C for 150 ms
}

void loop() {
  // Tell BME680 to begin measurement.
  unsigned long endTime = bme.beginReading();
  if (endTime == 0) {
    Serial.println(F("Failed to begin reading :("));
    return;
  }
  Serial.print(F("Reading started at "));
  Serial.print(millis());
  Serial.print(F(" and will finish at "));
  Serial.println(endTime);

  Serial.println(F("You can do other work during BME680 measurement."));
  delay(50); // This represents parallel work.
  // There's no need to delay() until millis() >= endTime: bme.endReading()
  // takes care of that. It's okay for parallel work to take longer than
  // BME680's measurement time.

  // Obtain measurement results from BME680. Note that this operation isn't
  // instantaneous even if milli() >= endTime due to I2C/SPI latency.
  if (!bme.endReading()) {
    Serial.println(F("Failed to complete reading :("));
    return;
  }
  Serial.print(F("Reading completed at "));
  Serial.println(millis());

  Serial.print(F("Temperature = "));
  Serial.print(bme.temperature);
  Serial.println(F(" *C"));

  Serial.print(F("Pressure = "));
  Serial.print(bme.pressure / 100.0);
  Serial.println(F(" hPa"));

  Serial.print(F("Humidity = "));
  Serial.print(bme.humidity);
  Serial.println(F(" %"));

  Serial.print(F("Gas = "));
  Serial.print(bme.gas_resistance / 1000.0);
  Serial.println(F(" KOhms"));

  Serial.print(F("Approx. Altitude = "));
  Serial.print(bme.readAltitude(SEALEVELPRESSURE_HPA));
  Serial.println(F(" m"));

  Serial.println();
  delay(2000);
}
Working Explanation
First, Connect the Arduino UN0 with the BME680 environmental sensor according to the schematic above. Secondly, Upload the code in your Arduino. Finally, Open the Serial Monitor to see the environmental readings of gas, temperature, pressure, and humidity. In addition, If you want to see the drastic change in the readings, then place the sensor in a pollutant gas environment. Since the sensor is fabricated with a metal oxide surface, it will detect the VOCs by absorbing the oxygen molecules. Further, the module will show the absorbed readings on the Serial monitor. Hence, you can compare whether the Air quality is decreasing or it’s increasing.
Code Explanation
- For the code, first, we have downloaded the required library of Adafruit_BME680. You can download the library from:
https://github.com/adafruit/Adafruit_BME680
- Then we have included those libraries on Arduino IDE. SPI library is also get added to communicate with the sensor. Moreover, the variable SEALEVELPRESSURE_HPA ( ) got created. It is to compare the pressure with sea level. For the 12C communication protocol, we have the bme as Adafruit_BME680 object
- In the void setup, we have initialized the serial monitor by using Serial. begin( ). Then we have initialized the sensor and set the parameters for it. For example, setTemperature ( ) has been used to set the oversampling temperature. In the same vein, other commands are used to set humidity and pressure oversampling.
- In the void loop, to get the readings from the sensor, we have given the command bme.beginReading ( ). And, describes if it doesn’t get the reading before the end time the serial monitor would print Failed to begin Reading. To end the asynchronous reading we have called the end.Reading( ). After that, we have given the commands to get the readings of the environment. For example bme.Temperature returns the temperature readings. Similarly, other commands would work.
Application
- Wearable devices
- Smartphones
- Smartwatches
Uses
- It can be utilized in the weather station
- In navigation system
- It can also be used in IoT devices