Introduction
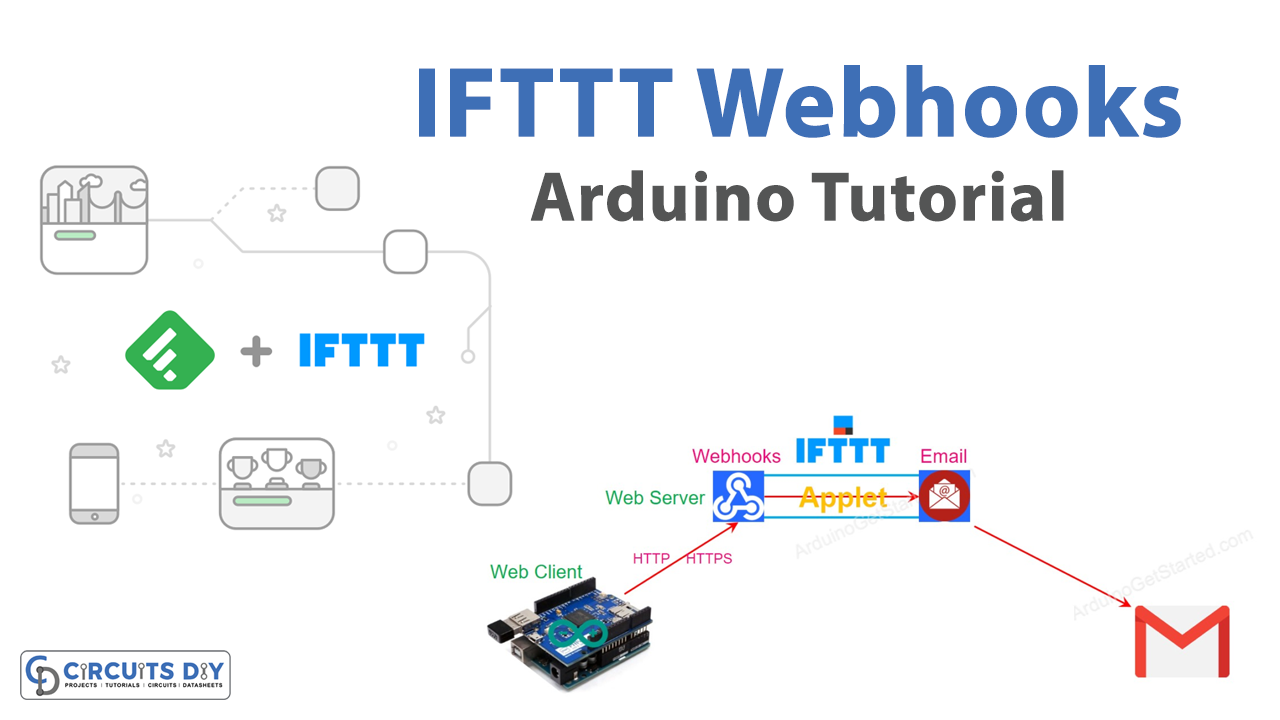
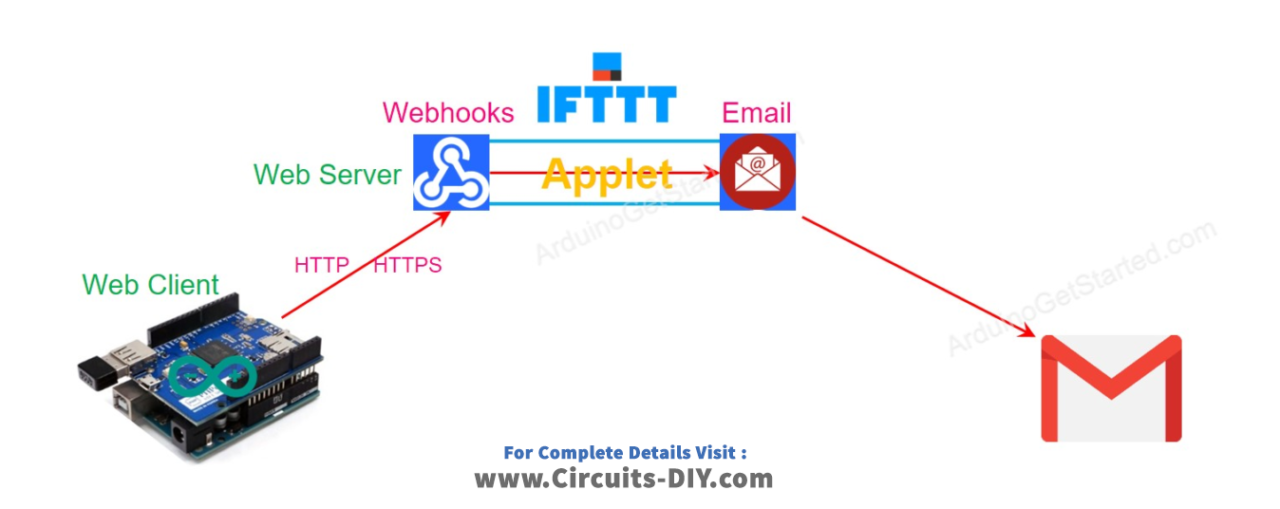
Interfacing IFTTT Webhooks with Arduino UNO microcontroller to send and receive emails to and from Gmail is a powerful way to integrate Arduino with web services and create interactive IoT applications. The Internet of Things (IoT) has opened up new possibilities for connecting devices and services in innovative ways, and IFTTT (If This Then That) is a popular platform for automating interactions between web services. By combining IFTTT Webhooks with Arduino UNO, you can trigger events on the Arduino based on inputs from the physical world and send data from the Arduino to web services, such as sending and receiving emails from Gmail.
IFTTT Webhooks is a service that allows you to trigger custom events using HTTP requests. With Webhooks, you can send data to external services or receive data from them by triggering an event with a simple HTTP request. To use IFTTT Webhooks, you need to create an IFTTT account and enable the Webhooks service. You will also need to generate an API key that you can use to make HTTP requests to the Webhooks service. Once you have set up your account and obtained your API key, you can start using Webhooks to trigger events and perform actions.
Hardware Components
You will require the following hardware for Interfacing IFTTT with Arduino.
IFTTT with Arduino UNO
- Create an IFTTT account if you don’t have one already.
- Create an applet that uses the Webhooks service as the trigger and the Gmail service as the action.
- Get your Webhooks API key by going to the Webhooks service page and clicking on “Documentation” in the top right corner.
- Connect the Arduino UNO board to your computer using a USB cable.
- Open the Arduino IDE and create a new sketch.
Here’s a code snippet that demonstrates how to send an email using IFTTT Webhooks and Arduino UNO:
#include <ESP8266WiFi.h>
#include <WiFiClient.h>
#include <ESP8266HTTPClient.h>

const char* ssid = "your_wifi_ssid";
const char* password = "your_wifi_password";
const char* event = "your_ifttt_event_name";
const char* key = "your_ifttt_webhooks_api_key";

void setup() {
  Serial.begin(115200);
  WiFi.begin(ssid, password);
  while (WiFi.status() != WL_CONNECTED) {
    delay(1000);
    Serial.println("Connecting to WiFi...");
  }
}

void loop() {
  HTTPClient http;
  String url = "https://maker.ifttt.com/trigger/" + String(event) + "/with/key/" + String(key);
  http.begin(url);
  http.addHeader("Content-Type", "application/json");
  int httpResponseCode = http.POST("{\"value1\":\"Hello World!\"}");
  if (httpResponseCode > 0) {
    Serial.println(http.getString());
  } else {
    Serial.println("Error sending request");
  }
  http.end();
  delay(60000); // Wait for 1 minute before sending another request
}
In this example, you need to replace “your_wifi_ssid” and “your_wifi_password” with the SSID and password of your WiFi network, “your_ifttt_event_name” with the name of the event you created in IFTTT, and “your_ifttt_webhooks_api_key” with your Webhooks API key.
- Add the following code to the sketch to monitor the status of a pin on the Arduino UNO board and send an email when the pin changes state:
#include <ESP8266WiFi.h>
#include <WiFiClient.h>
#include <ESP8266HTTPClient.h>

const char* ssid = "your_wifi_ssid";
const char* password = "your_wifi_password";
const char* event = "your_ifttt_event_name";
const char* key = "your_ifttt_webhooks_api_key";
int pin = 13;
int state = 0;

void setup() {
  Serial.begin(115200);
  pinMode(pin, INPUT);
  WiFi.begin(ssid, password);
  while (WiFi.status() != WL_CONNECTED) {
    delay(1000);
    Serial.println("Connecting to WiFi...");
  }
}

void loop() {
  int newState = digitalRead(pin);
  if (newState != state) {
    HTTPClient http;
    String url = "https://maker.ifttt.com/trigger/" + String(event) + "/with/key/" + String(key);
    http.begin(url);
    http.addHeader("Content-Type", "application/json");
    String message = "Pin " + String(pin) + " is now " + (newState ? "HIGH" : "LOW");
    int httpResponseCode = http.POST("{\"value1\":\"" +message + ""}");
if (httpResponseCode > 0) {
Serial.println(http.getString());
} else {
Serial.println("Error sending request");
}
http.end();
state = newState;
}
delay(100); // Poll the pin every 100ms
}
In this example, you need to replace “your_wifi_ssid” and “your_wifi_password” with the SSID and password of your WiFi network, “your_ifttt_event_name” with the name of the event you created in IFTTT and “your_ifttt_webhooks_api_key” with your Webhooks API key. You also need to set the “pin” variable to the pin number you want to monitor.
7. Upload the sketch to the Arduino UNO board using the Arduino IDE.
8. Open the serial monitor in the Arduino IDE to monitor the status of the pin and see the messages sent and received by IFTTT Webhooks.
Schematic
Make connections according to the circuit diagram given below.
Installing Arduino IDE
First, you need to install Arduino IDE Software from its official website Arduino. Here is a simple step-by-step guide on “How to install Arduino IDE“.
Installing Libraries
Before you start uploading a code, download and unzip the following libraries at /Progam Files(x86)/Arduino/Libraries (default), in order to use the sensor with the Arduino board. Here is a simple step-by-step guide on “How to Add Libraries in Arduino IDE“.
Working Explanation
First, the code sends an HTTP POST request to the IFTTT Webhooks service with a JSON payload that contains the message “Hello World!” in the “value1” field. The URL of the Webhooks service is constructed using the event name and API key provided in the code.
When the sketch runs, it connects to the WiFi network and waits for the connection to be established. Once connected, it sends an HTTP POST request to the Webhooks service and waits for the response. If the response code is greater than 0, it prints the response body to the serial monitor. If the response code is 0, it prints an error message. After sending the request, the sketch waits for 1 minute before sending another request. This delay is added to prevent sending too many requests in a short period of time and avoid being rate-limited by the Webhooks service.
Secondly, the code monitors the state of a digital input pin (pin 13) and sends an HTTP POST request to the IFTTT Webhooks service whenever the state changes. The message sent in the JSON payload contains the pin number and its current state (HIGH or LOW). When the sketch runs, it connects to the WiFi network and waits for the connection to be established. Once connected, it enters a loop that reads the state of the pin every 100ms. If the state has changed since the last reading, the sketch sends an HTTP POST request to the Webhooks service with a JSON payload that contains the message about the pin state.
The URL of the Webhooks service is constructed using the event name and API key provided in the code. The HTTP POST request contains a JSON payload with the message to be sent in the “value1” field. If the response code is greater than 0, the sketch prints the response body to the serial monitor. If the response code is 0, it prints an error message. After sending the request, the sketch updates the state variable to the new state of the pin so that it can detect future changes.
Applications
- Remote monitoring and control
- Home automation
- Data logging
- Security
- Smart appliances
Conclusion.
We hope you have found this IFTTT Tutorial very useful. If you feel any difficulty in making it feel free to ask anything in the comment section.