Introduction
Bluetooth technology has become integral to our everyday lives, allowing us to connect devices wirelessly and seamlessly. This article will explore how to interface a BT06 Bluetooth module with an Arduino microcontroller. The BT06 is a low-cost module we can use in many electronic projects. The Arduino provides a simple and convenient platform for programming and controlling the module. Together, these two components open up a world of possibilities for creating wireless projects that can communicate with other devices, such as smartphones.
So, whether you’re a beginner looking to get started with Bluetooth technology or an experienced maker looking for a new project, this article is for you. With the step-by-step instructions in this article, you will learn how to connect the BT06 to the Arduino, write a program to control the module, and set up a wireless connection. By the end of this article, you will have a solid understanding of how to interface the BT06 Bluetooth module with an Arduino and be well on your way to creating your wireless projects.
What is BT06 Bluetooth Module?
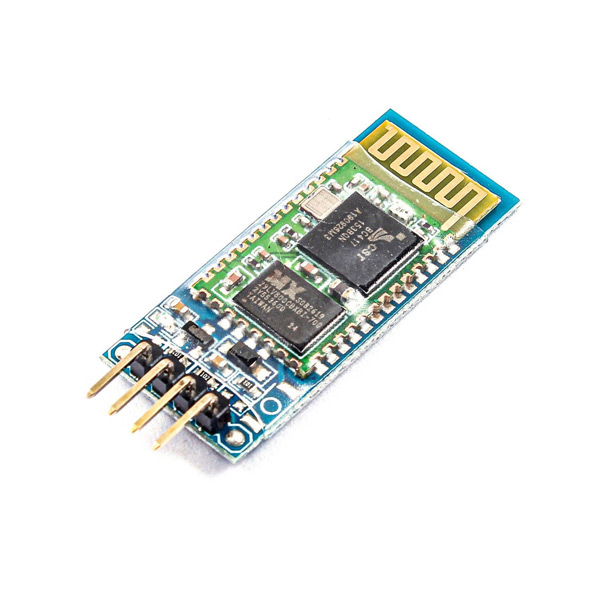
A BT06 Bluetooth Module is a specific kind of wireless communication module that makes use of the Bluetooth protocol to enable electronic devices to connect with one another and share data over relatively short distances.
Hardware Components
You will require the following hardware for Interfacing BT06 Bluetooth Module with Arduino.
| S.no | Component | Value | Qty |
|---|---|---|---|
| 1. | Arduino UNO | – | 1 |
| 2. | Bluetooth Module | BT06 | 1 |
| 3. | Breadboard | – | 1 |
| 4. | Jumper Wires | – | 1 |
BT06 Bluetooth Module with Arduino
To interface the BT06 Bluetooth module, follow the given steps:
Schematic
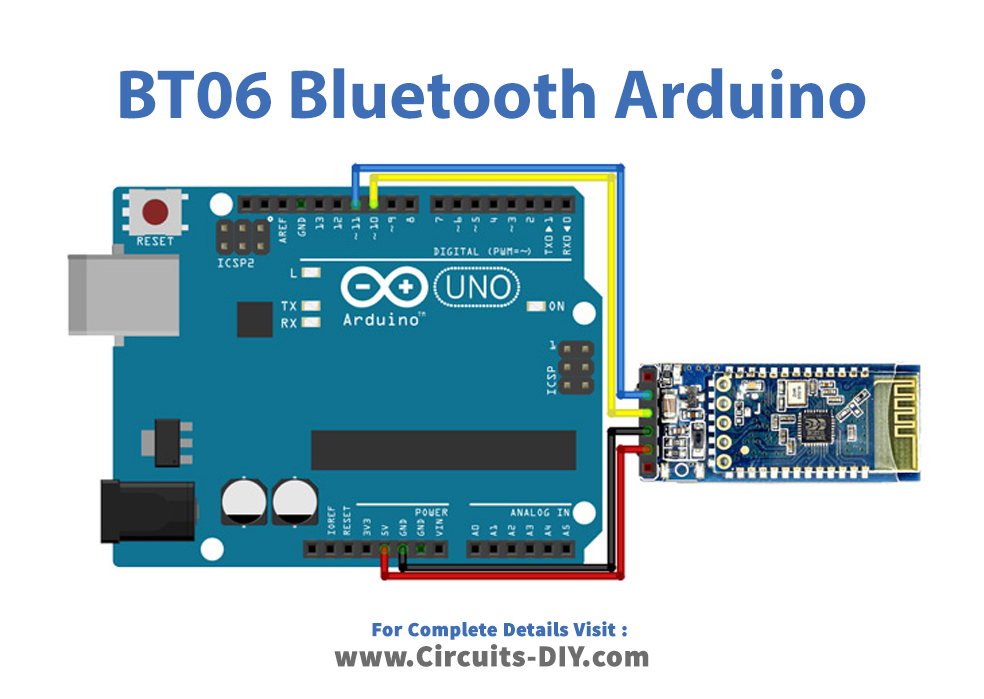
Make connections according to the circuit diagram given below.
Wiring / Connections
| Arduino | Bluetooth Module |
|---|---|
| 5V | VCC |
| GND | GND |
| D10 | TX |
| D11 | DX |
Installing Arduino IDE
First, you need to install Arduino IDE Software from its official website Arduino. Here is a simple step-by-step guide on “How to install Arduino IDE“.
Installing Libraries
Before you start uploading a code, download and unzip the following libraries at /Progam Files(x86)/Arduino/Libraries (default), in order to use the sensor with the Arduino board. Here is a simple step-by-step guide on “How to Add Libraries in Arduino IDE“.
Code
Now copy the following code and upload it to Arduino IDE Software.
/*
  Modified on March 09, 2021
  Modified by MohammedDamirchi from https://github.com/PaulStoffregen/SoftwareSerial
  Home
*/


#include <SoftwareSerial.h>

SoftwareSerial mySerial(10, 11); // RX, TX

void setup() {
Open serial communications and wait for the port to open:
  Serial.begin(9600);
  while (!Serial) {
    ; // wait for serial port to connect. Needed for native USB port only
  }

  // set the data rate for the SoftwareSerial port
  mySerial.begin(9600);
}

void loop() { // run over and over
  if (mySerial.available()) {
    Serial.write(mySerial.read());
  }
  if (Serial.available()) {
    mySerial.write(Serial.read());
  }
Let’s Test It
Once you upload the code, it’s now time to test the circuit!
The code creates a communication between the Arduino and another device via a software serial port; data received from the software serial port is sent over to the hardware serial port, and vice-versa, allowing data to be transmitted and received in both directions simultaneously.
Working Explanation
To understand the working, let’s dive into the coding explanation:
- The first line, #include <SoftwareSerial.h>, is a preprocessor directive that includes a library called “SoftwareSerial” in the code. This library allows the use of a software serial port on the Arduino board.
- The next line SoftwareSerial mySerial(10, 11), creates an instance of the “SoftwareSerial” class with the name “mySerial” and assigns digital pins 10 and 11 as the RX (receive) and TX (transmit) pins for the software serial port, respectively. These pins can be changed as per the user’s requirement.
- The void setup() function is a built-in Arduino function that runs only once when the board is powered on or reset. Inside the setup() function:
- Serial.begin(9600); initializes the built-in serial port with a baud rate of 9600. Baud rate is the number of bits per second that are transmitted.
- while (!Serial) { ; } is a loop that waits for the serial port to be ready before continuing with the rest of the code.
- mySerial.begin(9600); sets the baud rate for the software serial port to 9600, the same as the built-in serial port.
- The void loop() function runs continuously after finishing the setup() function. Inside the loop() function:
- if (mySerial.available()) { Serial.write(mySerial.read()); } checks if there is data available on the software serial port. If there is, it reads the data and writes it to the built-in serial port.
- if (Serial.available()) { mySerial.write(Serial.read()); } checks if there is data available on the built-in serial port. If there is, it reads the data and writes it to the software serial port.
Applications
- Remote control devices
- Wireless communication system
Conclusion.
We hope you have found this Interfacing BT06 Bluetooth Module with Arduino Circuit very useful. If you feel any difficulty in making it feel free to ask anything in the comment section.