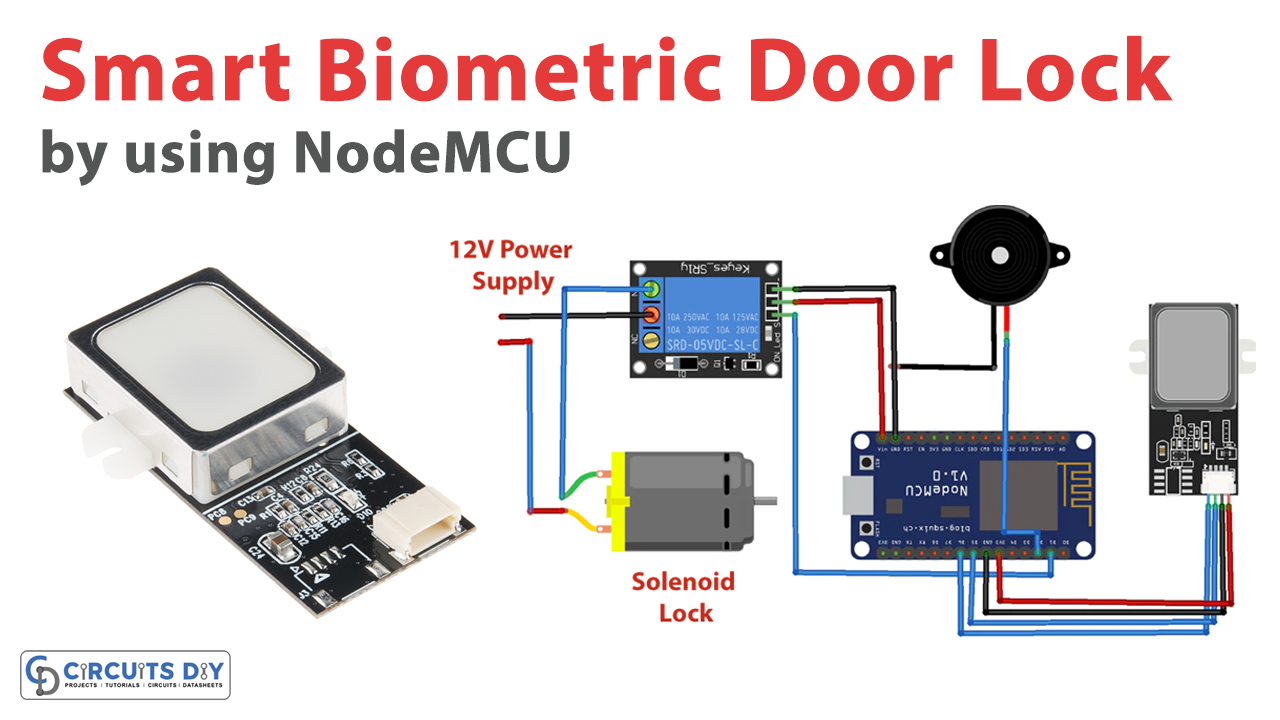
Introduction
A Smart Biometric Door Lock using NodeMCU and Fingerprint Sensor is a cutting-edge security solution that combines the power of IoT, biometrics, and cloud computing to provide a secure and convenient access control system. It utilizes a NodeMCU microcontroller board, a fingerprint sensor, and Wi-Fi connectivity to authenticate and grant access to authorized individuals.
With this technology, you can ditch the hassle of keys or access cards, as the system scans and verifies the fingerprint of an individual before unlocking the door. The data is also stored in the cloud, allowing for easy access management and monitoring, making it an ideal solution for homes, offices, and other establishments.
Hardware Components
You will require the following hardware for the Smart Biometric Door Lock.
| Components | Value | Qty |
|---|---|---|
| ESP8266 | NodeMCU | 1 |
| Fingerprint Sensor | – | 1 |
| Relay | – | 1 |
| Buzzer | 5mm | 1 |
| DC Motor | – | 1 |
| Jumper Wires | – | 1 |
Arduino Code
- Include necessary libraries:
#include "FPS_GT511C3.h"
#include "SoftwareSerial.h"
#include <ESP8266WiFi.h>
#include "Adafruit_MQTT.h"
#include "Adafruit_MQTT_Client.h"- Define the WiFi network details:
const char *ssid = "Galaxy-M20"; // Enter your WiFi Name
const char *pass = "ac312124"; // Enter your WiFi Password- Define the MQTT broker details:
#define MQTT_SERV "io.adafruit.com"
#define MQTT_PORT 1883
#define MQTT_NAME "choudharyas"
#define MQTT_PASS "988c4e045ef64c1b9bc8b5bb7ef5f2d9"- Create an instance of the WiFi client and the MQTT client:
WiFiClient client;
Adafruit_MQTT_Client mqtt(&client, MQTT_SERV, MQTT_PORT, MQTT_NAME, MQTT_PASS);- Define the Adafruit MQTT Publish feed:
Adafruit_MQTT_Publish Fingerprint = Adafruit_MQTT_Publish(&mqtt,MQTT_NAME "/f/Fingerprint");- Define the fingerprint scanner object:
FPS_GT511C3 fps(D6, D5);- Set up the relay and buzzer pins:
#define relay D1
#define buzzer D2- In the
setup()function, initialize the serial communication and connect to WiFi:
Serial.begin(9600);
fps.Open();
fps.SetLED(true);
pinMode(relay, OUTPUT);
pinMode(buzzer, OUTPUT);

WiFi.begin(ssid, pass);
while (WiFi.status() != WL_CONNECTED)
{
    delay(500);
    Serial.print(".");
}- In the
loop()function, call theMQTT_connect()function to establish a connection to the MQTT broker:
void loop()
{
    MQTT_connect();
    ...
}- Check if a fingerprint is pressed and capture it:
if (fps.IsPressFinger())
{
    fps.CaptureFinger(false);
    ...
}- Identify the captured fingerprint:
int id = fps.Identify1_N();- If the fingerprint is recognized, perform the corresponding action (e.g. open the door, publish a message to the MQTT broker):
if (id == 7)
{
    Serial.print("Ashish Entered");
    Buzzer();
    digitalWrite(relay, HIGH);
    delay(6000);
    digitalWrite(relay, LOW);
    msg = "Ashish Entered";
    msg.toCharArray(msg1, 20);
    if (! Fingerprint.publish(msg1))
    {
        //delay(7000);
    }
}
else if (id == 8)
{
    ...
}
else if (id == 9)
{
    ...
}- If the fingerprint is not recognized, perform the corresponding action (e.g. send a request to IFTTT to log the event, sound the buzzer):
else
{
    send_event("login_event");
    Serial.println("Finger not found");
    for(int i = 7; i > 0; i--){
        digitalWrite(buzzer, HIGH);
        delay(100);
        digitalWrite(buzzer, LOW);
        delay(100);
    }
}- Implement the
send_event()function to send a request to IFTTT:
void send_event(const char *event)
{
WiFiClient client;
const int httpPort = 80;
if (!client.connect("maker.ifttt.com", httpPort))
{
Serial.println("connection failed");
return;
}
String url = "/trigger/";
url += event;
url += "/with/key/";
url += IFTTT_KEY;
client.print(String("GET ") + url + " HTTP/1.1\r\n" +
"Host: maker.ifttt.com\r\n" +
"User-Agent: ArduinoWiFi/1.1\r\n" +
"Connection: close\r\n\r\n");
while (client.connected())
{
String line = client.readStringUntil('\n');
if (line == "\r")
{
Serial.println("headers received");
break;
}
}
while (client.available())
{
String line = client.readStringUntil('\n');
Serial.println(line);
}
Serial.println("request sent");
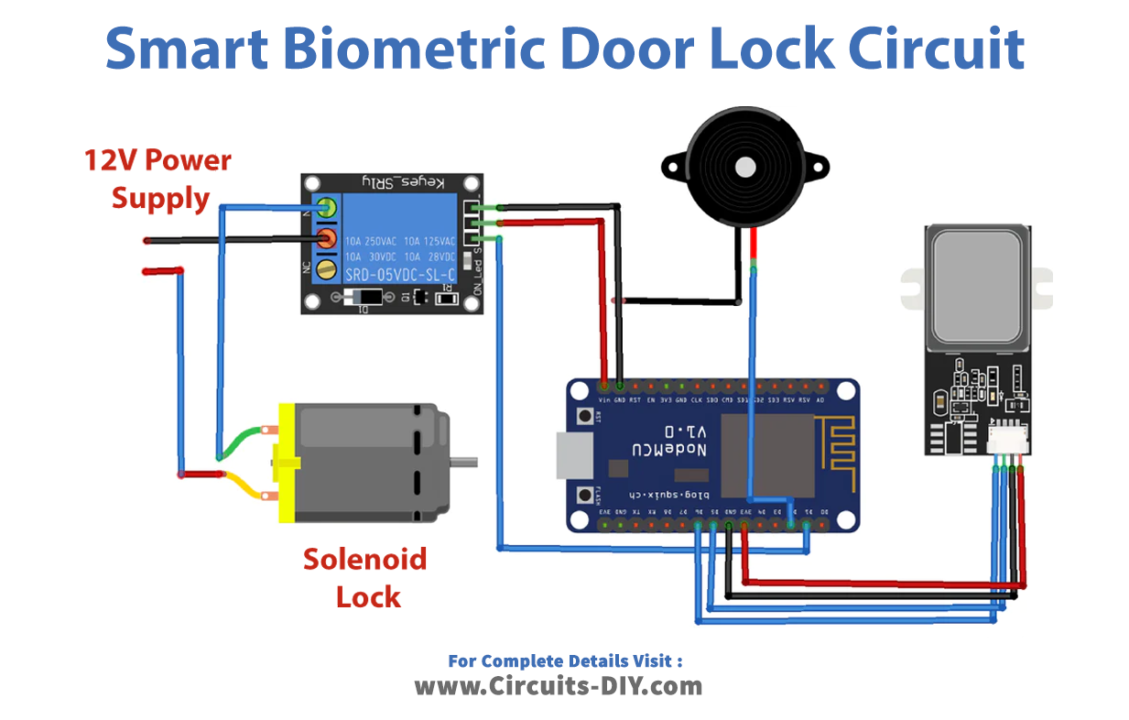
}Schematic
Make connections according to the circuit diagram given below.
Installing Arduino IDE
First, you need to install Arduino IDE Software from its official website Arduino. Here is a simple step-by-step guide on “How to install Arduino IDE“.
Installing Libraries
Before you start uploading a code, download and unzip the following libraries at /Program Files(x86)/Arduino/Libraries (default), in order to use the sensor with the Arduino board. Here is a simple step-by-step guide on “How to Add Libraries in Arduino IDE“.
Code
Now copy the following code and upload it to Arduino IDE Software.
#include "FPS_GT511C3.h"
#include "SoftwareSerial.h"
#include <ESP8266WiFi.h>
#include "Adafruit_MQTT.h"
#include "Adafruit_MQTT_Client.h"

const char *ssid = "Galaxy-M20"; // Enter your WiFi Name
const char *pass = "ac312124"; // Enter your WiFi Password

String msg;
char msg1[20];
WiFiClient client;

#define MQTT_SERV "io.adafruit.com"
#define MQTT_PORT 1883
#define MQTT_NAME "choudharyas"
#define MQTT_PASS "988c4e045ef64c1b9bc8b5bb7ef5f2d9"

void send_event(const char *event);
const char *host = "maker.ifttt.com";
const char *privateKey = "hUAAAz0AVvc6-NW1UmqWXXv6VQWmpiGFxx3sV5rnaM9";


FPS_GT511C3 fps(D6, D5);
#define relay D1
#define buzzer D2

Adafruit_MQTT_Client mqtt(&client, MQTT_SERV, MQTT_PORT, MQTT_NAME, MQTT_PASS);
//Set up the feed you'r publishing to
Adafruit_MQTT_Publish Fingerprint = Adafruit_MQTT_Publish(&mqtt,MQTT_NAME "/f/Fingerprint");


void setup()
{
Serial.begin(9600); //set up Arduino's hardware serial UART
delay(100);
fps.Open(); //send serial command to initialize fps
fps.SetLED(true); //turn on LED so fps can see fingerprint
pinMode(relay, OUTPUT);
pinMode(buzzer, OUTPUT);
digitalWrite(relay, LOW); // keep motor off initally

Serial.println("Connecting to ");
Serial.println(ssid);
WiFi.begin(ssid, pass);
while (WiFi.status() != WL_CONNECTED)
{
delay(500);
Serial.print("."); // print ... till not connected
}
Serial.println("");
Serial.println("WiFi connected");
}

void loop()
{
MQTT_connect();
// Identify fingerprint test
if (fps.IsPressFinger())
{
fps.CaptureFinger(false);
int id = fps.Identify1_N();

if (id ==7) //<- change id value depending model you are using
{
Serial.print("Ashish Entered");
Buzzer();
digitalWrite(relay, HIGH);
delay(6000);
digitalWrite(relay, LOW);
msg = "Ashish Entered";
msg.toCharArray(msg1, 20);
if (! Fingerprint.publish(msg1))
{
//delay(7000);
}
}
else if (id ==8)
{
Serial.print("Manoj Entered");
Buzzer();
digitalWrite(relay, HIGH);
delay(6000);
digitalWrite(relay, LOW);
msg = "Manoj Entered";
msg.toCharArray(msg1, 20);
if (! Fingerprint.publish(msg1))
{
//delay(7000);
}
}

else if (id ==9)
{
Serial.print("Aswinth Entered");
Buzzer();
digitalWrite(relay, HIGH);
delay(6000);
digitalWrite(relay, LOW);
msg = "Aswinth Entered";
msg.toCharArray(msg1, 20);
if (! Fingerprint.publish(msg1))
{
//delay(7000);
}
}


else
{//if unable to recognize
send_event("login_event");
Serial.println("Finger not found");
for(int i = 7; i > 0; i--){
digitalWrite(buzzer, HIGH);
delay(100);
digitalWrite(buzzer, LOW);
delay(100);
}

}
}
else
{
Serial.println("Please press finger");
}
delay(100);


}

void send_event(const char *event)
{
Serial.print("Connecting to ");
Serial.println(host);

// Use WiFiClient class to create TCP connections
WiFiClient client;
const int httpPort = 80;
if (!client.connect(host, httpPort)) {
Serial.println("Connection failed");
return;
}

// We now create a URI for the request
String url = "/trigger/";
url += event;
url += "/with/key/";
url += privateKey;

Serial.print("Requesting URL: ");
Serial.println(url);

// This will send the request to the server
client.print(String("GET ") + url + " HTTP/1.1\r\n" +
"Host: " + host + "\r\n" +
"Connection: close\r\n\r\n");
while(client.connected())
{
if(client.available())
{
String line = client.readStringUntil('\r');
Serial.print(line);
} else {
// No data yet, wait a bit
delay(50);
};
}

Serial.println();
Serial.println("closing connection");
client.stop();
}

void MQTT_connect()
{
int8_t ret;

// Stop if already connected.
if (mqtt.connected())
{
return;
}

uint8_t retries = 3;
while ((ret = mqtt.connect()) != 0) // connect will return 0 for connected
{

mqtt.disconnect();
delay(5000); // wait 5 seconds
retries--;
if (retries == 0)
{
// basically die and wait for WDT to reset me
while (1);
}
}
}

void Buzzer()
{
digitalWrite(buzzer, HIGH);
delay(1000);
digitalWrite(buzzer, LOW);
}
Working Explanation
The code first sets up the necessary libraries, defines the WiFi SSID and password, and creates a WiFi client. It then sets up the fingerprint scanner module and initializes the MQTT client. It also sets up a feed to publish fingerprint data to. In the loop function, it checks if a finger is being pressed on the fingerprint scanner module. If it detects a finger, it captures the fingerprint and identifies it using the Identify1_N method. If it matches any of the predefined fingerprint IDs, it prints a message to the serial monitor, activates a buzzer, turns on a relay, and publishes the corresponding message to the MQTT feed.
If the fingerprint scanner module fails to recognize the fingerprint, it calls the send_event function to publish an event to the IFTTT webhook. The function creates a TCP connection to the IFTTT webhook and sends an HTTP GET request to trigger an event with a private key. The MQTT_connect function checks if the MQTT client is connected to the broker and retries the connection if necessary. The Buzzer function activates a buzzer for a specified duration.
Applications
- Home security systems
- Offices and commercial buildings
- Government buildings
- Laboratories and research facilities
- Hospitals and medical facilities
- Educational institutions
- Hotels and hospitality industry