A Capacitor is an electrical device that stores electric charge and the ability of the capacitor to store the electric charge is known as its Capacitance. Figuring out the values of different capacitors in the circuits can be challenging. When we come across circuit boards which are previously designed or we take out one from old TV or computer, in attempt to repair it. If we need to know the capacitance of a particular capacitor in the board to eliminate the fault. Then we face a problem in getting the exact value of the capacitor from the board especially if it is a surface mount device. With the help of a capacitance meter, we can measure the rate of charge storage of the capacitor, and based on this, we can get the Capacitance of the Capacitor. So we buy equipment for measuring the capacitance, but all these devices are costly and not for everyone. With that in mind, we are going to design a simple Arduino capacitance meter to measure the capacitance of unknown capacitors.
Hardware Required
| S.No | Components | Value | Qty |
|---|---|---|---|
| 1 | Arduino Uno | – | 1 |
| 2 | Resistor | 220Ω,10KΩ | 1,1 |
| 3 | Capacitor | 4.7uF | 1 |
| 4 | Connecting Wires | – | – |
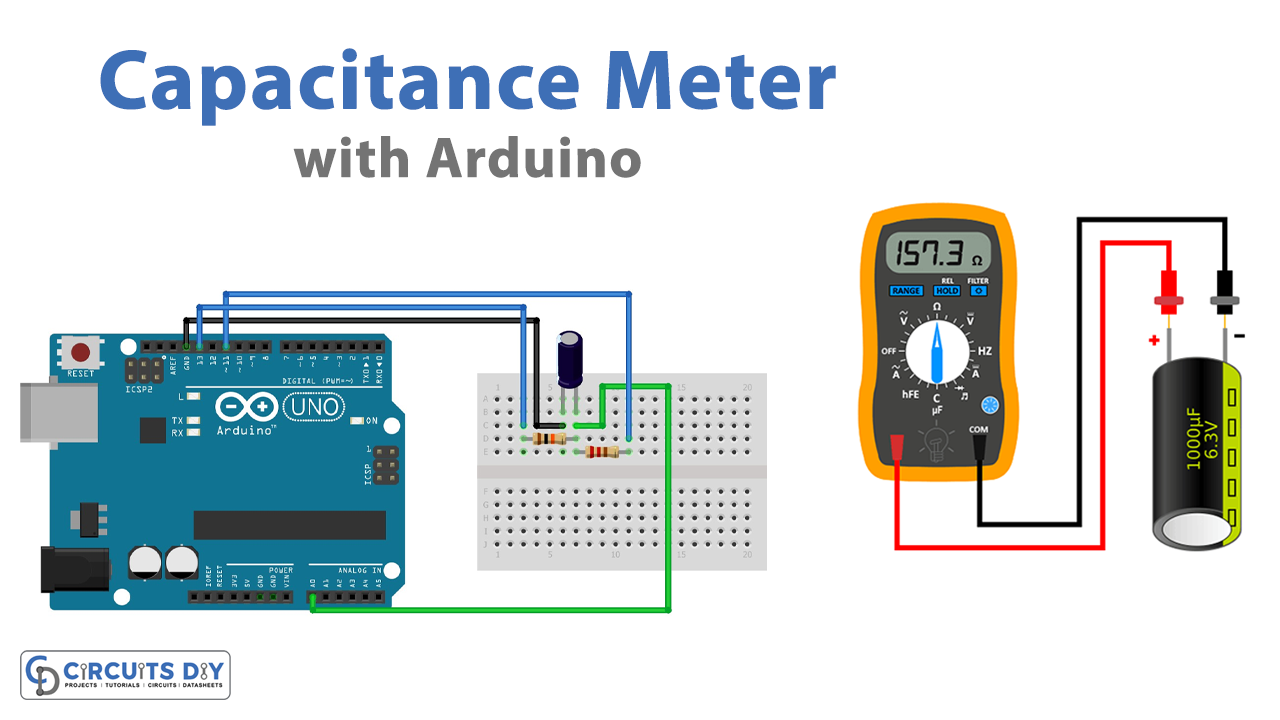
Circuit Diagram

Working Explanation
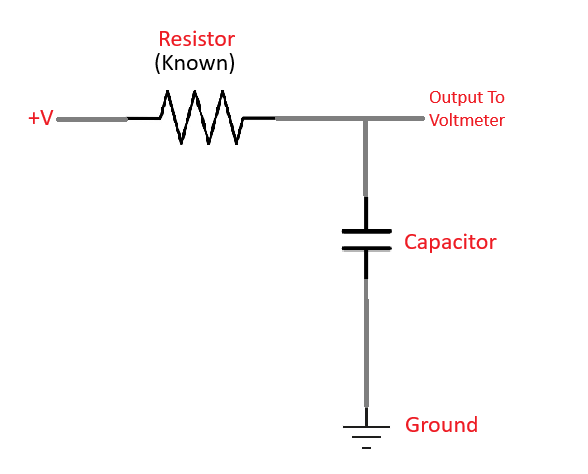
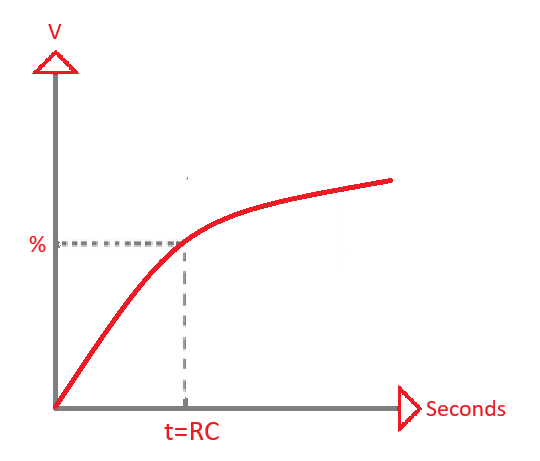
Here by using Arduino digital pins and a serial monitor, we can measure unknown capacitor values. This is a calculation-based technique, by charging and discharging a capacitor through a known value resistor. And we can measure unknown capacitance values in Farad by calculating the time delay.
C = Tc/R
Tc– Time constant of the capacitor (in seconds)
R – Resistance of the circuit (in ohms)
C – The capacitance
Here digital pin 13 is used as a charging pin for the capacitor and digital pin 11 acts as a discharge pin. And the time constant output fed into analog read pin A0.
Arduino Code
// Initialize Pins
int analogPin = 0;
int chargePin = 13;
int dischargePin = 11; //speeds up discharging process, not necessary though

// Initialize Resistor
int resistorValue = 560;

// Initialize Timer
unsigned long startTime;
unsigned long elapsedTime;

// Initialize Capacitance Variables
float microFarads;
float nanoFarads;

void setup()
{
  pinMode(chargePin, OUTPUT);
  digitalWrite(chargePin, LOW);
  Serial.begin(9600); // Necessary to print data to serial monitor over USB
}

void loop()
{
  digitalWrite(chargePin, HIGH); // Begins charging the capacitor
  startTime = millis(); // Begins the timer

  while(analogRead(analogPin) < 648)
  {
    // Does nothing until capacitor reaches 63.2% of total voltage
  }

  elapsedTime= millis() - startTime; // Determines how much time it took to charge capacitor
  microFarads = ((float)elapsedTime / resistorValue) * 1000;
  Serial.print(elapsedTime);
  Serial.print(" mS    ");

  if (microFarads > 1) // Determines if units should be micro or nano and prints accordingly
  {
    Serial.print((long)microFarads);
    Serial.println(" microFarads");
  }

  else
  {
    nanoFarads = microFarads * 1000.0;
    Serial.print((long)nanoFarads);
    Serial.println(" nanoFarads");
    delay(500);
  }

  digitalWrite(chargePin, LOW); // Stops charging capacitor
  pinMode(dischargePin, OUTPUT);
  digitalWrite(dischargePin, LOW); // Allows capacitor to discharge
  while(analogRead(analogPin) > 0)
  {
    // Do nothing until capacitor is discharged
  }

  pinMode(dischargePin, INPUT); // Prevents capacitor from discharging
}
Applications
- A capacitance Meter can be used to measure the capacitance of unknown capacitors.
- Using Arduino for Capacitance Meter makes it easy to implement the project and with slight modifications, the circuit can be made for a wide range of capacitors.