Introduction
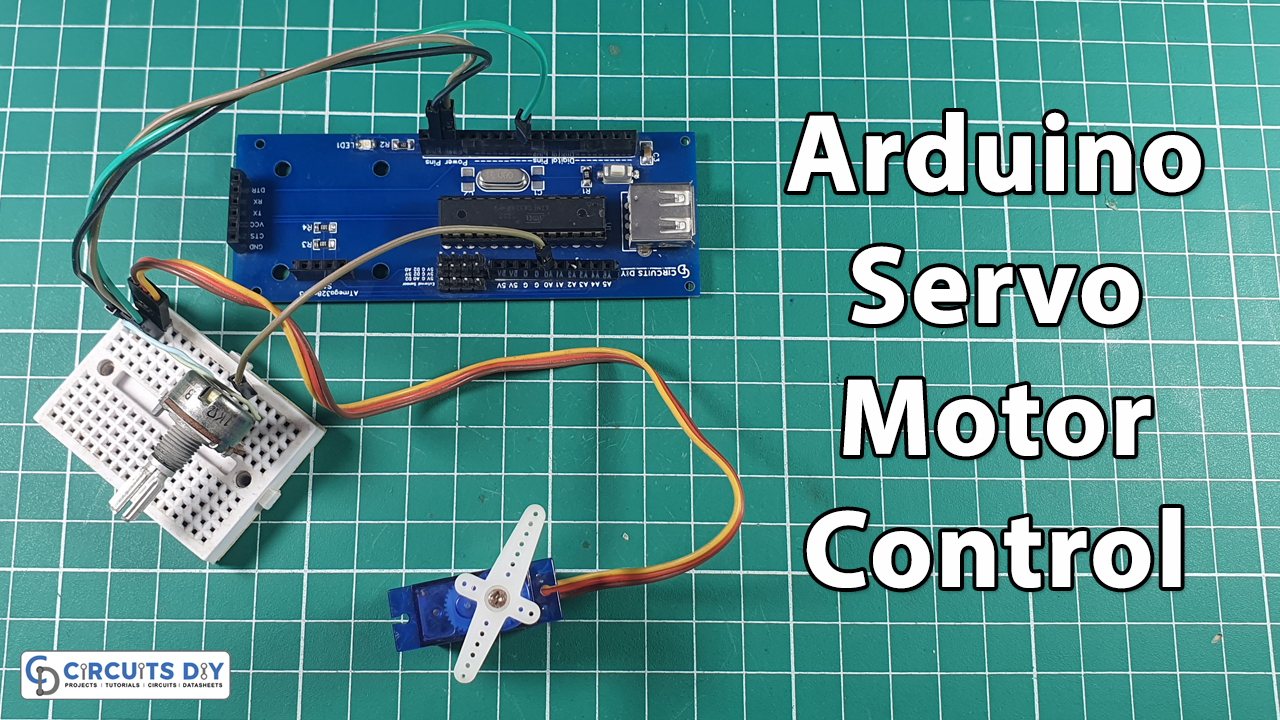
The Servo Library is a great library for controlling servo motors. In this article, you will find “Arduino Servo Motor Control” by Potentiometer. It controls the position of an RC (hobby) servo motor with your Arduino and a potentiometer.
This circuit can be utilized in so many different applications like Robots, CNC Routers, etc, Or where precise controlling is needed. So let’s get started without wasting a time.

This Project is sponsored by PCBWay. They have an open-source community, people can share their design projects with each other. Moreover, every time people place an order for your board, PCBWay will donate 10% of the cost of PCB to you, for your contribution to the Open Source Community.
What is Servo Motor?
A servomotor is a rotary actuator or linear actuator that allows for precise control of angular or linear position, velocity, and acceleration

Hardware Components
You will require the following hardware for Controlling Arduino Servo Motor by a Potentiometer.
| S.no | Component | Value | Qty |
|---|---|---|---|
| 1. | Arduino | UNO | 1 |
| 2. | Servo Motor | – | 1 |
| 3. | Potentiometer | – | 1 |
| 4. | USB 2.0 cable type A/B | – | 1 |
| 5. | Breadboard | – | 1 |
| 6. | Jumper Wires | – | – |
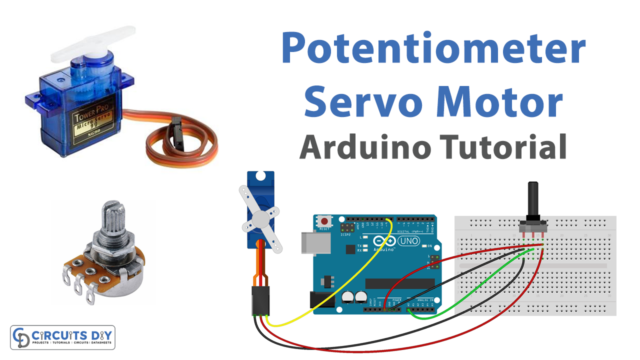
Steps Controlling Arduino Servo Motor by Potentiometer
- First Connect Potentiometer to the breadboard.
- One end of the pot is connected to 5v of Arduino and the other to the ground while the middle pin connects to Arduino A0.
- Then connect Servo OUT pin to D9 of Arduino and 5V to 5V ..Ground to GND
- Upload the code
- Power Up the circuit and move a potentiometer you will see a rotating servo precisely.
Schematic
Make connections according to the circuit diagram given below.
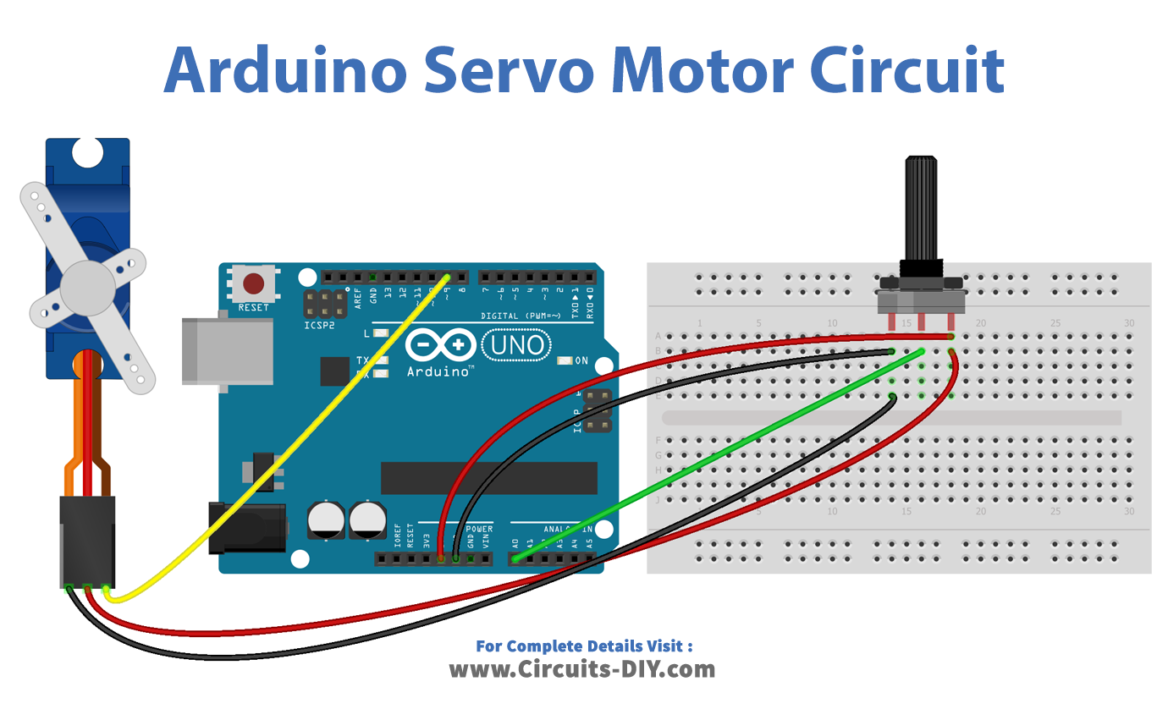
Wiring / Connections
| Arduino | Servo Motor | Potentiometer |
|---|---|---|
| 5V | VCC | VCC |
| GND | GND | GND |
| A0 | Terminal 2 | |
| D9 | PWM |
Installing Arduino IDE
First, you need to install Arduino IDE Software from its official website Arduino. Here is a simple step-by-step guide on “How to install Arduino IDE“.
Code
Now copy the following code and upload it to Arduino IDE Software.
#include <Servo.h>

Servo myServo;  // create servo object to control a servo

void setup() {
  // initialize serial communication at 9600 bits per second:
  Serial.begin(9600);

  myServo.attach(9);  // attaches the servo on pin 9 to the servo object
}

void loop() {
  // reads the value of the potentiometer (value between 0 and 1023)
  int analogValue = analogRead(A0);

  // scales it to use it with the servo (value between 0 and 180)
  int angle = map(analogValue, 0, 1023, 0, 180);

  // sets the servo position according to the scaled value
  myServo.write(angle);

  // print out the value
  Serial.print("Analog: ");
  Serial.print(analogValue);
  Serial.print(", Angle: ");
  Serial.println(angle);
  delay(100);
}
Conclusion.
We hope you have found this Arduino servo motor controlling circuit very useful. If you feel any difficulty in making it feel free to ask anything in the comment section.