Overview
Process control of appliances using a 5V SPDT relay module and an ESP32-WROOM microcontroller is a widespread application used in everyday home automation and consumer electronics. but the incorporation of debouncing effectively causes several issues in the proper use of the device at times. Luckily, this issue can be quickly resolved by simply introducing a debouncing algorithm in the controlling code. In today’s tutorial, we are going to understand how to control any appliance wirelessly while compensating for pushbutton debouncing using an SPDT relay and an ESP32-WROOM microcontroller.
What is a Relay?
A relay is a simple electromechanical switch device that operates using a set DC signal when applied to its coil. It has one common terminal (COM) that can be connected to either a normally open (NO) or normally closed (NC) contact, depending on the relay’s state. When the 5V supply energizes the coil, it generates a magnetic field, causing the internal switch contacts to switch between these positions.
Hardware Components
You’ll need the following hardware components to get started:
| Components | Value / Model | Qty |
|---|---|---|
| ESP32 | – | 1 |
| Button | – | 1 |
| Relay | – | 1 |
| Power Adapter | 12v | 1 |
| Warming Light Bright Waterproof | – | 1 |
| DC Power Jack | – | 1 |
| Breadboard | – | 1 |
| Jumper Wires | – | 1 |
| DC Power for ESP32 | – | 1 |
Steps-by-Step Guide
(1) Setting up Arduino IDE
Download Arduino IDE Software from its official site. Here is a step-by-step guide on “How to install Arduino IDE“.
(2) ESP32 in Arduino IDE
There’s an add-on that allows you to program the ESP32 using the Arduino IDE. Here is a step-by-step guide on “How to Install ESP32 on Arduino IDE“.
(3) Include Libraries
Before you start uploading a code, download and unzip the ezButton.h library at /Program Files(x86)/Arduino/Libraries (default). Here is a step-by-step guide on “How to Add Libraries in Arduino IDE“.
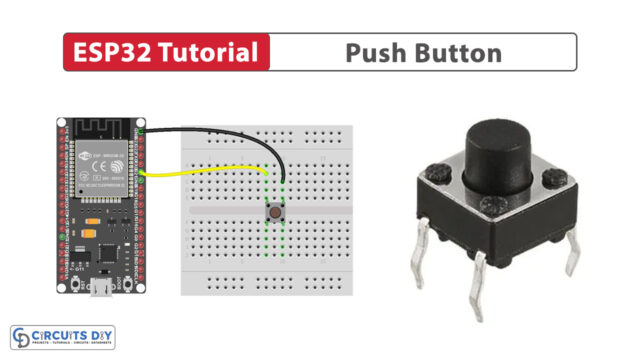
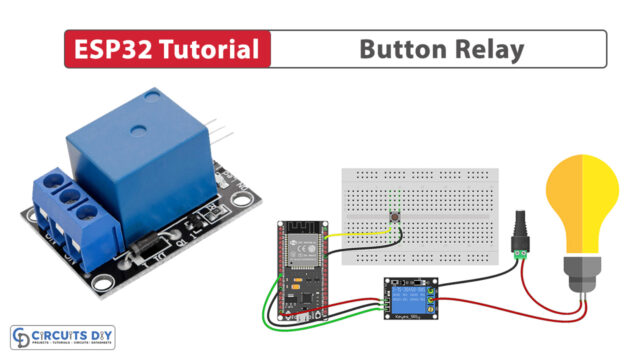
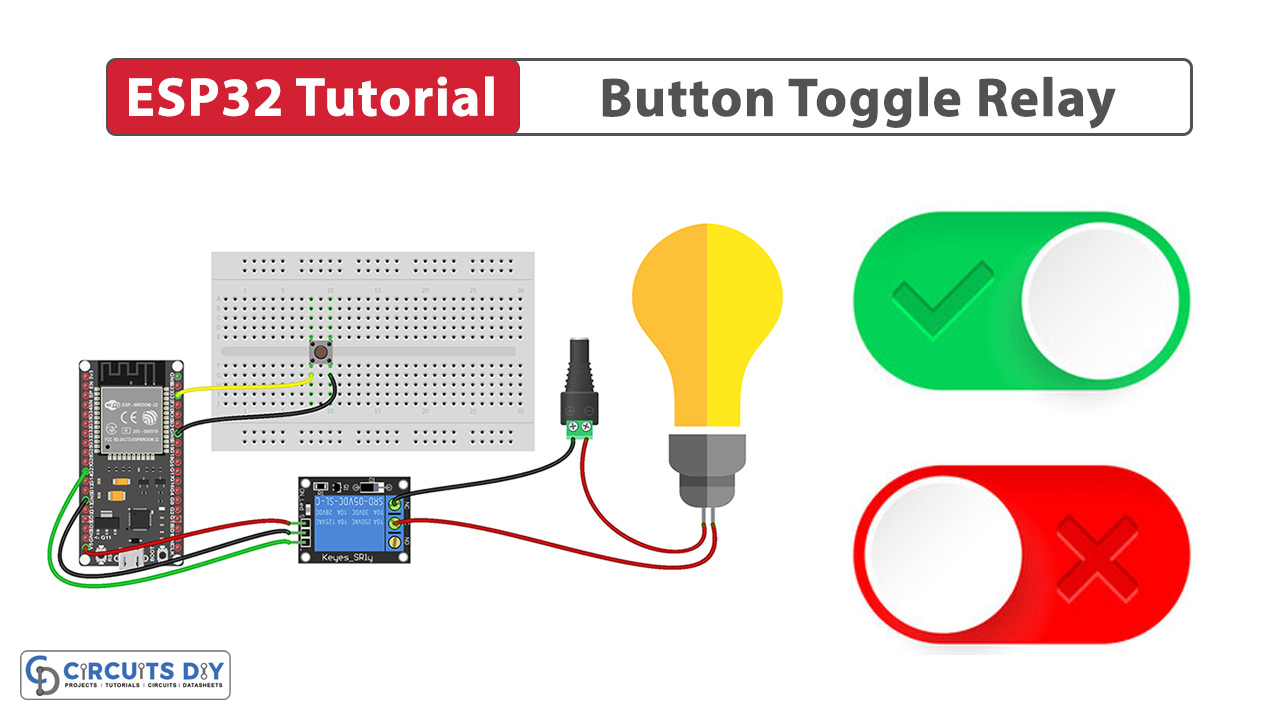
(4) Schematic
Make connections according to the circuit diagram given below.

Wiring / Connections
| ESP32 | Button | Relay |
|---|---|---|
| 5V | VCC | |
| GND | GND | GND |
| GIOP22 | Pin 3 | |
| GIOP27 | IN |
(5) Uploading Code
This code uses the ezButton library to handle button input on an ESP32 microcontroller. It’s set up to work with a button connected to GPIO pin 22 and a relay connected to GPIO pin 27. The button has a debounce time of 50 milliseconds to prevent false readings due to mechanical noise.
In the main loop, it continuously checks if the button is pressed using the ezButton’s isPressed() function. When the button is pressed, it toggles the state of the relay and prints a message to the serial monitor. The relay state is then updated accordingly, turning it on or off based on the button press.
Now copy the following code and upload it to Arduino IDE Software.
#include <ezButton.h>

#define BUTTON_PIN 22  // ESP32 pin GPIO22 connected to button's pin
#define RELAY_PIN  27  // ESP32 pin GPIO27 connected to relay's pin

ezButton button(BUTTON_PIN);  // create ezButton object that attach to pin 7;

// variables will change:
int relay_state = LOW;   // the current state of relay

void setup() {
  Serial.begin(9600);         // initialize serial
  pinMode(RELAY_PIN, OUTPUT); // set ESP32 pin to output mode
  button.setDebounceTime(50); // set debounce time to 50 milliseconds
}

void loop() {
  button.loop(); // MUST call the loop() function first

  if (button.isPressed()) {
    Serial.println("The button is pressed");

    // toggle state of relay
    relay_state = !relay_state;

    // control relay arccoding to the toggled state
    digitalWrite(RELAY_PIN, relay_state);
  }
}