Introduction
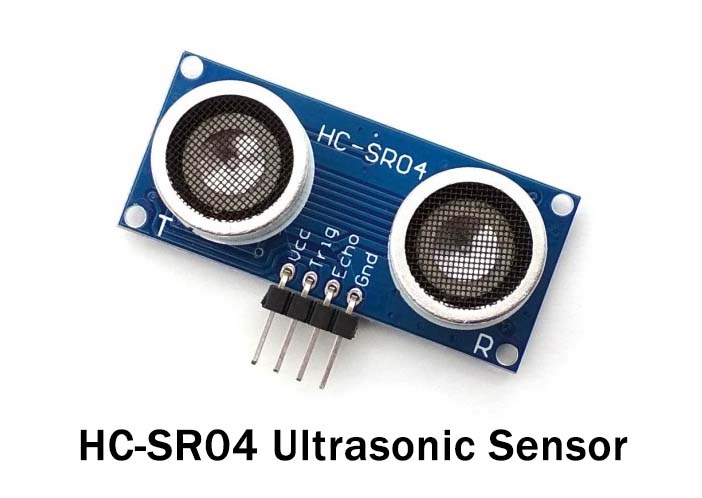
Ultrasonic sensors are a very compact device used to sense ultrasonic energy. The sensor essentially calculates the distance of the targeted object. It is usually used as a proximity sensor. It has more applications in automobiles. Precisely, used to make a system secure. The HS-SR04 ultrasonic sensor, which is also known as SONAR detects the distance with high accuracy and always gives reliable readings. Even, the Black material or sunlight can’t affect the system. So, in this tutorial, we are going to understand how to interface “Ultrasonic Sensor HC-SR04 with Arduino UNO”. Yet, we first need to comprehend that how the ultrasonic sensor works.
How does the Ultrasonic Sensor work?
The sensors have two main elements, that is, the transmitter, and the receiver. The transmitter utters the sound that is too high for the hearing range of humans by utilizing the piezoelectric crystal. The receiver then discovers that sounds. To calculate the distance between the targeted object and the sensor, the formula: D=1/2 T×C is used. Where T is the time between the transmitter and receiver. While C is the speed of sound.
Hardware Required
| S.no | Component | Value | Qty |
|---|---|---|---|
| 1. | Arduino | UNO | 1 |
| 2. | USB Cable Type A to B | – | 1 |
| 3. | Jumper Wires | – | 1 |
| 4. | Ultrasonic Sensor | HC-SR04 | 1 |
Circuit Diagram
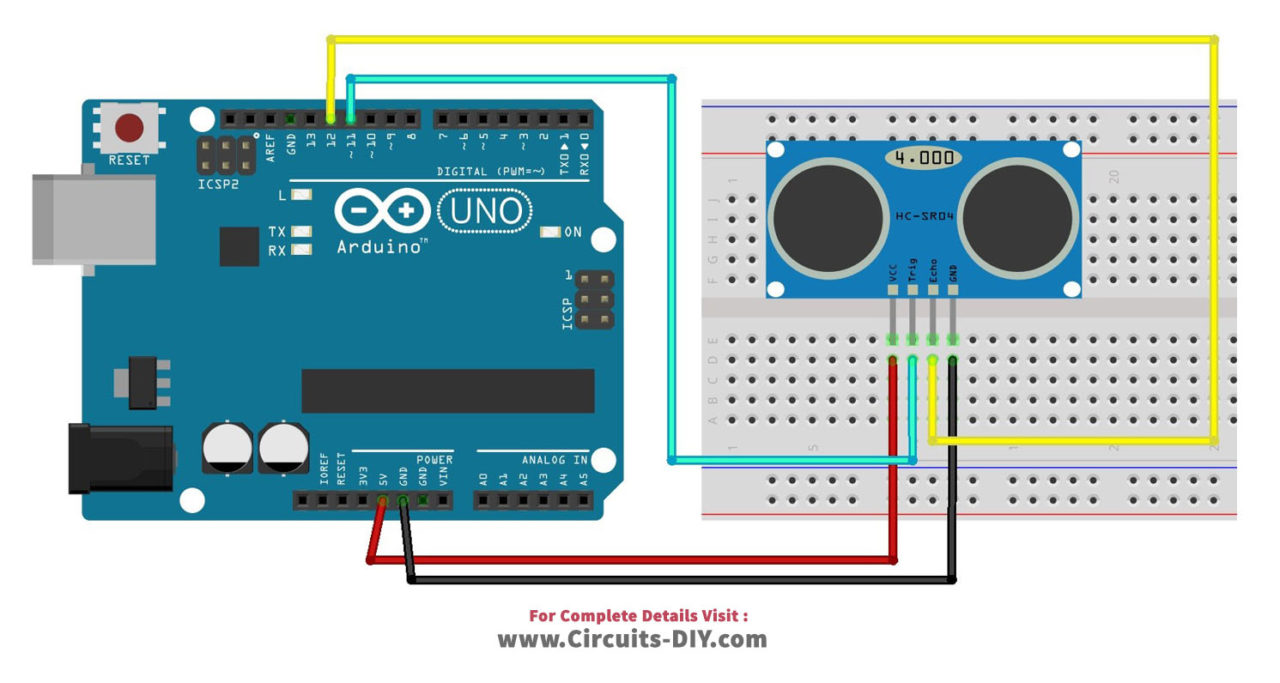
Connection Table
| Arduino | Ultrasonic Sensor HC-SR04 |
|---|---|
| 5V | VCC |
| Pin 11 | Trig |
| Pin 12 | Echo |
| GND | GND |
Arduino Code
// Circuits DIY
// For Complete Details Visit -> https://circuits-diy.com
    Ultrasonic sensor Pins:
        VCC: +5VDC
        Trig : Trigger (INPUT) - Pin11
        Echo: Echo (OUTPUT) - Pin 12
        GND: GND
 */

int trigPin = 11;    // Trigger
int echoPin = 12;    // Echo
long duration, cm, inches;

void setup() {
  //Serial Port begin
  Serial.begin (9600);
  //Define inputs and outputs
  pinMode(trigPin, OUTPUT);
  pinMode(echoPin, INPUT);
}

void loop() {
  // The sensor is triggered by a HIGH pulse of 10 or more microseconds.
  // Give a short LOW pulse beforehand to ensure a clean HIGH pulse:
  digitalWrite(trigPin, LOW);
  delayMicroseconds(5);
  digitalWrite(trigPin, HIGH);
  delayMicroseconds(10);
  digitalWrite(trigPin, LOW);

  // Read the signal from the sensor: a HIGH pulse whose
  // duration is the time (in microseconds) from the sending
  // of the ping to the reception of its echo off of an object.
  pinMode(echoPin, INPUT);
  duration = pulseIn(echoPin, HIGH);

  // Convert the time into a distance
  cm = (duration/2) / 29.1;     // Divide by 29.1 or multiply by 0.0343
  inches = (duration/2) / 74;   // Divide by 74 or multiply by 0.0135

  Serial.print(inches);
  Serial.print("in, ");
  Serial.print(cm);
  Serial.print("cm");
  Serial.println();

  delay(250);
}
Working Explanation
Connect the components as described above in the connection table. After assembling the code, upload it to the Arduino UNO. Bring anything in front of the ultrasonic sensor, and open the serial monitor. Now, you can see the calculated reading. The reading would be zero if there is nothing in front of the sensor or when the sensor doesn’t read a distance properly. Try with different materials and analyze the output.
Code Explanation
Assign the digital pins of an Arduino for trig and echo pins of the SONAR. Define in the void setup that trig and echo pins are the output pins. In the void loop, trigger the SONAR by transmitting a high pulse of 10msec. However, before that, send a low pulse to make sure that the high pulse that you are getting is clean. Now, read the signal from the sensor. After that, you only need to transform the duration to a distance using a formula: D=1/2 T×C. Print those results on the serial monitor.
Application and Uses
- In robotic navigation systems
- To sense the water level
- For level controlling
- For weather resistance
- In security devices, etc