Introduction
Have you heard of parking systems that can identify an obstacle in the driver’s blind spot and alert them before an accident can occur? And have you explored the reasoning behind it? Yes! this must be because of the sensor. But which sensor? Let’s explore together. So, continue reading this article as we are going to discuss Simple Obstacle Sensor with Arduino
There are numerous sensors available for obstacle detection, including ultrasonic sensors and infrared sensors. This obstacle sensor that we are making uses simple components like IR LED and photodiode.
What is an Obstacle Sensor?
A device used to detect obstacles is termed an obstacle sensor. They are sometimes IR sensors. An infrared signal is transmitted by an IR sensor, which is used to detect obstacles. The infrared signal bounces off an object’s surface and is then picked up by an infrared receiver.

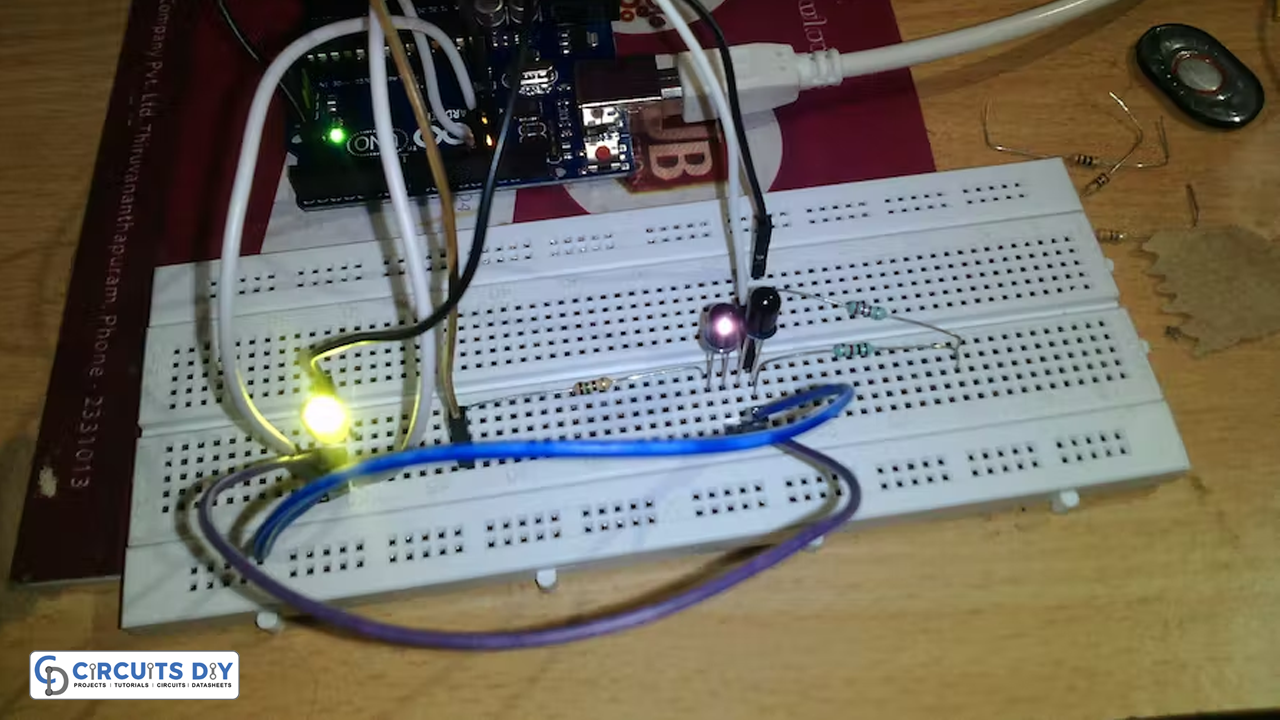
Hardware Components
You will require the following hardware for Simple Obstacle Sensor with Arduino
| S.no | Component | Value | Qty |
|---|---|---|---|
| 1. | Arduino UNO | – | 1 |
| 2. | IR transmitter | – | 1 |
| 3. | Photo Diode | – | 1 |
| 4. | LED | – | 2 |
| 5. | Resistor | 150Ω,3KΩ | 1,1 |
| 6. | Breadboard | – | 1 |
| 7. | Jumper Wires | – | 1 |
Steps Making Obstacle Sensor
To make this Simple Obstacle Sensor, you need a few basic components along with an IR sensor. Once you get them all, follow the given steps:
Schematic
Make connections according to the circuit diagram given below.

Wiring / Connections
| Arduino | IR Module | LED Green | LED Red |
|---|---|---|---|
| 5V | VCC with R1 | ||
| GND | GND | -ve | -ve |
| A0 | OUT with R2 | ||
| D12 | +ve | ||
| D13 | +ve |
Installing Arduino IDE
First, you need to install Arduino IDE Software from its official website Arduino. Here is a simple step-by-step guide on “How to install Arduino IDE“.
Code
Now copy the following code and upload it to Arduino IDE Software.
int photoDiode=2;
int GreenLed=13;
int senRead=0;
int SenseRate=905;
 void setup()
 {
  pinMode(photoDiode,OUTPUT);
  pinMode(GreenLed,OUTPUT);
  pinMode(12,OUTPUT);
  digitalWrite(photoDiode,HIGH);
  digitalWrite(GreenLed,LOW);
  Serial.begin(9600);
 }
 void loop()
 {
  int val=analogRead(senRead);
  Serial.println(val);
  if(val <= SenseRate)
  {
   digitalWrite(12,HIGH);
   digitalWrite(GreenLed,LOW);
   delay(20);
  }
  else if(val > SenseRate)
  {
   digitalWrite(12,LOW);
   digitalWrite(GreenLed,HIGH);
   delay(20);
  }
 }
Let’s Test It
Once you upload the code in Arduino, its now time to test the circuit. After that, you have powered up the Arduino, if the obstacle comes in front of the sensor the green LED with turn On.
Working Explanation
When the light emitted by the IR LED strikes the photodiode after it has hit an object, the photodiode’s resistance decreases dramatically. The threshold value is specified in the code. When the incoming radiation is on the photodiode, the voltage drop becomes high. The threshold voltage is then compared with that voltage. If the voltage to the photodiode is greater than the threshold voltage, the output becomes high and the LED would turn ON.
Applications
- Parking systems
- Automobiles obstacle detection
- Robotics applications
Conclusion.
We hope you have found this Simple Obstacle Sensor with Arduino Circuit very useful. If you feel any difficulty in making it feel free to ask anything in the comment section.