Introduction
To display any message that uses characters, we used the Liquid crystal displays. But, there are devices like digital counters, timers, digital clocks that need to display the number. For this purpose, we use the seven-segment display. And, to display 4 digits, we utilized the more advanced module called 4 digits seven segment display. So, in this tutorial, we are going to interface ” TM1637 4-Digit 7-Segment Display with Arduino UNO”.
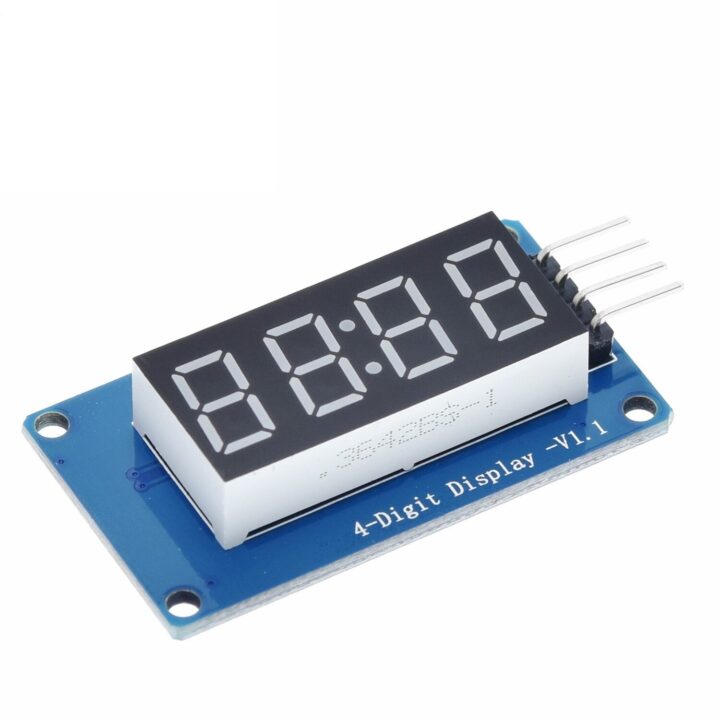
An overview about TM1637 LCD
The module has 12 pins to interface with any microcontroller. The structure of the board module includes the LED driver TM1637. The driver includes the function that controls the brightness of LEDs. Also, it supports the function to adjust the brightness of the LEDs. Moreover, the module operates at 3.3V. hence interface through the two-wire bus.
The module can sustain the difficult environment and can perform greatly in tough situations. Moreover, it can be installed in mobile applications. Hence some pre-written programs make the installation easier. There are two important pins, DIO and CLK through which the communication is done. Data or information can be sent or received by these two pins
Features and Specifications
- The module uses the two-wire interface.
- It has eight adjustable luminance levels.
- The module displays four numeric digits.
- The module is portable in size and easier to afford.
- The operating temperature range is -10 degrees Celsius to 80 degrees Celsius.
- It draws an operating current of 80mA.
- The operating voltage range of the module is from 3.3V to 5V
Hardware Required
| S.no | Component | Value | Qty |
|---|---|---|---|
| 1. | Arduino | UNO | 1 |
| 2. | USB Cable Type A to B | – | 1 |
| 3. | Jumper Wires | – | 1 |
| 4. | 4-Digit 7-Segment Display | TM1637 | 1 |
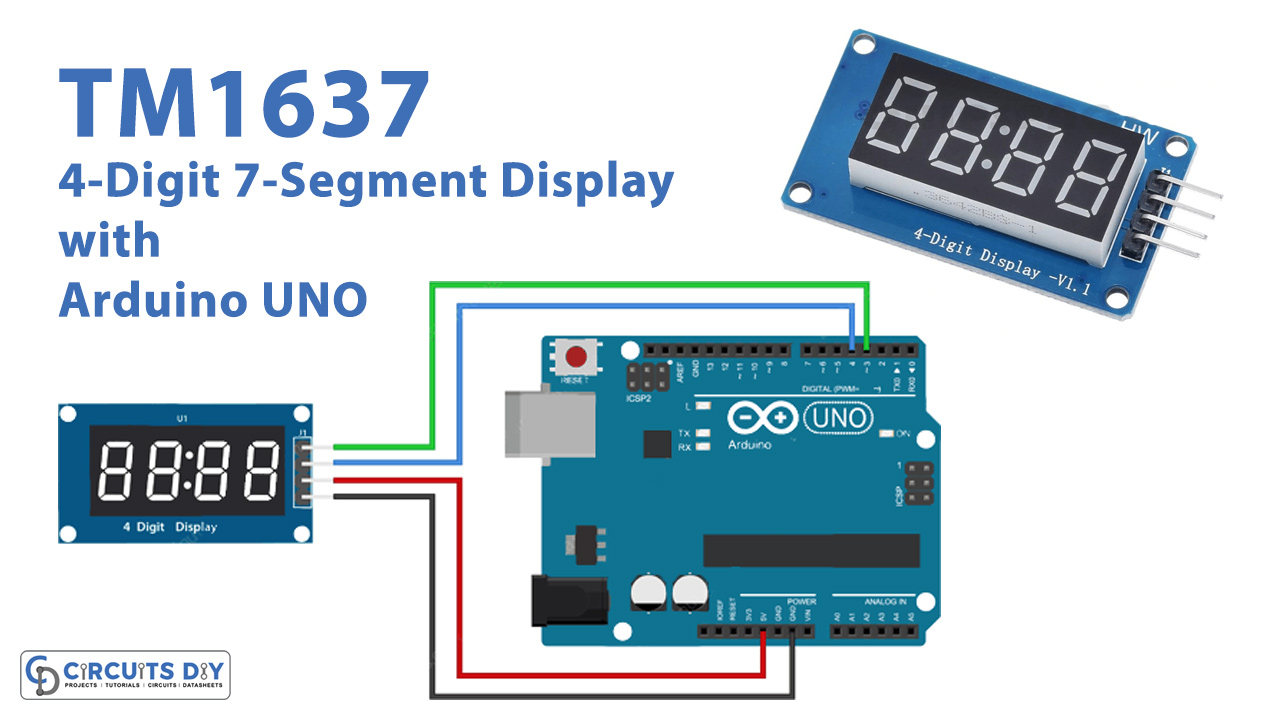
Circuit Diagram
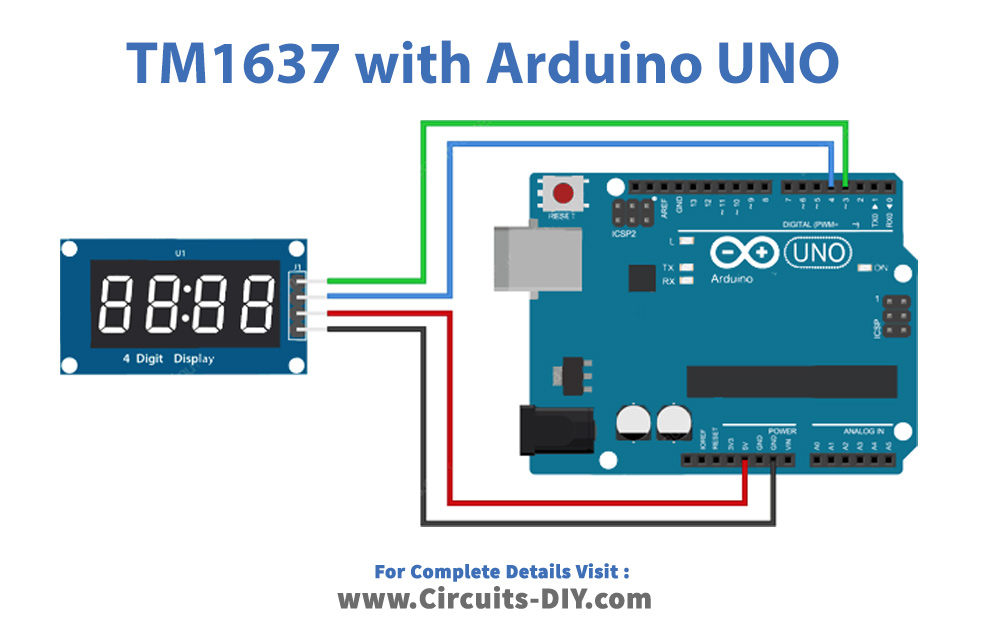
Connection Table
| Arduino | TM1637 4-Digit 7-Segment Display |
|---|---|
| GND | GND |
| 5V | VCC |
| D4 | DI0 |
| D3 | CLK |
Arduino Code
// Include the library
#include <TM1637Display.h>

// Define the connections pins
#define CLK 3
#define DIO 4

// Create a display object of type TM1637Display
TM1637Display display = TM1637Display(CLK, DIO);

// Create an array that turns all segments ON
const uint8_t allON[] = {0xff, 0xff, 0xff, 0xff};

// Create an array that turns all segments OFF
const uint8_t allOFF[] = {0x00, 0x00, 0x00, 0x00};

// Create an array that sets individual segments per digit to display the word "dOnE"
const uint8_t done[] = {
  SEG_B | SEG_C | SEG_D | SEG_E | SEG_G,           // d
  SEG_A | SEG_B | SEG_C | SEG_D | SEG_E | SEG_F,   // O
  SEG_C | SEG_E | SEG_G,                           // n
  SEG_A | SEG_D | SEG_E | SEG_F | SEG_G            // E
};

// Create degree celsius symbol
const uint8_t celsius[] = {
  SEG_A | SEG_B | SEG_F | SEG_G,  // Degree symbol
  SEG_A | SEG_D | SEG_E | SEG_F   // C
};

void setup() {

}

void loop() {
	// Set the brightness to 5 (0=dimmest 7=brightest)
	display.setBrightness(5);

	// Set all segments ON
	display.setSegments(allON);

	delay(2000);
	display.clear();

	// Show counter 0-9
	int i;
	for (i = 0; i < 10; i++) {
		display.showNumberDec(i);
		delay(50);
	}

	delay(2000);
	display.clear();

	display.showNumberDec(-12);			// Prints _-12
	delay(2000);
	display.clear();

	display.showNumberDec(-999);		// Prints -999
	delay(2000);
	display.clear();

	display.showNumberDec(31, false);	// Prints __31
	delay(2000);
	display.clear();

	display.showNumberDec(31, true);	// Prints 0031
	delay(2000);
	display.clear();

	display.showNumberDec(14, false, 2, 1);	// Prints _14_
	delay(2000);
	display.clear();

	display.showNumberDec(-5, false, 3, 0);	// Prints _-5_
	delay(2000);
	display.clear();

	// Prints 12:34
	display.showNumberDecEx(1234, 0b11100000, false, 4, 0);

	delay(2000);
	display.clear();

	// Prints 15°C
	int temperature = 15;
	display.showNumberDec(temperature, false, 2, 0);
	display.setSegments(celsius, 2, 2);

	delay(2000);
	display.clear();

	// Prints dOnE
	display.setSegments(done);

	while(1);
}
Working Explanation
Connect the TM1637 4-Digit 7-Segment Display with Arduino UNO. Write the above-mentioned code and upload it to your Arduino UNO. And, observe the 4 digits screen.
Code Explanation
Download the and install TM1637Display library. You can download the library from:
https://github.com/avishorp/TM1637
- Include the library. Define the PINs of an Arduino that are connected with the module pins. Create the TM1637Display object called display and store the function TM1637Display( ). Set the individual segment using hexadecimal numbers. For example, 0*ff converts into 11111111 in binary. So, use 0*to turn on the segments. Use 0*00 to turn off the segment. Create an array unit8_t done[ ] to set individual segments. For this matter, the given code snippet would help to print the word ‘done‘.
- The void setup of this code is empty. There has nothing to be included.
- In the void loop set the brightness by display brightness function. . Use setSegments( ) to set individual segment. The code contains three arguments of this function. The first argument is an array that contains segment information or data. While the second argument is the number of digits. The third argument is to determine the position. Use ShowNumberDec( ) to display the number. The first argument of this function is to display on the screen. the other argument of this function is optional. ShowNumberDecEx( ) is an extended function of the above function. It enables to control of the dots of the display. Print the word display by using the display.SetSegments(done).
Application and Uses
- Firstly, it can be utilized in power units.
- Moreover, in the stopwatches and counters.
- Also, in robotics applications.
- Further, in computer peripherals and utility power meters.
- And, to display time.