Introduction
In the past, using ultrasonic sensors for the measurement of distance was viewed as the last choice since it was thought that the technology was challenging to understand and apply. However, due to the development of ultrasonic sensors, which have become efficient and simple to utilize in practically any application, this outdated perspective is now changed.
The success of ultrasound is a result of its great reliability. These sensors perform accurately because of their extremely dependable sound wave technology, making them adaptable in a variety of circumstances for object recognition and level monitoring.
What is Ultrasonic Range Detector?
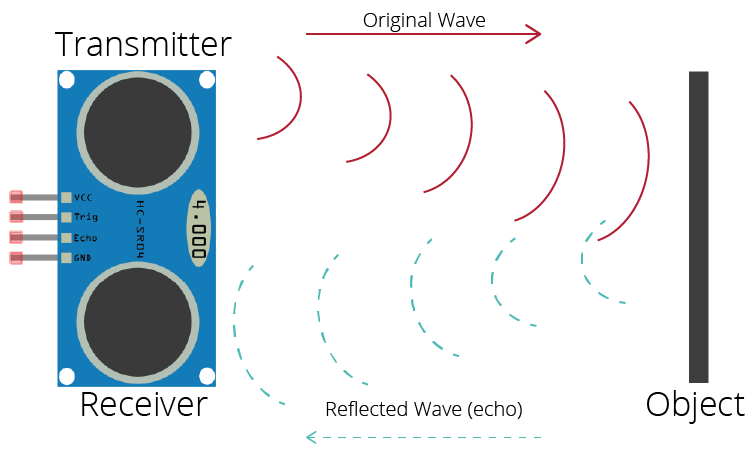
Ultrasonic range finders are tiny sensors that can detect and measure distance. They can be used as a motion detector or to determine the proximity of an object, depending on the sensor. They are frequently referred to as sonar sensors
Hardware Components
You will require the following hardware for Ultrasonic Range Detector Using Arduino and SR-04F.
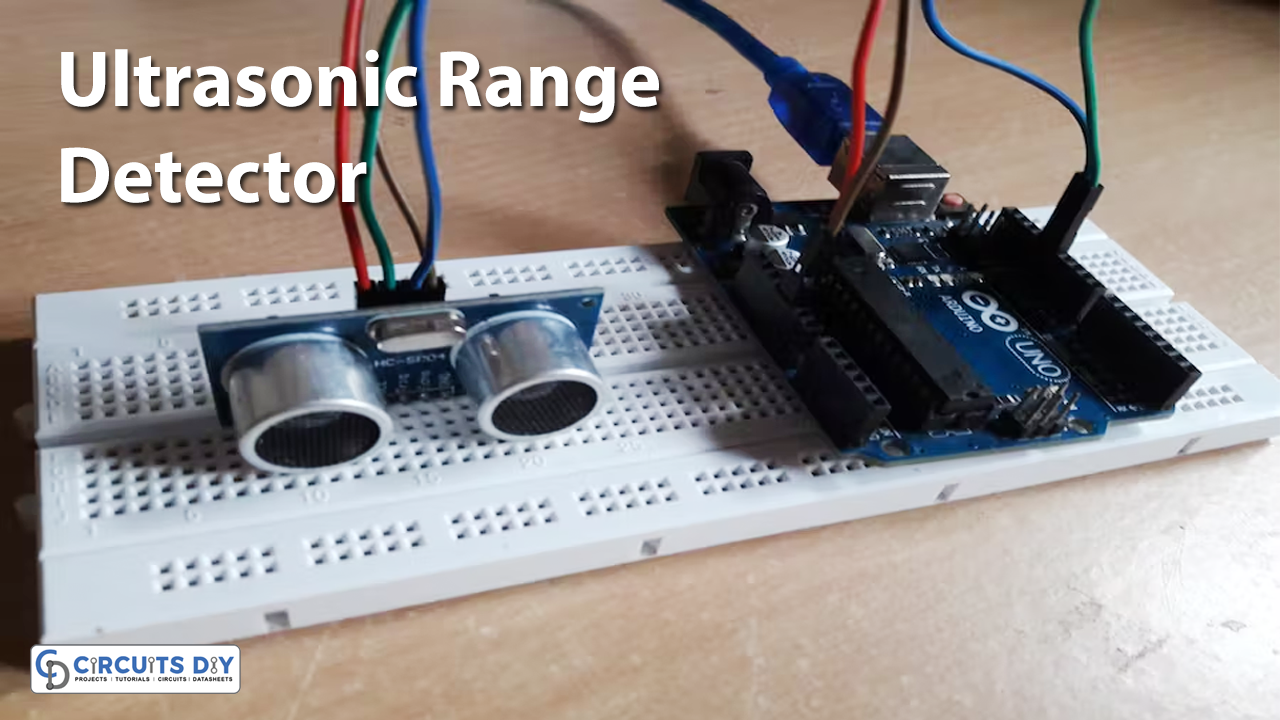
Steps for Making Ultrasonic Range Detector
To make, Ultrasonic Range Detector Using Arduino, you need the sonar sensor and Arduino as the main components. You also need some wires to connect the. Once you get them all; follow the following steps:
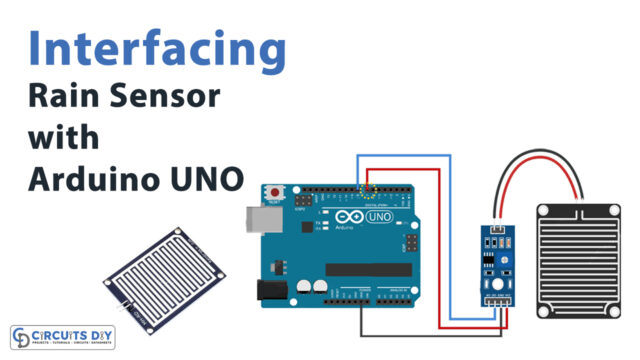
Schematic
Make connections according to the circuit diagram given below.
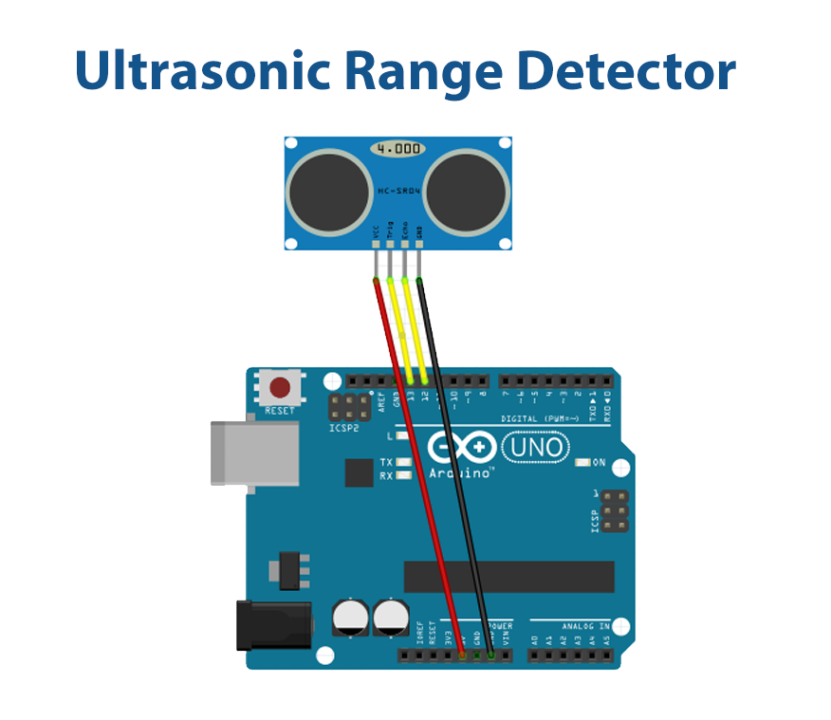
Wiring / Connections
| Arduino | Ultrasonic Sensor |
|---|---|
| 5V | VCC |
| GND | GND |
| D13 | Trig |
| D12 | Echo |
Installing Arduino IDE
First, you need to install Arduino IDE Software from its official website Arduino. Here is a simple step-by-step guide on “How to install Arduino IDE“.
Code
Now copy the following code and upload it to Arduino IDE Software.
#define trigPin 13
#define echoPin 12
void setup()
{
  Serial.begin (9600);
  pinMode(trigPin, OUTPUT);
  pinMode(echoPin, INPUT);
}
void loop()
{
  long duration, distance;
  digitalWrite(trigPin, LOW);
  delayMicroseconds(2);
  digitalWrite(trigPin, HIGH);
  delayMicroseconds(10);
  digitalWrite(trigPin, LOW);
  duration = pulseIn(echoPin, HIGH);
  distance = (duration/2) / 29.1;
  if (distance >= 200 || distance <= 0)
  {
    Serial.println("Out of range");
  }
  else
  {
    Serial.print(distance);
    Serial.println(" cm");
  }
  delay(500);
}
Let’s Test It
It’s now time to run and test the circuit. So, power up the Arduino. Place the object in front of the sensor, you would see the readings coming to your Serial monitor. Once the distance gets out of range, the serial monitor would print the message.
Working Explanation
- We define two variables:
- The first one describes the Arduino’s digital pin that is connected with a trig pin of the sensor.
- The second describes the Arduino pin that is connected to the echo pin of the sonar sensor
- we initialize the serial monitor by specifying the baud rate and the declare the state of pins on the Arduino
- We then make the trig pin low for some seconds and then make it high for some seconds. We use the function digitalWrite for that purpose. We then calculate the duration which leads us to calculate the distance. Once we get the distance, we then give the condition. If the distance is greater than or equal to 200 or less than or equal to zero, the serial monitor would print “out of range”. We then give some delay to get the next readings.
Applications
- Robotics
- Alarm and security system
- Commercial and Industrial projects
Conclusion.
We hope you have found this Ultrasonic Range Detector Using Arduino and SR-04F Circuit very useful. If you feel any difficulty in making it feel free to ask anything in the comment section.