Introduction
Many times we have seen that the weather is unpredictable. The rain shows at the time that no one is prepared for it. Hence, it may risk so many things. So, the designers have designed the rain sensor to get notified of the rain. The sensor is highly used in the skylight to close it when detects rain. Moreover, it is utilized in electronic shutters and windows. Also, the automotive industry uses this sensor for car applications, etc. Therefore, In this tutorial, we are going to interface “Rain Sensor with Arduino UNO”.
How Rain Sensor Works?
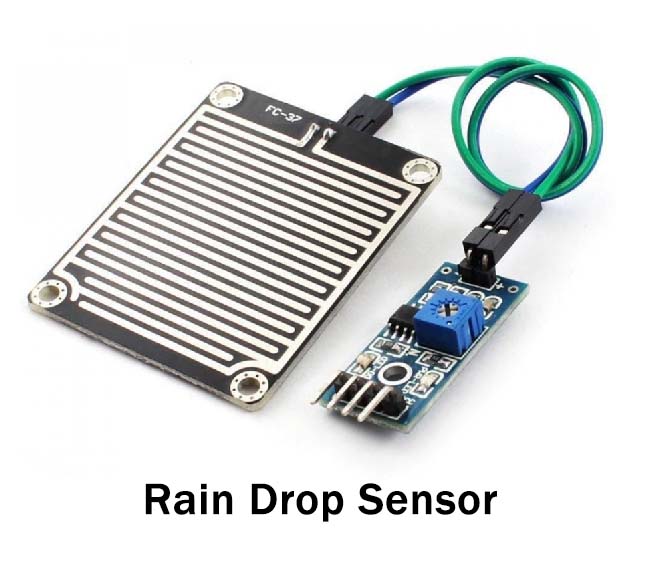
Mainly, the sensor has the sensing pad of copper traces. These traces together work as the variable resistor. Hence, the resistance varies according to the amount of water on the surface. A more amount of water means higher conductivity, which lowers the resistance. A lower amount of water means lower conductivity means higher resistance. Hence, this resistance determines the voltage that helps to determine the rain.
Hardware Required
| S.no | Component | Value | Qty |
|---|---|---|---|
| 1. | Arduino | UNO | 1 |
| 2. | USB Cable Type A to B | – | 1 |
| 3. | Jumper Wires | – | – |
| 4. | Rain Sensor | – | 1 |
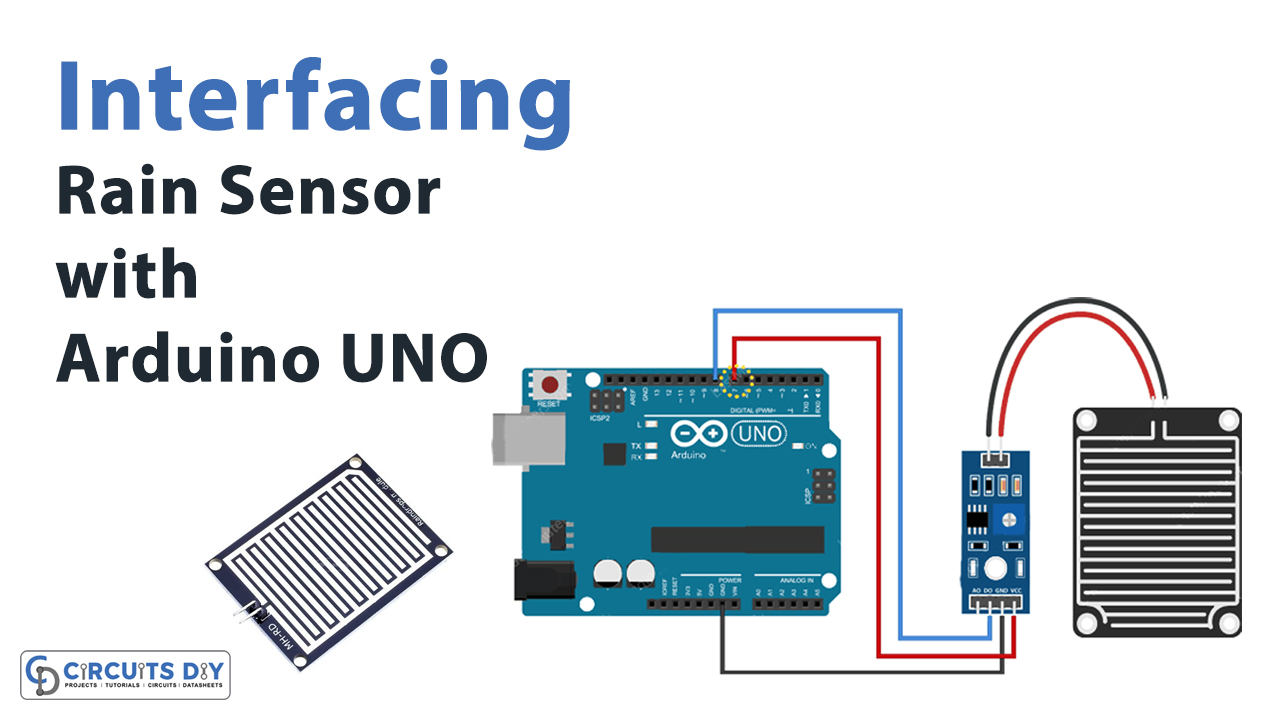
Circuit Diagram

Connection Table
| Arduino | Rain Sensor |
|---|---|
| – | A0 |
| D8 | D0 |
| GND | GND |
| D7 | VCC |
Arduino Code
// Sensor pins
#define sensorPower 7
#define sensorPin 8

void setup() {
	pinMode(sensorPower, OUTPUT);

	// Initially keep the sensor OFF
	digitalWrite(sensorPower, LOW);

	Serial.begin(9600);
}

void loop() {
	//get the reading from the function below and print it
	int val = readSensor();
	Serial.print("Digital Output: ");
	Serial.println(val);

	// Determine status of rain
	if (val) {
		Serial.println("Status: Clear");
	} else {
		Serial.println("Status: It's raining");
	}

	delay(1000);	// Take a reading every second
	Serial.println();
}

//  This function returns the sensor output
int readSensor() {
	digitalWrite(sensorPower, HIGH);	// Turn the sensor ON
	delay(10);							// Allow power to settle
	int val = digitalRead(sensorPin);	// Read the sensor output
	digitalWrite(sensorPower, LOW);		// Turn the sensor OFF
	return val;							// Return the value
}
Working Explanation
Connect the rain sensor with Arduino UNO according to the circuit diagram. Copy the above-mentioned code and paste it into your Arduino IDE. Upload the code in the Arduino. Now, you can observe the readings on the serial monitor. The circuit will give the reading after every second. When the rain is observed, you may see drastic changes in the readings.
Code Explanation
- Declare the sensor pins that are connected with the pins of an Arduino.
- In the void setup, define the output pin mode of the sensor. using digitalWrite, keep the sensor low. Initialize serial monitor by serial. begin ( ).
- In the void loop, call readSensor( ) function to read the value. Formulate the if-else condition to determine the status of rain. Give some delay to get new readings. Now, formulate the function to return the output of the sensor.
Application and Uses
- It can be used in water preservation devices.
- It is used in automobiles.
- In the irrigation systems.