Introduction
Soil moisture monitoring is an important aspect of agriculture and gardening, as it helps farmers and gardeners understand the water requirements of their crops and plants. Interfacing an Arduino FC-28 soil hygrometer module with an Arduino UNO microcontroller provides a simple and cost-effective solution for measuring soil moisture levels. The FC-28 module uses ultrasonic technology to determine the distance between the module and the soil surface, and the Arduino UNO board processes this data to calculate the soil moisture level.
The FC-28 soil hygrometer module is an electronic device that measures the soil moisture level. It is not specifically designed to measure soil moisture but instead measures the distance between the module and the soil surface using ultrasonic technology. By measuring the distance between the module and the soil surface, the FC-28 soil hygrometer module can provide an approximation of soil moisture levels, as dry soil typically has a greater distance between the module and the soil surface compared to moist soil. The FC-28 module is designed to interface with microcontrollers such as the Arduino UNO and is typically connected to the microcontroller via its power, trigger, echo, and ground pins.
Hardware Components
You will require the following hardware for Soil Moisture Sensor with Arduino.
| S.no | Component | Value | Qty |
|---|---|---|---|
| 1. | Arduino UNO | – | 1 |
| 2. | USB Cable Type A to B | – | 1 |
| 3. | Capacitive Soil Moisture Sensor | – | 1 |
| 4. | Power Adapter for Arduino | 9V | 1 |
| 5. | Jumper Wires | – | 1 |
Steps Interfacing Soil Moisture Sensor with Arduino
- Connect the FC-28 soil hygrometer module to the Arduino UNO. Connect the VCC pin of the module to the 5V pin on the Arduino, the GND pin to a GND pin on the Arduino, the Trig pin to pin 8 on the Arduino, and the Echo pin to pin 9 on the Arduino.
- Open the Arduino IDE and create a new sketch.
- Include the required libraries for the serial communication and the pulseIn() function. Add the following code at the beginning of your sketch:
#include <SoftwareSerial.h>
#include <PulseIn.h>
- Define the pins connected to the Trig and Echo pins of the FC-28 soil hygrometer module:
const int trigPin = 8;
const int echoPin = 9;
- In the setup() function, initialize the serial communication with a baud rate of 9600:
Serial.begin(9600);
- In the loop() function, add the following code to trigger the FC-28 soil hygrometer module, measure the time it takes for the signal to return, and calculate the soil moisture level based on that time:
long duration;
int distance;

digitalWrite(trigPin, LOW);
delayMicroseconds(2);
digitalWrite(trigPin, HIGH);
delayMicroseconds(10);
digitalWrite(trigPin, LOW);

duration = pulseIn(echoPin, HIGH);
distance = duration / 2 / 29.1;
- Based on the calculated distance, determine the soil moisture level and print it on the serial monitor:
if (distance >= 50) {
  Serial.println("Dry");
} else if (distance >= 20 && distance < 50) {
  Serial.println("Moist");
} else {
  Serial.println("Wet");
}
- Add a delay of 1000ms so the loop doesn’t run too quickly:
delay(1000);
- Upload the code to the Arduino UNO.
- Open the serial monitor and observe the soil moisture level being printed.
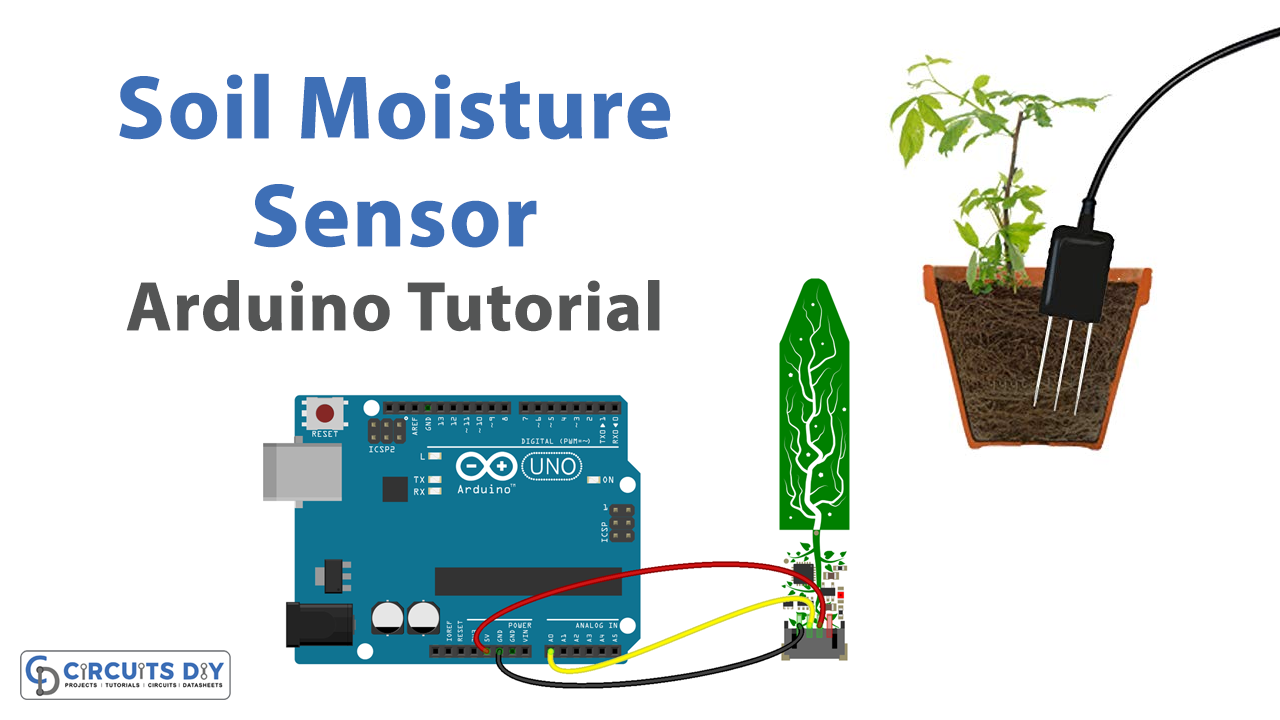
Schematic
Make connections according to the circuit diagram given below.

Wiring / Connections
| Arduino | Soil Moisture Sensor |
|---|---|
| 5V | VCC |
| GND | GND |
| A0 | AOUT |
Installing Arduino IDE
First, you need to install Arduino IDE Software from its official website Arduino. Here is a simple step-by-step guide on “How to install Arduino IDE“.
Code
Now copy the following code and upload it to Arduino IDE Software.
#define AOUT_PIN A0 // Arduino pin that connects to AOUT pin of moisture sensor

void setup() {
  Serial.begin(9600);
}

void loop() {
  int value = analogRead(AOUT_PIN); // read the analog value from sensor

  Serial.print("Moisture: ");
  Serial.println(value);

  delay(500);
}
Working Explanation
The setup() is used to initialize the serial communication and set the pin modes for the input and output pins. In the loop() function, first the trigPin is set to LOW and a delay of 2 microseconds is added. Then, the trigPin is set to HIGH and a delay of 10 microseconds is added. This triggers the FC-28 soil hygrometer module to send an ultrasonic pulse to measure the soil moisture level. The duration of the echoPin response is measured using pulseIn().
The duration is then divided by 2 and divided again by 29.1 to get the distance in cm. If the distance is greater than or equal to 400 cm, it means the soil is dry. Otherwise, the soil is moist. The status is printed on the serial monitor using Serial.println(). A delay of 1000 milliseconds is added to the end of the loop to slow down the reading rate.
Applications
- Soil Moisture Monitoring
- Smart Plant Care
- Environmental Monitoring
- Agricultural Applications
Conclusion.
We hope you have found this Soil Moisture Sensor Circuit very useful. If you feel any difficulty in making it feel free to ask anything in the comment section.