Introduction
Wireless technology has revolutionized the way we communicate and control electronic devices. With a button, we can turn on our TV, open our garage door, or even start our car from a distance. But how does all of this magic happen? The answer lies in RF (radio frequency) receiver modules. By connecting an RF receiver module to your Arduino board, you can use these signals to trigger actions or events in your projects. In this blog, we’ll delve into the world of RXB61 315/433MHz RF Receiver Module and show you how to get started using it with your Arduino projects.
We’ll cover the basics of RF receiver module technology and walk through the steps for connecting and programming an RF receiver module with your Arduino board. So let’s get started and unlock the power of wireless communication with the RXB61 RF receiver module!
What is RF Receiver Module?
An RF module, which stands for “radio-frequency module,” is a small electronic device that sends or receives radio signals between two devices. Wireless communication between devices is typically helpful in an embedded system.
Hardware Components
You will require the following hardware for Interfacing the RXB61 315/433MHz RF Receiver Module with Arduino.
| Value | Component | Value | Qty |
|---|---|---|---|
| 1. | Arduino UNO | – | 1 |
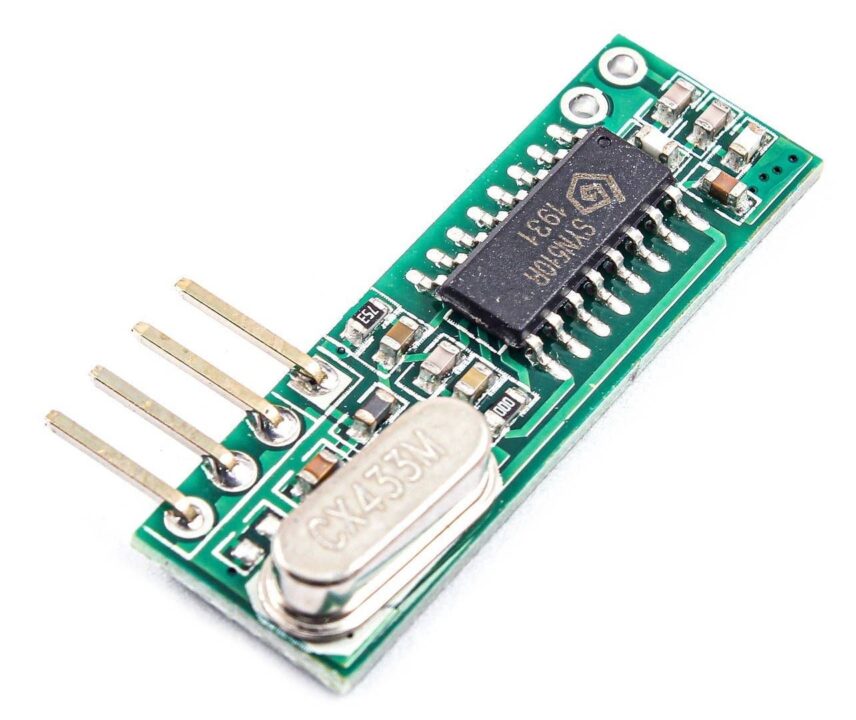
| 2. | Receiver Module | RXB61 433MHz | 1 |
| 3. | Breadboard | – | 1 |
| 4. | Jumper Wires | – | 1 |
RF Receiver Module with Arduino
Once you get all the components, you need to follow the three main steps:
- Building a circuit using schematic
- Uploading a code in Arduino
- Testing the circuit
Schematic
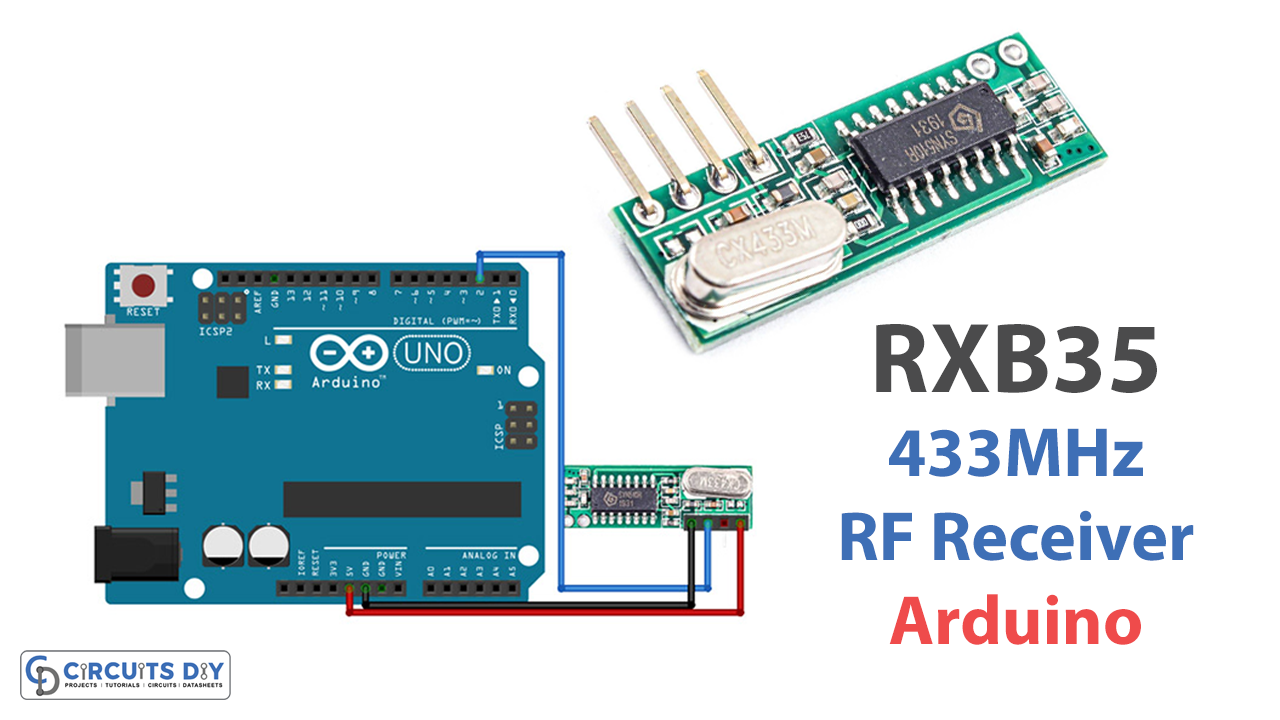
Make connections according to the circuit diagram given below.
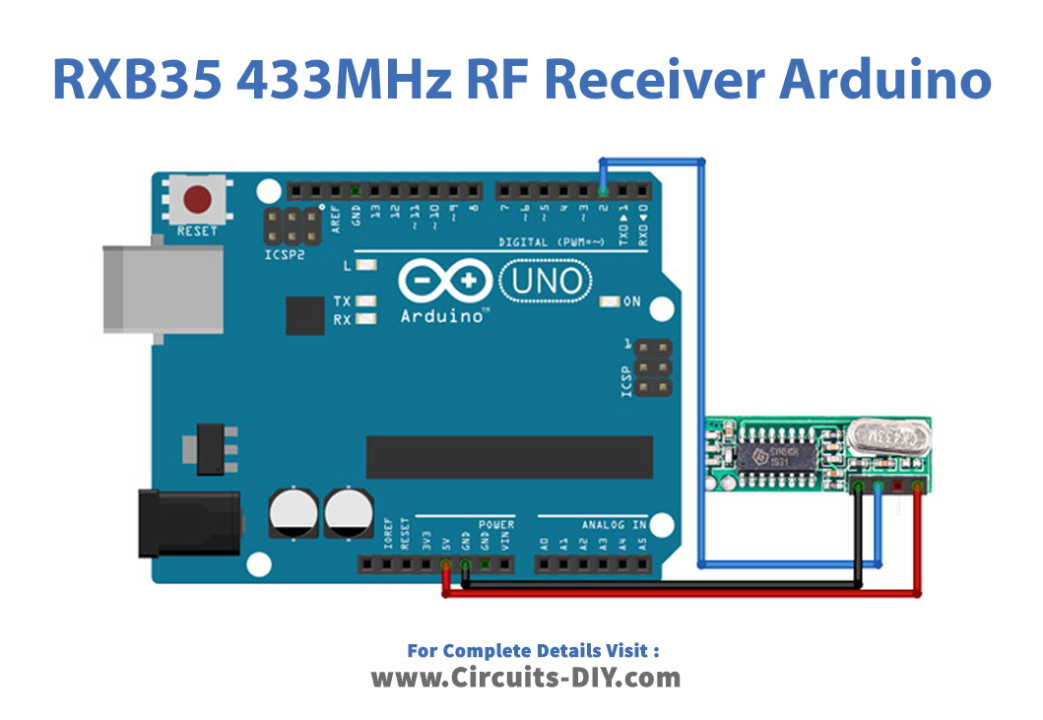
Wiring / Connections
| Arduino | Receiver Module |
|---|---|
| 5V | VCC |
| GND | GND |
| D2 | DATA |
Installing Arduino IDE
First, you need to install Arduino IDE Software from its official website Arduino. Here is a simple step-by-step guide on “How to install Arduino IDE.”
Installing Libraries
Before you start uploading a code, download and unzip the following libraries at /Progam Files(x86)/Arduino/Libraries (default) in order to use the sensor with the Arduino board. Here is a simple step-by-step guide on “How to Add Libraries in Arduino IDE“.
Code
Now copy the following code and upload it to Arduino IDE Software.
#include <RCSwitch.h>

RCSwitch mySwitch = RCSwitch();

void setup() {
  Serial.begin(9600);
  mySwitch.enableReceive(0);  // Receiver on interrupt 0 => that is pin #2
}

void loop() {
  if (mySwitch.available()) {

    int value = mySwitch.getReceivedValue();

    if (value == 0) {
      Serial.print("Unknown encoding");
    } else {
      Serial.print("Received ");
      Serial.print( mySwitch.getReceivedValue() );
      Serial.print(" / ");
      Serial.print( mySwitch.getReceivedBitlength() );
      Serial.print("bit ");
      Serial.print("Protocol: ");
      Serial.println( mySwitch.getReceivedProtocol() );
    }

    mySwitch.resetAvailable();
  }
}
Let’s Test It
It’s now time to test the circuit. Once you upload the code to the Arduino, code-test the transmitter-receiver connection. The serial monitor shows the received data!
Working Explanation
- The code first includes the RCSwitch library and creates an object of the RCSwitch class.
- In the void setup function, the code initializes the receiver and enables it to listen for signals on interrupt 0, typically associated with pin two on an Arduino board.
- In the void loop function, the code checks if a signal is available using the available() method of the RCSwitch object. If a signal is available, the code reads the value of the signal using the getReceivedValue() method and prints it to the serial monitor along with the bit length and protocol of the signal. The resetAvailable() method is then called to reset the receiver and prepare it for the next signal.
Applications
- Wireless communication
- Remote-controlled gadgets, etc
Conclusion.
We hope you have found this “Interfacing RXB61 315/433MHz RF Receiver Module with Arduino Circuit” very useful. If you feel any difficulty in making it feel free to ask anything in the comment section.