Introduction
It’s likely that you’ve used a joystick a lot while playing your favorite game, or at the least, have seen someone else use one. . But have you ever used a mouse-controlled joystick? If not, don’t worry, because in this post we’ll show you how to construct a Joystick Controlled Mouse with Arduino.
As you know. A joystick is a device that allows you to control the movement of the character you play in a video game and has a stick that goes left, right, forward, and backward as well as a sensor that determines where the stick is in relation to the screen. But, do you know what is joystick controlled mouse? Let’s discuss it!
What is Joystick Controlled Mouse?
Joystick-controlled mouse control is a device that controls the computer pointer when a button is pressed. This may be an alternate option for individuals who have trouble using a mouse. The device can move the cursor in any direction (x and Y axis) and also performs a click function with the built-in joystick’s switch.

Hardware Components
You will require the following hardware to make a Joystick Controlled Mouse.
| S.no | Component | Value | Qty |
|---|---|---|---|
| 1. | Arduino | UNO | 1 |
| 2. | Dual-axis Joystick | – | 1 |
| 3. | Jumper Wires | – | 1 |
Steps Making in Joystick Controlled Mouse
In the making of this Joystick Controlled Mouse, you need to have an Arduino and dual-axis joystick. Once you got that, it’s now time to follow the given steps:
Schematic
Make connections according to the circuit diagram given below.
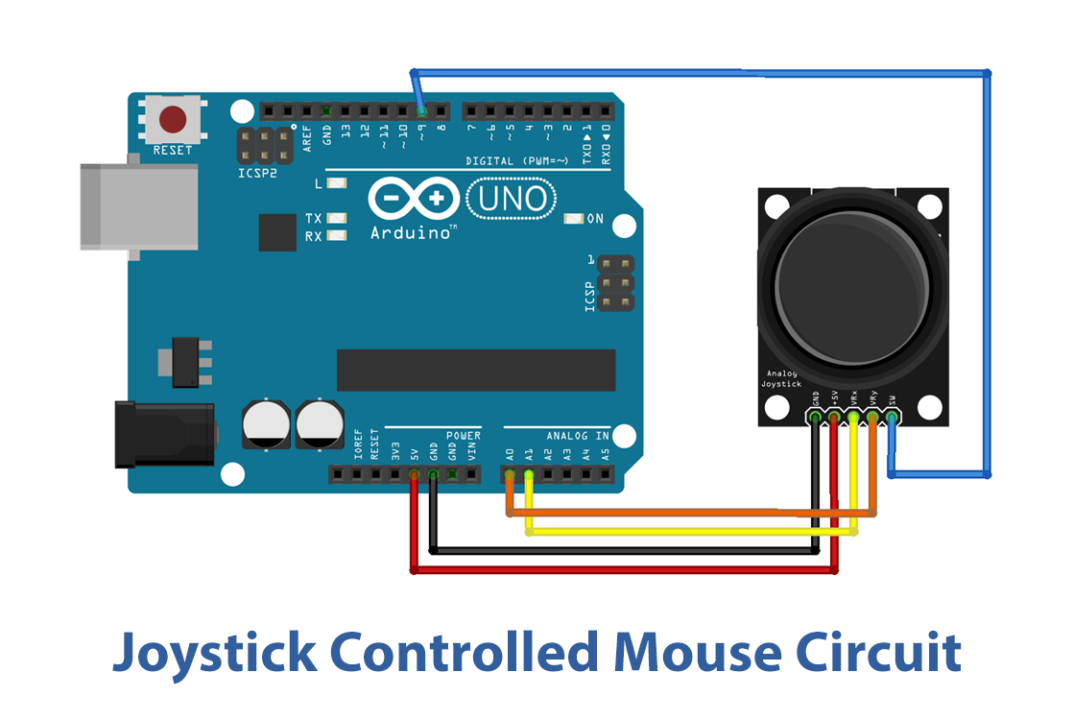
Wiring / Connections
| Arduino | Joystick |
|---|---|
| 5V | 5v |
| GND | GND |
| A0 | VRx |
| A1 | VRy |
| D9 | SW |
Python Programming
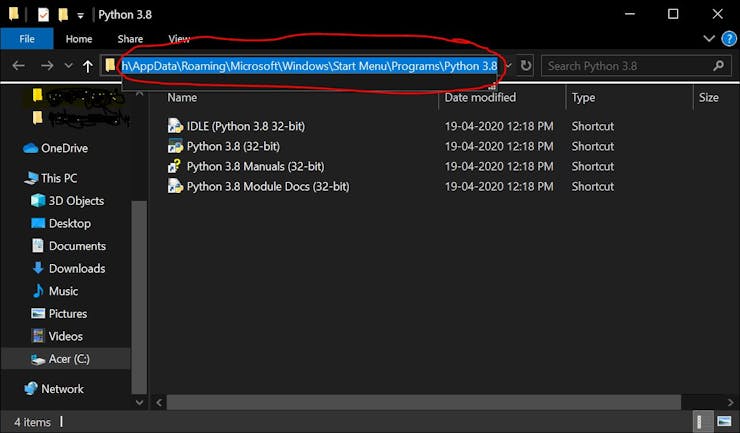
The user must have python 3 installed on their laptop/computer. It can be downloaded from here. After installation, Copy the path of the python file location.
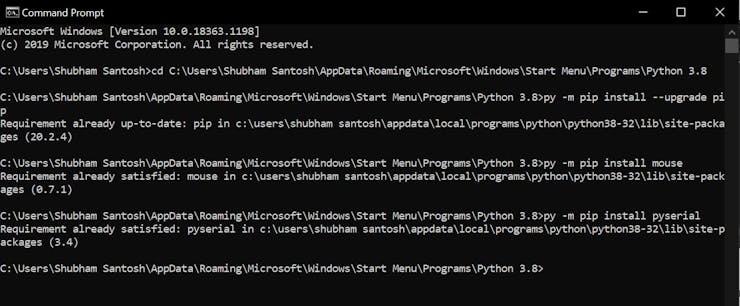
The following steps are to be performed on the command prompt. Open the command prompt and enter the following-
cd <paste the path of the python file>py –m pip install –-upgrade pippy –m pip install mousepy -m pip install pyserial
The mouse module is used to perform mouse action and pyserial module is used to send/receive data from the Arduino. I had already installed the necessary modules, so I got this
The python program is made to read the data printed by the Arduino and recognize the x and y direction values as well as the status of the switch(SW).
The current coordinates of the cursor are obtained from the mouse function mouse.get_position() which provides the cursor’s X and Y coordinates in the form of pixels.
When the joystick is moved, the analog values provided by the Arduino are added to the current cursor’s position to move the cursor in the desired direction.
To move the cursor in the given direction, the function mouse.move(X+x,Y+y) satisfies this purpose.
where X and Y are the current cursor’s position and x and y are the increment/decrement positions provided by the Arduino.
example: mouse.moveTo(100,150) moves the cursor to 100 pixels on the x-axis and 150 pixels on the y-axis.
To perform click operation based on the SW status, mouse.click(button="left") is used.
Installing Arduino IDE
First, you need to install Arduino IDE Software from its official website Arduino. Here is a simple step-by-step guide on “How to install Arduino IDE“.
Code
Now copy the following code and upload it to Arduino IDE Software.
void setup()
{
  Serial.begin(9600);
  pinMode(9,INPUT);     // SW pin
  digitalWrite(9,HIGH);

}
int prev_state=0;   // previous state of switch
void loop() {
  int z=0,xpos=0,ypos=0;
  int x=analogRead(A0);
  int y=analogRead(A1);
  int sensitivity=10;    // you can adjust the sensitivity based on your comfort
  if(x>=550)                     // when moved up
  xpos=map(x,550,1023,0,sensitivity);
  if(x<=450)                   // when moved down
  xpos=map(x,450,0,0,-sensitivity);
  if(y>=550)                    // when moved right
  ypos=map(y,550,1023,0,sensitivity);
  if(y<=450)                  // when moved left
  ypos=map(y,450,0,0,-sensitivity);
  int curr_state=digitalRead(9);
  if(curr_state==1 && prev_state==0)   // when SW is pressed
  z=1;
  else
  z=0;
  if(xpos!=0 or ypos!=0 or z==1) // prints only when the joystick is moved
  {
  Serial.print(xpos);    // print the data and separating by ":"
  Serial.print(":");
  Serial.print(ypos);
  Serial.print(":");
  Serial.println(z);
  }
  prev_state=curr_state;
  delay(10);         // for normal operation
}
Let’s Test It
Now that you are done with the connections, you need to upload the code and power the Arduino. Once you are done with that move the sensor and you would see the readings appear on the Serial monitor.
Working Explanation
To understand the working of a circuit, you need to understand the code:
- In the void setup, we first initialize the serial monitor, then we have declared the Arduino pin 9 as input to take the coming input. Then we make that input high by using the digitalWrite function. We then also make an object to store the previous value. So, initially, we store 0 in it.
- In the void loop, we give analogRead function to get the analog values of the x and y axis coming from the sensor. Then we define the sensitivity, you can adjust the sensitivity by yourself. Then we give conditions for moving up, moving down, moving right, and moving left. For example, if the value of x-axes exceeds 550, it would move up; etc. After that, we defined the current state which is actually the state that Pin 9 reads. The current state would be equal to the previous state when SW is pressed, in that case, z axes got the value 1, otherwise remains 0. Then we give the condition when the z axes have a value of 1, or either x or y has a value that does not equal 0, in that case, the value has been printed on the serial monitor ( it means the values are only get printed when the joystick moves). Then we store the current state value to the previous state and give a little delay to get the other value.
The Arduino code is built to output values between -sensitivity and +sensitivity depending on the position when the joystick is dragged away from the center. The value set by default is 10. As a result, the Arduino writes value 10 when the joystick is moved to one extreme position and prints -10 when the joystick is pushed to the other extreme position.
Applications
- It is used to move the pointer so that it may easily navigate among files and applications on your screen.
- It can be used in gaming devices.
Conclusion.
We hope you have found this Joystick-controlled Mouse very useful & interesting. If you feel any difficulty in making it feel free to ask anything in the comment section.