Introduction
Have you ever gone to the place where as you walk or merely take a step in that location, the lights turn on? Do you know how that get possible? Because of motion sensors. Motion sensors are used in these locations. The PIR motion detection sensor is among the most popular and affordable sensors for this use. It is a passive infrared sensor that operates at little power and is typically seen in security equipment and automatic lighting systems. It notifies the user of the movement but does not reveal the person who moved. But, this article is not only about PIR motion sensors, it’s about “IoT Motion Sensor using ESP01 & PIR”
So, here we are converting the PIR motion sensor into an IoT motion sensor. It will send us a notification on our mobile phone when it detects the motion. The distance between the sensor and the phone is not a limitation because everything is internet-based. As long as the internet is there you will get the readings.

PCBWay commits to meeting the needs of its customers from different industries in terms of quality, delivery, cost-effectiveness, and any other demanding requests. As one of the most experienced PCB manufacturers in China. They pride themselves to be your best business partners as well as good friends in every aspect of your PCB needs.
Hardware Component
The following components are required to make IoT Motion Sensor Circuit
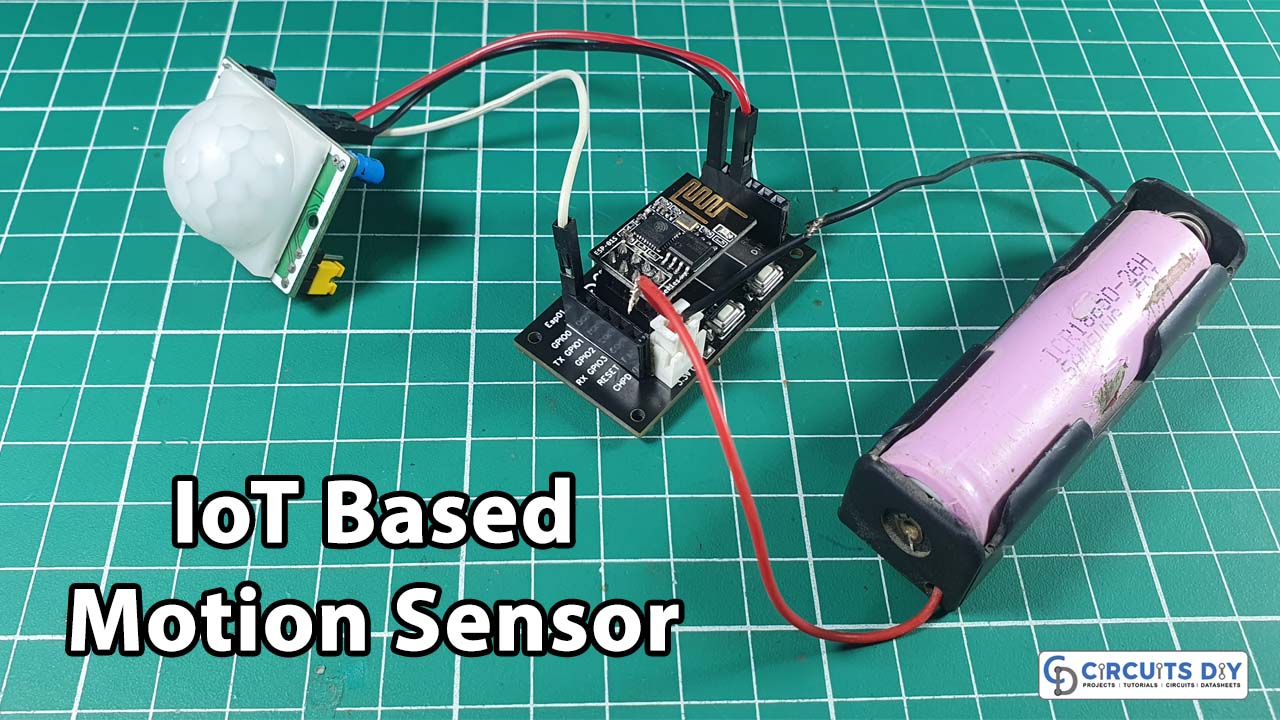
IoT Motion Sensor Circuit

Connection of the Circuit
- Connect the PIR sensor and ESP 01’s GND to the power supply’s negative.
- Connect the VCC of the ESP 01 and the PIR sensor to the 3.3v of the power supply.
- Connect the ESP’s GPIO 2 pin to the OUT of the PIR sensor.
Create the Applet
When you are done with the hardware connection, it’s now time to install the application and take further steps.
- You must first register on the IFTTT website to build an applet.
- Additionally, install the IFTTT app.
- Log in to the app using your user credentials after downloading.
- Also, grant all requests for permissions.
Steps to Follow:
- Click your profile.
- Next, select Create from the drop-down list.

- Click the +This button now.

- now search up webhooks
- Afterward, click the Webhooks icon.

- Pick the “receive a web request” trigger option from the choose trigger menu.

- Now give the event a name, Like our name was “iot_Motion_Sensor”
- Keep in mind that there should be no gap between the words.

- Now clock on +That button

- Now, search for notification from the choose action service.
- then choose the notification icon.
- Keep in mind that for the notifications to function, the IFTTT app on your phone must be installed and logged in.

- Choose any of the options you want from here; we select simple notification.

- Now type the notice that you want to receive when motion is detected in the message box.
- We just put “Motion Detected” there.
- If you have several sensors set up, you might write “motion detected at the garage” or “motion detected in closet,” for example.
- If you would like, you may provide a time when motion is detected.

- Click Finish

- That’s all; the applet has now been successfully created.

Steps to Obtain the URL of the HTTP GET request

- Open an IFTTT account and log in.
- Select My services by clicking on your profile picture.
- Then select webhooks.

- Then select Documentation.

- Now change {event} to the name of the event you specified when you built your applet.
- It was “Iot Motion Sensor” in our situation.
- You may click the test button to see if your applet is functioning.
- This page will also contain your private key, which you should keep to yourself.
- We have modified ours.
- To enlarge the image, click on it.

Working
- Now use an FTDI or an Arduino as a USB to TTL converter to upload the code to your ESP8266-01 device.
- Once the circuit is connected, turn it on.
- When the PIR sensor calibration is complete, the LED present on the board will turn OFF after 30 seconds.
- Now, whenever motion is detected, the LED will glow, and a push notification with the message “Motion Detected” which will be sent to your phone.
Arduino Code
#include <ESP8266WiFi.h>
#include <ESP8266HTTPClient.h>

const char* ssid = "*****"; //Your WiFI ssid
const char* password = "*****"; //Your WiFi password
boolean PIRstate ; //variable to store PIR state
boolean lastPIRstate = HIGH;
int PIR = 0; //PIR connected to GPIO 0

void setup () {

  WiFi.begin(ssid, password);

  while (WiFi.status() != WL_CONNECTED)
  {
    delay(1000);
  }

  pinMode(PIR, INPUT); //digitalWrite(PIR, LOW);

  pinMode(LED_BUILTIN, OUTPUT);

  delay(30000);

}

void loop()
{

  PIRstate = digitalRead(PIR);  //HIGH when motion detected, else LOW

  if (PIRstate != lastPIRstate)  //Checking if there is any motion
  {

    digitalWrite(LED_BUILTIN, LOW);
    delay(100);
    digitalWrite(LED_BUILTIN, HIGH);
    if (WiFi.status() == WL_CONNECTED)  //Check WiFi connection status
    {
      HTTPClient http;  //Declare an object of class HTTPClient

      http.begin("paste the link from ifttt");  //Specify request destination
      http.GET();   //Send the request
      http.end();   //Close connection

    }
    lastPIRstate = PIRstate;
  }

}
Application and Uses
- The purpose of security in automation systems
- In circuits for burglar alarms
Conclusion
- The PIR motion sensor has been linked to one of the ESP 8266-01’s GPIO pins.
- Our ESP 8266 – 01 controller will be able to tell when the PIR senses motion whenever the PIR sensor’s output states change.
- We have set up our IFTTT webhooks applet to receive an HTTP GET request from the ESP.
- An alert notice on our cell phone will be sent whenever an HTTP GET request is made.