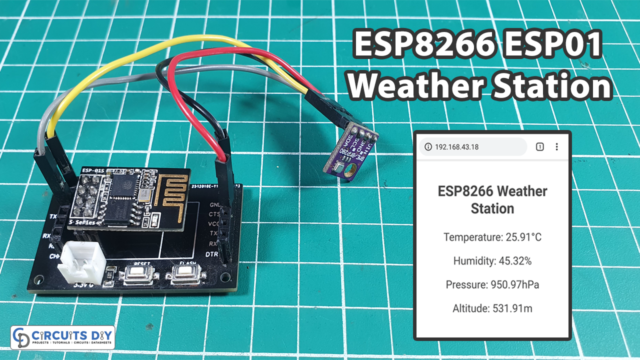
Introduction
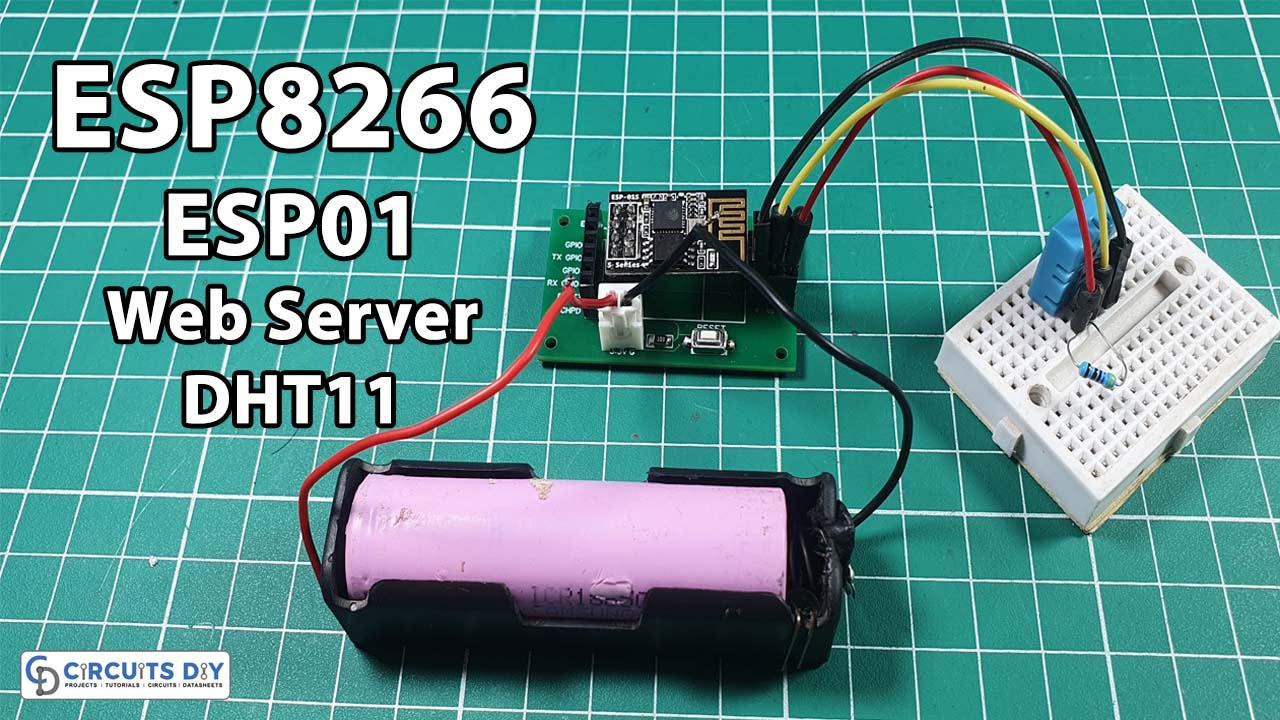
In this tutorial, we are going to make a web server using “ESP8266 ESP01 and DHT11 Sensor”. The DHT11 is a low-cost yet effective temperature and humidity sensor. It makes it possible to estimate the temperature and humidity levels in the surrounding environment. . Additionally, the humidity levels range from 20% to 80%. Additionally, the sensor only requires a very low voltage range of three to five volts to function. It uses 2.5mA of current as well.
The internal structure of the DHT11 sensor contains the thermistor and a humidity sensing element. The thermistor usually changes its resistance with the temperature change. Hence, the resistance decreases with the increase in temperature. On the other side, the humidity component has two electrodes that have a substrate between them. As the resistance gets changed, the conductivity of this substrate also gets changed.
How does the ESP8266 device function?
You can use the ESP8266, a low-cost WiFi module that is a member of the ESP family, to control your electronics projects from any location around the globe. It can connect to a WiFi network since it contains a built-in microprocessor and a 1MB flash. The TCP/IP protocol stack enables the communication between the module and WiFi signals. The module’s maximum operating voltage is 3.3 volts, thus you can’t supply 5 volts since it would damage the module.
PCBWay commits to meeting the needs of its customers from different industries in terms of quality, delivery, cost-effectiveness, and any other demanding requests. As one of the most experienced PCB manufacturers in China. They pride themselves to be your best business partners as well as good friends in every aspect of your PCB needs.
Hardware Components
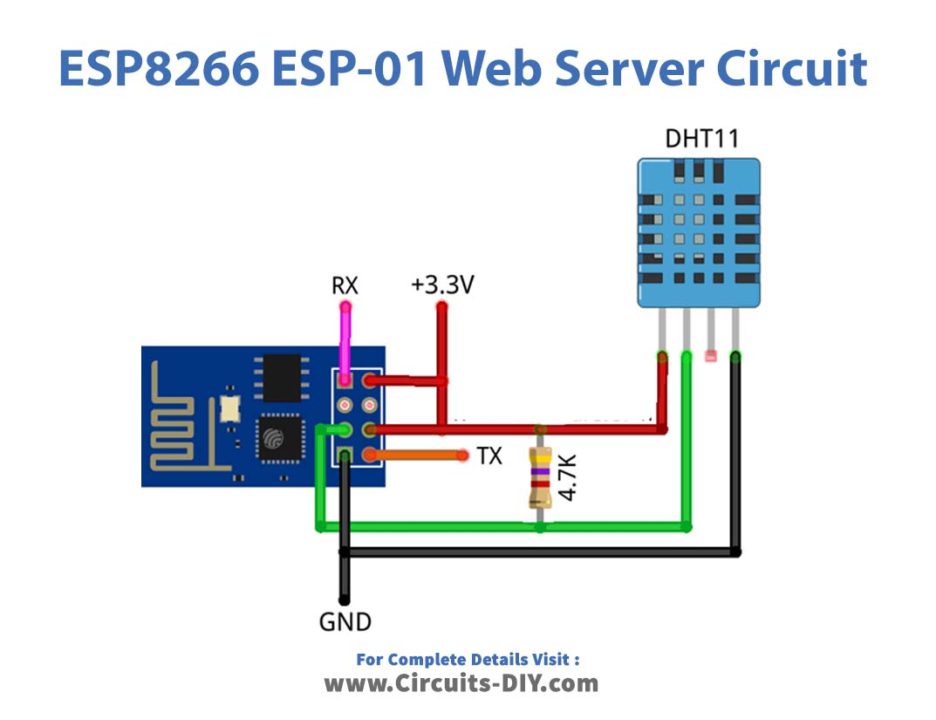
The following components are required to make a Web Server Circuit
| S.no | Component | Value | Qty |
|---|---|---|---|
| 1. | Temp. & Humidity Sensor | DHT11 | 1 |
| 2. | module | ESP01 | 1 |
| 3. | Resistor | 4.7k | 1 |
| 4. | Battery | 3.3V | 1 |
| 5. | Connection Wires | – | 1 |
DHT11 Pinout
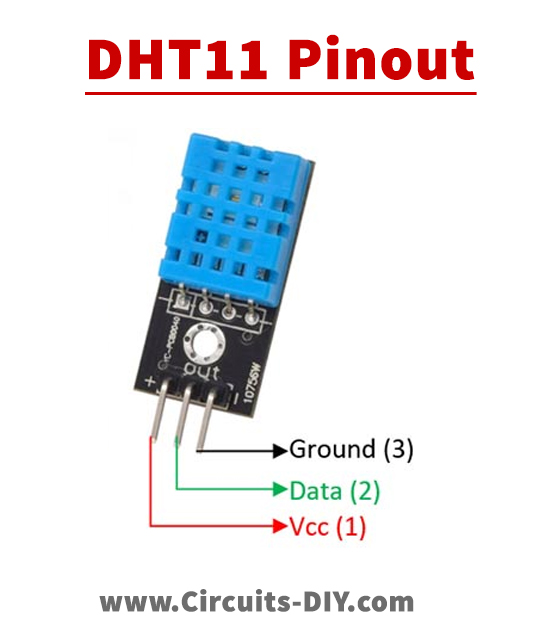
For a detailed description of pinout, dimension features, and specifications download the datasheet of DHT11
Web Server Circuit
ESP8266 Code
#include <ESP8266WiFi.h>
#include "DHT.h"

#define DHTPIN 2        // what digital pin we're connected to
#define DHTTYPE DHT11   // DHT 11
DHT dht(DHTPIN, DHTTYPE);

const char* ssid     = "Circuits DIY"; // Your ssid
const char* password = "03433212601"; // Your Password
WiFiServer server(80);

void setup() {

// Start DHT11
dht.begin();
Serial.begin(115200);
delay(10);
Serial.println();

// Connect to WiFi network
WiFi.mode(WIFI_STA);
Serial.println();
Serial.println();
Serial.print("Connecting to ");
Serial.println(ssid);

WiFi.begin(ssid, password);

while (WiFi.status() != WL_CONNECTED) {
delay(500);
Serial.print(".");
}
Serial.println("");
Serial.println("WiFi connected");

// Start the server
server.begin();
Serial.println("Server started");

// Print the IP address
Serial.println(WiFi.localIP());
}

void loop() {

 float h = dht.readHumidity();
 float t = dht.readTemperature(); // Read temperature as Celsius (the default)
 float f = dht.readTemperature(true); // Read temperature as Fahrenheit (isFahrenheit = true)

 Check if any reads failed and exit early (to try again).
 if (isnan(h) || isnan(t) || isnan(f)) {
 Serial.println("Failed to read from DHT sensor!");
 return;
 }

 Serial.print("Humidity % : ");
 Serial.println(h);
 Serial.print("Temperature *C: ");
 Serial.println(t);
 Serial.print("Temperature *F: ");
 Serial.println(f);

WiFiClient client = server.available();
client.println("HTTP/1.1 200 OK");
client.println("Content-Type: text/html");
client.println("Connection: close");  // the connection will be closed after completion of the response
client.println("Refresh: 5");  // refresh the page automatically every 5 sec
client.println();
client.println("<!DOCTYPE html>");
client.println("<html xmlns='http://www.w3.org/1999/xhtml'>");
client.println("<head>\n<meta charset='UTF-8'>");
client.println("<title>ESP8266 Temperature & Humidity DHT11 Sensor</title>");
client.println("</head>\n<body>");
client.println("<H2>ESP8266 & DHT11 Sensor</H2>");
client.println("<H3>Humidity / Temperature</H3>");
client.println("<pre>");
client.print("Humidity (%)         : ");
client.println((float)h, 2);
client.print("Temperature (°C)  : ");
client.println((float)t, 2);
client.print("Temperature (°F)  : ");
client.println((float)f, 2);
//client.print("Temperature (°K)  : ");
//client.println(Kelvin(temp), 2);
client.println("</pre>");
client.println("<H3>www.Circuits-DIY.com</H3>");
client.print("</body>\n</html>");
delay(2000);
}
Working Explanation
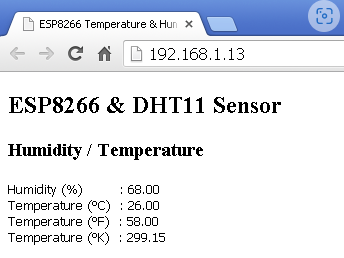
After making connections, compile and upload the code. Note that, Change “SSID” and “password” to the name of your wifi network. Using a serial monitor, check the IP address of the ESP8266 Module. To view temperature and humidity readings, open your browser by IP address.
Code Explanation
- First, we have included the libraries for the ESP8266 module and DHT11 sensor. Now we defined the module pin that is connected to the DHT sensor pin. Then, we have defined the DHT type, since we are using DHT11 so we have written that. After that, we made the object called DHT. Here we put both the defined parameter; DHT DHT(DHTPIN, DHTTYPE); Then define our SSID and password. A char* is a char pointer. WiFiServer(80); This method establishes a server that waits for incoming connections on the given port. The default HTTP port is 80, and the web server is on port 80 here.
- In the void setup, we first provide the functions to initialize the DHT sensor. Then, we give the function WiFi.mode(WIFI_STA); Station (STA) mode connects the ESP module to a Wi-Fi network established by an access point. WiFi.begin establishes the network settings for the WiFi library and gives the status right away. WiFi.status() Return the connection status. WL_CONNECTED assigned when connected to a WiFi network;
- In the void loop, we have defined some float variables, to store float values. Then we give the condition to quit early if any reading failed. When converting the result of employing floating-point numbers into ASCII and getting the letter “float” written as “isnan,” the meaning is: “is not a number.” Then, we printed all the values coming from the sensor using Serial. println. WiFiClient client. creates a client that has the connection to a client-defined internet IP address. client.println
Application and Uses
- The circuit can be utilized in weather stations to get the weather situation of different places.