Introduction
Controlling appliances using an RFID card is a modern and convenient way to automate the process of turning on and off electrical devices. In this tutorial, we will show you how to control a 5V SPDT relay with an MFRC-522 NFC/RFID module and an Arduino UNO microcontroller. The MFRC-522 module is a highly integrated reader/writer for contactless communication at 13.56 MHz. The SPDT relay, which stands for Single Pole Double Throw relay, is an electromagnetic switch that is used to control the flow of electricity to an electrical device.
By using the Arduino UNO microcontroller, we can read the data from the RFID card and use that data to control the state of the relay. With this setup, you can easily turn on and off your appliances by simply presenting an RFID card to the module.
Hardware Components
You will require the following hardware for RFID NFC Relay with Arduino.
| S.no | Component | Value | Qty |
|---|---|---|---|
| 1. | Arduino UNO | – | 1 |
| 2. | USB Cable Type A to B | – | 1 |
| 3. | RFID/NFC Kit (reader + tags) | RC522 | 1 |
| 4. | Relay | – | 1 |
| 5. | Power Adapter for Arduino | 9V | 1 |
| 6. | Jumper Wires | – | 10 |
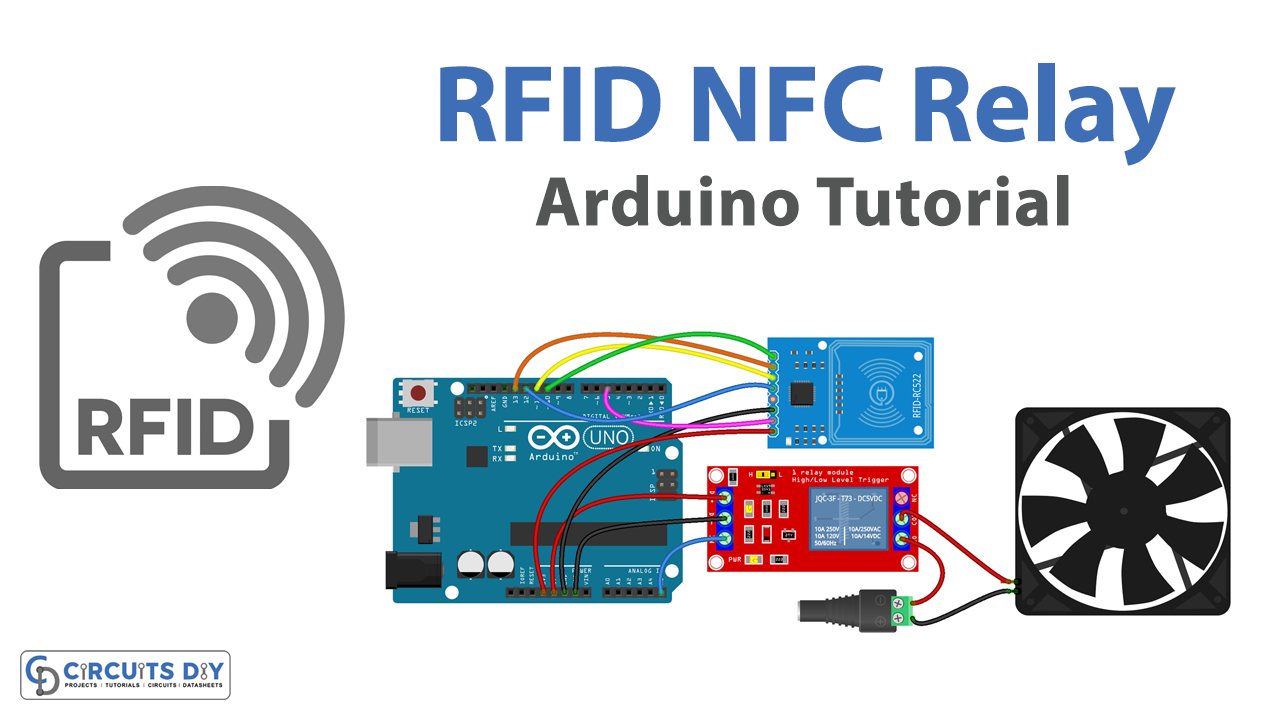
RFID NFC Relay with Arduino
- Connect the MFRC-522 NFC/RFID Module to the Arduino UNO using the appropriate pin connections. The pinout for the MFRC-522 is as follows:
- SDA – Digital pin 10
- SCK – Digital pin 13
- MOSI – Digital pin 11
- MISO – Digital pin 12
- IRQ – Not used
- GND – GND
- RST – Digital pin 9
- 3.3V – 3.3V
- Connect the SPDT relay to digital pin 3 of the Arduino UNO.
- In the Arduino IDE, include the “MFRC522” library to use the MFRC-522 module.
- In the setup function, initialize the MFRC-522 module using the “MFRC522” object’s “PCD_Init” method and set the relay pin as an output.
#include <MFRC522.h>

#define SS_PIN 10
#define RST_PIN 9

MFRC522 mfrc522(SS_PIN, RST_PIN);

const int relayPin = 3;

void setup() {
  Serial.begin(9600);
  SPI.begin();
  mfrc522.PCD_Init();
  pinMode(relayPin, OUTPUT);
}
- In the loop function, use the “MFRC522” object’s “PICC_IsNewCardPresent” and “PICC_ReadCardSerial” methods to read the ID of an RFID card presented to the module.
if (mfrc522.PICC_IsNewCardPresent()) {
    MFRC522::PICC_Type piccType = mfrc522.PICC_ReadCardSerial();
    if (piccType != MFRC522::PICC_TYPE_UNKNOWN) {
- Compare the card ID with a predefined value, if match then toggle the relay and post the status of the relay on the serial monitor using the “Serial.println()” function.
const byte predefinedCard[4] = {0x00, 0x00, 0x00, 0x00};  //Change to the ID of your RFID card

if(mfrc522.uid.uidByte[0] == predefinedCard[0] && mfrc522.uid.uidByte[1] == predefinedCard[1] && mfrc522.uid.uidByte[2] == predefinedCard[2] && mfrc522.uid.uidByte[3] == predefinedCard[3]) {
    digitalWrite(relayPin, !digitalRead(relayPin));
    if (digitalRead(relayPin) == 1) {
      Serial.println("Relay: On");
    } else {
      Serial.println("Relay: Off");
    }
  }
Schematic
Make connections according to the circuit diagram given below.
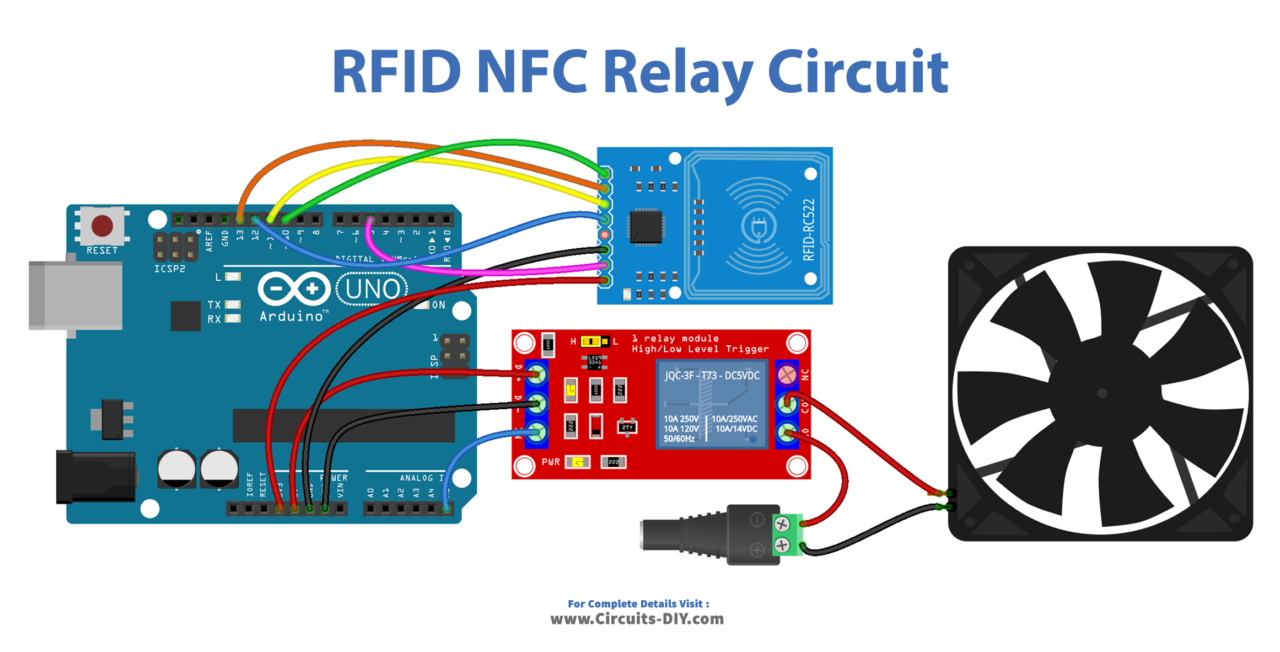
Wiring / Connections
| Arduino | Relay | RFID/NFC |
|---|---|---|
| 5V | VCC | |
| GND | GND | GND |
| A5 | INP | |
| D10 | SS | |
| D13 | SCK | |
| D11 | MOSI | |
| D12 | MISO | |
| D5 | RST | |
| 3V3 | VCC |
Installing Arduino IDE
First, you need to install Arduino IDE Software from its official website Arduino. Here is a simple step-by-step guide on “How to install Arduino IDE“.
Installing Libraries
Before you start uploading a code, download and unzip the following libraries at /Progam Files(x86)/Arduino/Libraries (default), in order to use the sensor with the Arduino board. Here is a simple step-by-step guide on “How to Add Libraries in Arduino IDE“.
Code
Now copy the following code and upload it to Arduino IDE Software.
#include <SPI.h>
#include <MFRC522.h>

#define SS_PIN 10
#define RST_PIN 5
#define RELAY_PIN A5 // the Arduino pin connects to relay

MFRC522 rfid(SS_PIN, RST_PIN);

byte authorizedUID[4] = {0xFF, 0xFF, 0xFF, 0xFF};

void setup() {
  Serial.begin(9600);
  SPI.begin(); // init SPI bus
  rfid.PCD_Init(); // init MFRC522
  pinMode(RELAY_PIN, OUTPUT); // initialize pin as an output.
  digitalWrite(RELAY_PIN, LOW); // deactivate the relay

  Serial.println("Tap RFID/NFC Tag on reader");
}

void loop() {
  if (rfid.PICC_IsNewCardPresent()) { // new tag is available
    if (rfid.PICC_ReadCardSerial()) { // NUID has been readed
      MFRC522::PICC_Type piccType = rfid.PICC_GetType(rfid.uid.sak);

      if (rfid.uid.uidByte[0] == authorizedUID[0] &&
          rfid.uid.uidByte[1] == authorizedUID[1] &&
          rfid.uid.uidByte[2] == authorizedUID[2] &&
          rfid.uid.uidByte[3] == authorizedUID[3] ) {
        Serial.println("Authorized Tag");
        digitalWrite(RELAY_PIN, HIGH); // activate the relay for 2 seconds
        delay(2000);
        digitalWrite(RELAY_PIN, LOW);  // deactivate the relay
      }
      else
      {
        Serial.print("Unauthorized Tag with UID:");
        for (int i = 0; i < rfid.uid.size; i++) {
          Serial.print(rfid.uid.uidByte[i] < 0x10 ? " 0" : " ");
          Serial.print(rfid.uid.uidByte[i], HEX);
        }
        Serial.println();
      }

      rfid.PICC_HaltA(); // halt PICC
      rfid.PCD_StopCrypto1(); // stop encryption on PCD
    }
  }
}
Working Explanation
In the setup function, the code initializes the MFRC-522 module using the MFRC522 object’s PCD_Init method. This method initializes the MFRC522 library and starts communication with the MFRC-522 module. Then, the code also sets the relay pin as an output pin using the pinMode() function. This function sets the specified pin to either an INPUT or OUTPUT mode. In this case, the relay pin is set as an OUTPUT.
The loop() function is another special function provided by the Arduino IDE that runs continuously after the setup function has finished executing. Inside the loop function, the code continuously reads the data from the RFID card using the MFRC522 object’s PICC_ReadCardSerial() method. This method reads the ID of the RFID card and stores it in a variable. Then the code compares the data read from the RFID card with a predefined value. If the data matches the predefined value, the code toggles the state of the relay using the digitalWrite() function. If the data does not match, the relay remains in its current state.
Applications
- Home Automation
- Industrial Automation
- Access Control
- Security Systems
- Remote Control
Conclusion.
We hope you have found this RFID NFC Relay Circuit very useful. If you feel any difficulty in making it feel free to ask anything in the comment section.