Introduction
Electronic gadgets and devices can’t work without batteries and chargers, Cell phones, Laptops, electronic devices, gaming gadgets, and so on need batteries. Or then again batteries are a necessity for these gadgets. Furthermore, batteries must be charged before utilizing those electronic gadgets. Likewise, these gadget batteries always want lighter and smaller Charger circuits so that an individual can carry them easily. So let us make a DIY project of the battery charger. So, in this tutorial, we are going to study “Simple 12 Volt Battery Charger Circuit Diagram”.
The circuit needs easily available components like a transformer and bridge rectifier. Also, to make the circuit more affordable, you have to create the rectifier circuit by yourself as we did for this circuit using diodes.
Hardware Components
The following components are required to make Battery Charger Circuit
| S.no | Component | Value | Qty |
|---|---|---|---|
| 1. | Step-down transformer | 0-14V AC / 3 Amps | 1 |
| 2. | Bridge Rectifier module | BR1010 | 1 |
| 3. | LED | – | 1 |
| 4. | Ceramic Capacitor | 0.01µF | 1 |
| 5. | Electrolyte Capacitor | 100µF/25V | 1 |
| 6. | Resistor | 1KΩ | 1 |
| 7. | 2-Pin Connector | – | 1 |
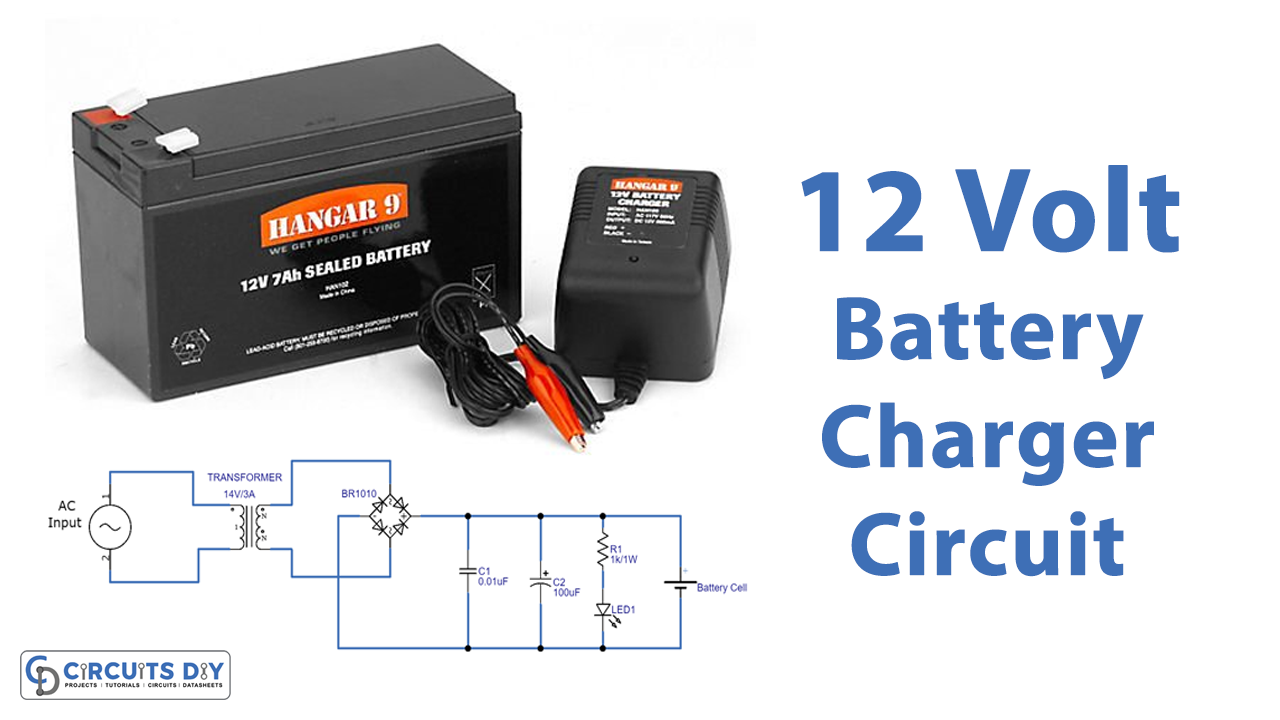
Battery Charger Circuit
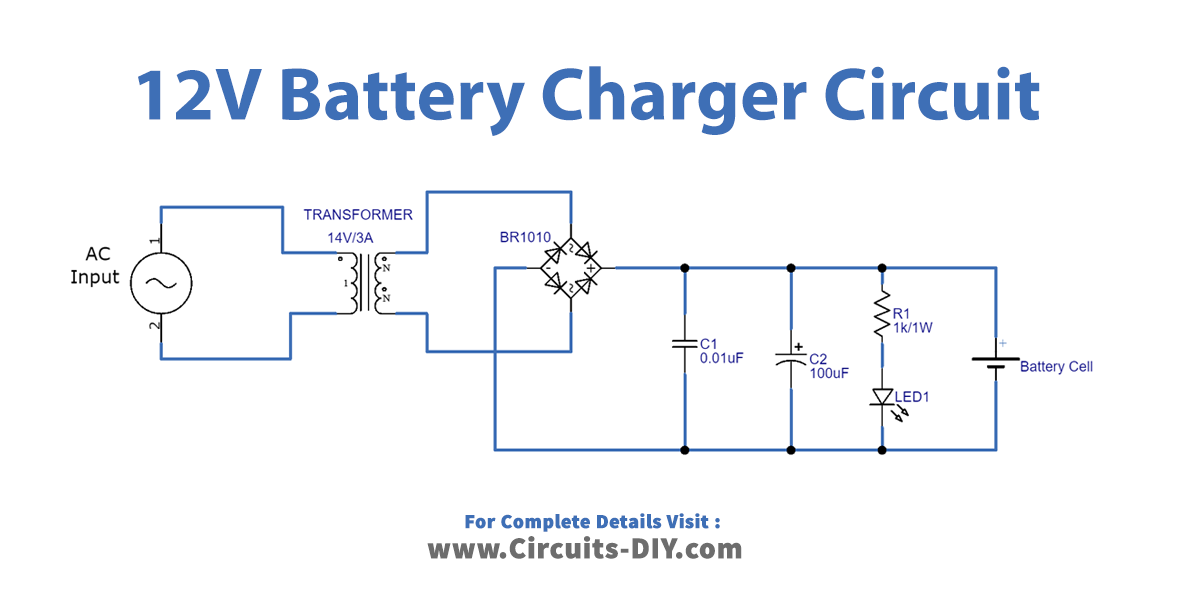
Working Explanation
To make this Simple 12 Volt Battery Charger, first, you need a transformer that steps down the AC voltage to 14V and 3A. After that, we made the bridge rectifier circuit. This bridge rectifier circuit converts Ac into DC voltage. But know that, this DC voltage still has ripples in it. The capacitors wired in this circuit will filter these ripples out. Green LEd is there to indicate the presence of DC voltage. Thus, you may find the DC voltage at the output side to charge the battery.
Application and Uses
- To charge gadgets and devices.
- You might charge your cellphone and other accessories through this.