Overview
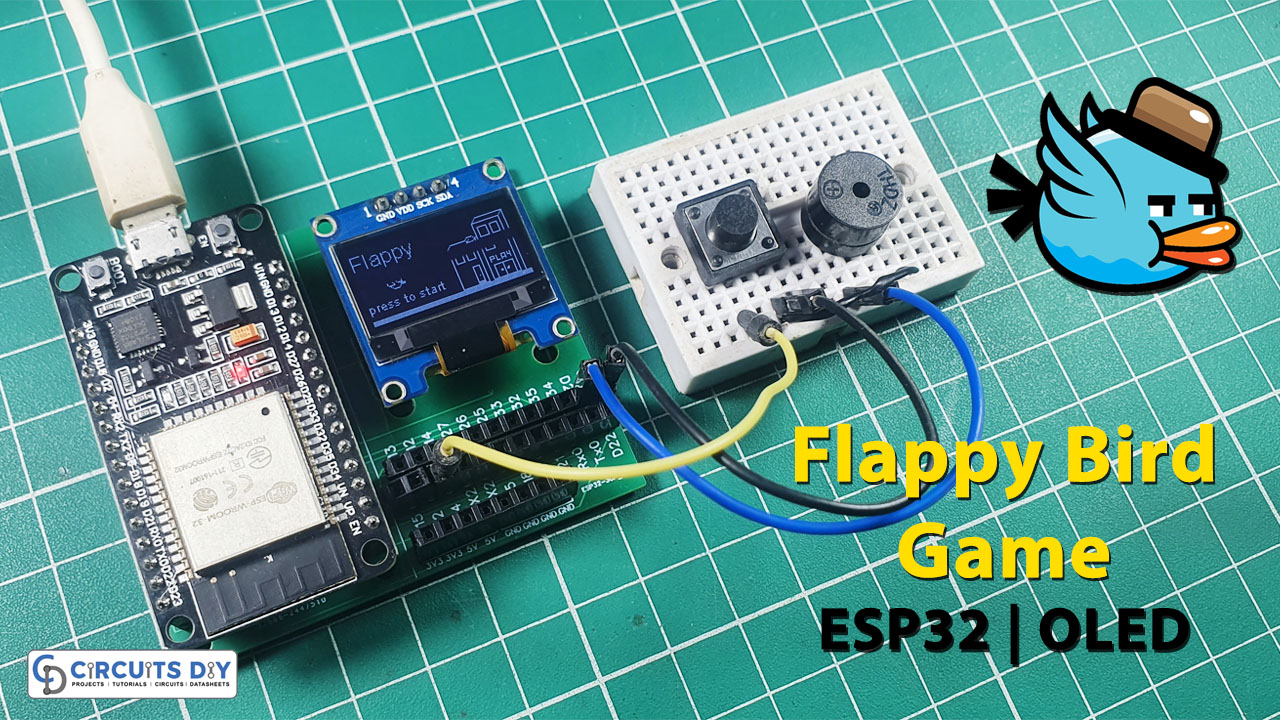
The Flappy Bird game took the world by storm with its addictive gameplay and simplistic design. In this article, we’ll explore how you can recreate this classic game using an OLED SSD1306 display and an ESP32 microcontroller. This DIY project is not only fun but also a great way to learn about programming and electronics.
Flappy Bird Game
Flappy Bird is a side-scrolling mobile game that gained immense popularity upon its release in 2013. In the game, players control a bird avatar by tapping the screen to make it flap its wings and navigate through a series of obstacles, which are green pipes protruding from the top and bottom of the screen

PCBWay commits to meeting the needs of its customers from different industries in terms of quality, delivery, cost-effectiveness, and any other demanding requests. As one of the most experienced PCB manufacturers in China. They pride themselves to be your best business partners as well as good friends in every aspect of your PCB needs.
Hardware Components
You’ll need the following hardware components to get started:
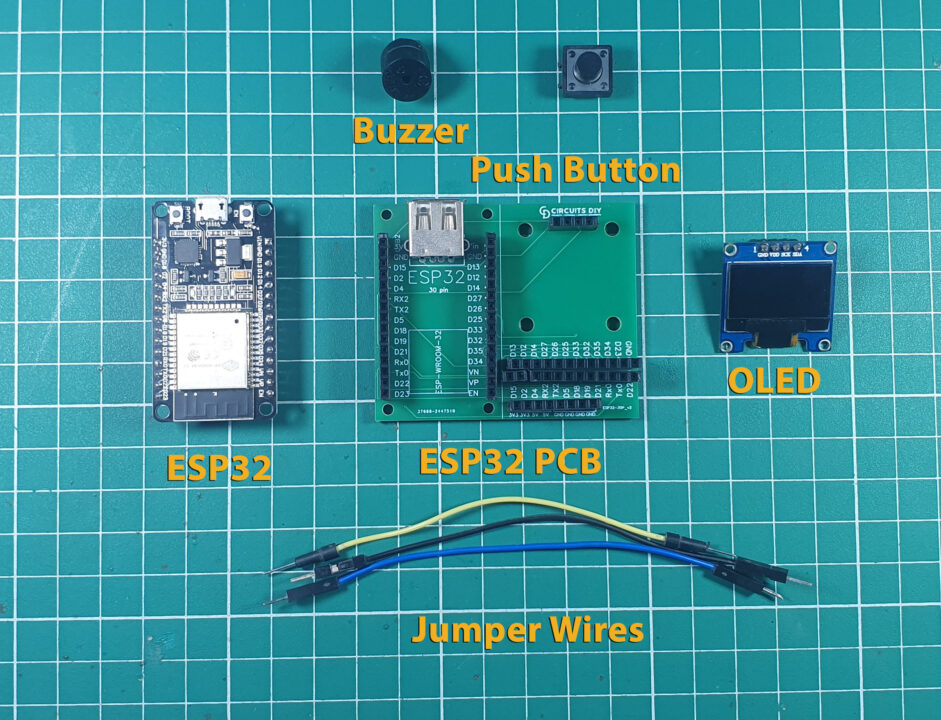
| Components | Value / Model | Qty |
|---|---|---|
| ESP32 | – | 1 |
| OLED | SSD1306 | 1 |
| Buzzer | – | 1 |
| Push Button | – | 1 |
| Jumper Wires | – | 1 |
| DC Power for ESP32 |
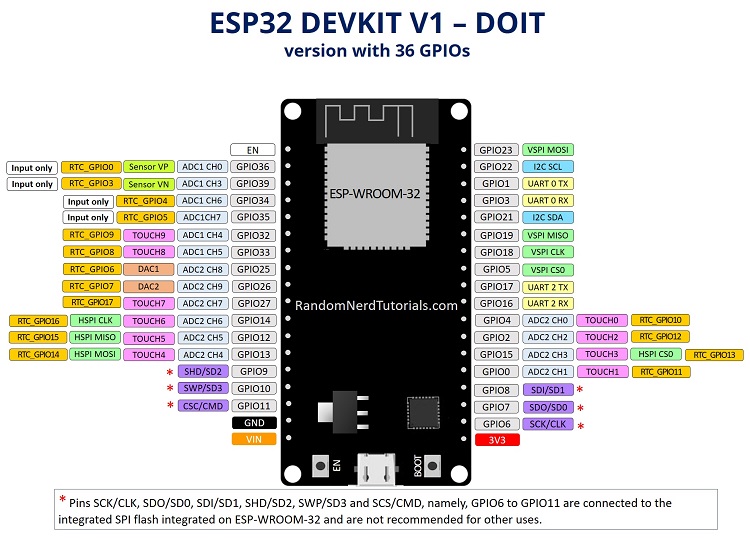
ESP32 Pinout
Steps-by-Step Guide
(1) Setting up Arduino IDE
Download Arduino IDE Software from its official site. Here is a step-by-step guide on “How to install Arduino IDE“.
(2) ESP32 in Arduino IDE
There’s an add-on that allows you to program the ESP32 using the Arduino IDE. Here is a step-by-step guide on “How to Install ESP32 on Arduino IDE“.
(3) Include Libraries
Before you start uploading a code, download and unzip the SSD1306Wire.h library at /Program Files(x86)/Arduino/Libraries (default). Here is a step-by-step guide on “How to Add Libraries in Arduino IDE“.
(4) Schematic
Make connections according to the circuit diagram given below.
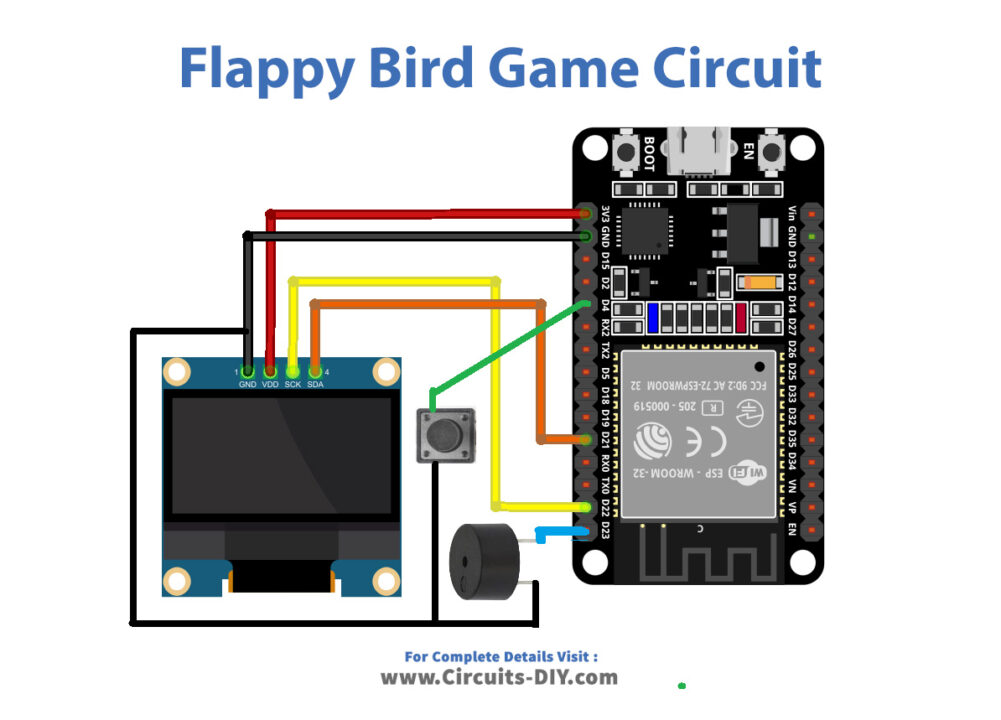
Wiring / Connections
| ESP32 | OLED | Push Button | Buzzer |
|---|---|---|---|
| 3V3 | VCC | ||
| GND | GND | GND | GND |
| GPIO21 | SDA | ||
| GPIO22 | SCK | ||
| GPIO23 | +VE | ||
| GPIO4 | One Leg |
(5) Uploading Code
Now copy the following code and upload it to Arduino IDE Software.
How code works
The code begins with necessary header includes for communication and display management. It then initializes variables and sets up the display in the setup function. The main loop of the program handles the core game logic, including displaying the title screen and prompt to start, managing user input for bird movement, updating obstacle positions and generating new obstacles, detecting collisions, updating the score, and resetting the game when necessary. The display updates function draws game elements like text, shapes, and images on the OLED screen, while the game logic section controls bird movement, obstacle generation, scoring, and collision detection. Finally, the display is refreshed to reflect the changes made in the loop. Overall, this sketch provides a basic yet functional implementation of the Flappy Bird game on the ESP32 platform with an OLED display
Conclusion
In wrapping up our exploration of creating a Flappy Bird game using an OLED SSD1306 display and an ESP32 microcontroller, it’s clear that this project offers both entertainment and educational value. By delving into the code and hardware setup, enthusiasts can gain practical insights into programming, electronics, and game development. The combination of the ESP32’s capabilities, the sharp graphics of the SSD1306 display, and the timeless appeal of Flappy Bird results in a DIY gaming experience that is not only enjoyable but also enriching