Introduction
There is no question that smoke is harmful to humans. Additionally, in this day and age with so many industries, restaurants run the risk of having a fire at any time, anyplace. Therefore, it’s crucial to minimize your exposure to smoke, particularly if you’re more likely to have particle-related side effects. And, for this we humans employ sensors; smoke detector sensors. Hence, this is the primary focus of our article, to build a Smoke Detector using MQ-2 Gas Sensor.
As is well known, several gases often explode to produce smoke. This means that our detector would be able to pick up on flammable gases including LPG, methane, butane, propane, alcohol, and hydrogen. However, depending on the type of gas, the detector’s resistance would vary.
What is Smoke Detector?
A smoke detector is an electronic fire-protection device that detects the presence of smoke as an early warning sign of a fire. It sends a signal to a large building’s fire alarm system or generates a visual and audible signal locally in a room or home.

Hardware Components
You will require the following hardware to make Smoke Detector.
| S.no | Component | Value | Qty |
|---|---|---|---|
| 1. | Arduino | UNO | 1 |
| 2. | Gas Sensor | MQ-2 | 1 |
| 3. | LED | 5 mm Red, Green | 1,1 |
| 4. | Buzzer | – | 1 |
| 5. | Resistor | 221Ω | 3 |
| 6. | Breadboard | – | 1 |
| 7. | Jumper Wires | – | 1 |
Steps Making Smoke Detector
Here, we’re aiming to instruct you on how to construct the simplest possible smoke detector. You simply need an Arduino, an MQ-2 sensor, and a few immediately available basic electronic components. To create a smoke detector using an MQ-2 gas sensor, follow the instructions.
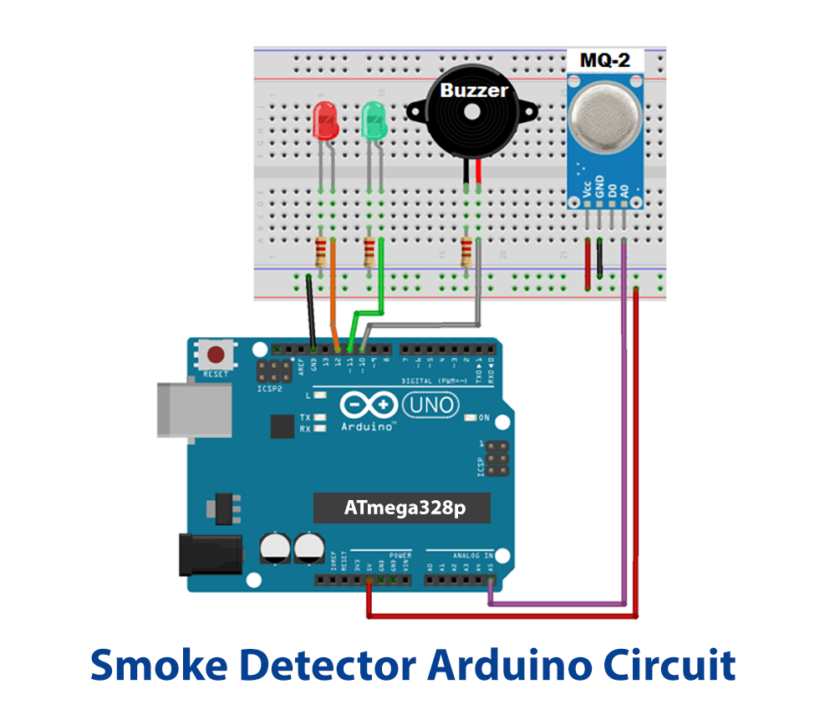
Schematic
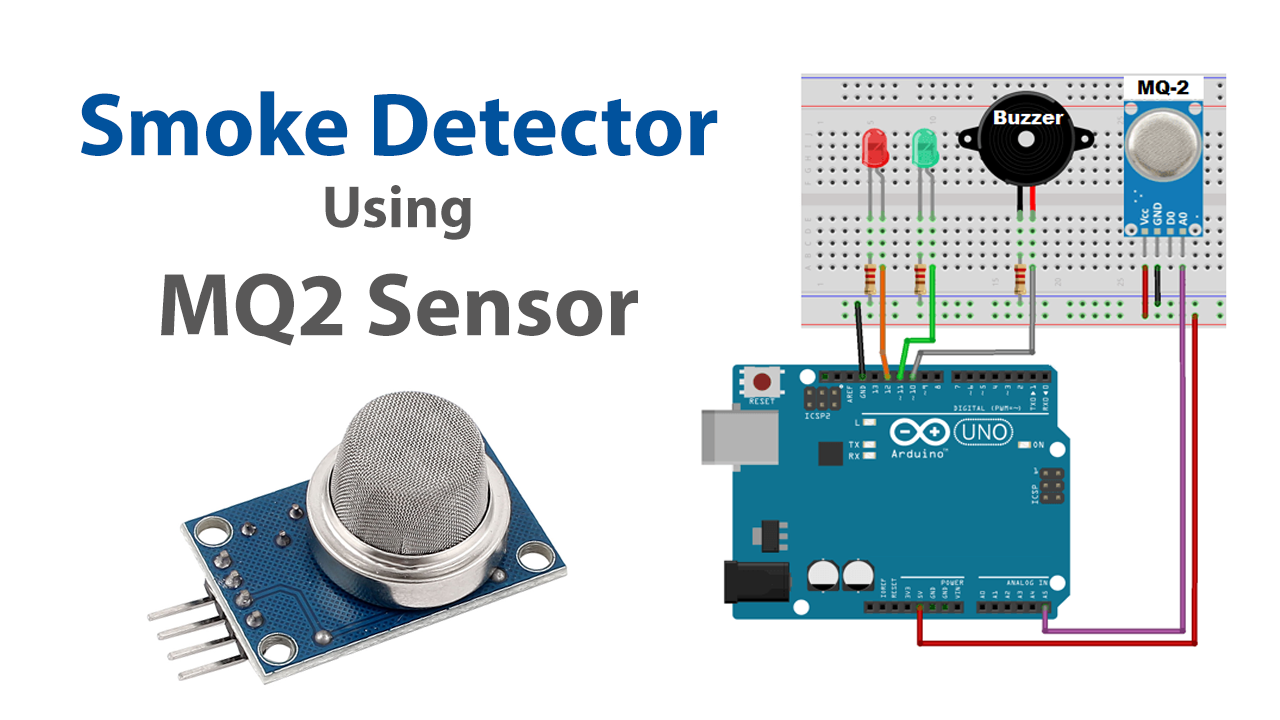
Make connections according to the circuit diagram given below.
Wiring / Connections
| Arduino | MQ-2 Sensor | Buzzer | LED Green | LED Red |
|---|---|---|---|---|
| 5V | VCC | |||
| GND | GND | -ve with R-221 | -ve with R-221 | -ve with R-221 |
| A5 | A0 | |||
| D10 | +ve | |||
| D11 | +ve | |||
| D12 | +ve |
Installing Arduino IDE
First, you need to install Arduino IDE Software from its official website Arduino. Here is a simple step-by-step guide on “How to install Arduino IDE“.
Code
Now copy the following code and upload it to Arduino IDE Software.
int redLed = 12;
int greenLed = 11;
int buzzer = 10;
int smokeA0 = A5;
// Your threshold value
int sensorThres = 400;

void setup() {
  pinMode(redLed, OUTPUT);
  pinMode(greenLed, OUTPUT);
  pinMode(buzzer, OUTPUT);
  pinMode(smokeA0, INPUT);
  Serial.begin(9600);
}
void loop() {
  int analogSensor = analogRead(smokeA0);

  Serial.print("Pin A0: ");
  Serial.println(analogSensor);
  // Checks if it has reached the threshold value
  if (analogSensor > sensorThres)
  {
    digitalWrite(redLed, HIGH);
    digitalWrite(greenLed, LOW);
    tone(buzzer, 1000, 200);
  }
  else
  {
    digitalWrite(redLed, LOW);
    digitalWrite(greenLed, HIGH);
    noTone(buzzer);
  }
  delay(100);
}
Let’s Test It
Now that the code has been uploaded, it’s time to test the device. Let’s turn on Arduino at this point and test the smoke detector circuit. Now bring it close to anything that produces smoke or gas. The LED would then turn on and the buzzer would begin to sound.
Working Explanation
To understand the working let’s dig into the code:
- The names of the Arduino pins that the sensor is linked to have first been specified. Additionally, we have defined the sensor’s threshold value.
- In the void setup, we declared the status of the defined pins. The pins that are connected to the sensor are declared as input because it takes the reading while LEDs and buzzer pins are declared as output.
- In the void loop, we give the analogRead function to read the value coming from the sensor. and then we have given the condition that if the coming value reaches our defined threshold value, the red led would go high, the green would go low, and the buzzer beeps. Otherwise, the red LED would remain low, the green remains high and the buzzer produces no sound.
As a result, the code will check the analog output voltage of the sensor, and when the smoke exceeds a threshold, it will sound a buzzer and switch on a red LED. A green LED will turn on until the output voltage falls below that threshold.
Applications
- Smoke detectors are extremely beneficial in the house, offices, schools, and industries.
Conclusion.
We hope you have found this Smoke Detector Circuit very useful. If you feel any difficulty in making it feel free to ask anything in the comment section.