Introduction
We need relays to control a high-voltage circuit with a low-voltage signal, as in some types of modems or audio amplifiers; or to control a high-current circuit with a low-current signal, as in an automobile’s starter solenoid; or to detect and isolate faults on distribution and transmission lines by opening and closing circuit breakers. So, relays are the primary focus of this article. Because in this tutorial we are going to understand How To Use A Relay With Arduino
Relay can be found in a variety of devices. They allow one circuit to switch to a second circuit that is fully independent of the first. Let’s dive deep to understand more!
What is Relay?
A relay is an electromechanical device that is used to connect or disconnect an electrical connection. It consists of a flexible, movable mechanical portion that may be controlled electrically by an electromagnet. So, by principle, a relay is similar to a mechanical switch, but it is controlled with an electronic signal rather than physically turning it on or off.
Hardware Components
You will require hardware for Interfacing a Relay with Arduino.
| S.no | Component | Value | Qty |
|---|---|---|---|
| 1. | Arduino UNO | – | 1 |
| 2. | Relay Module | – | 1 |
| 3. | Battery | – | 1 |
| 4. | Battery connector | – | 1 |
| 5. | Breadboard | – | 1 |
| 6. | Jumper Wires | – | 1 |
Steps Using a Relay with Arduino
This circuit uses only a few components. All of the features are listed in the hardware section above. Once you have them, proceed as follows:
Schematic
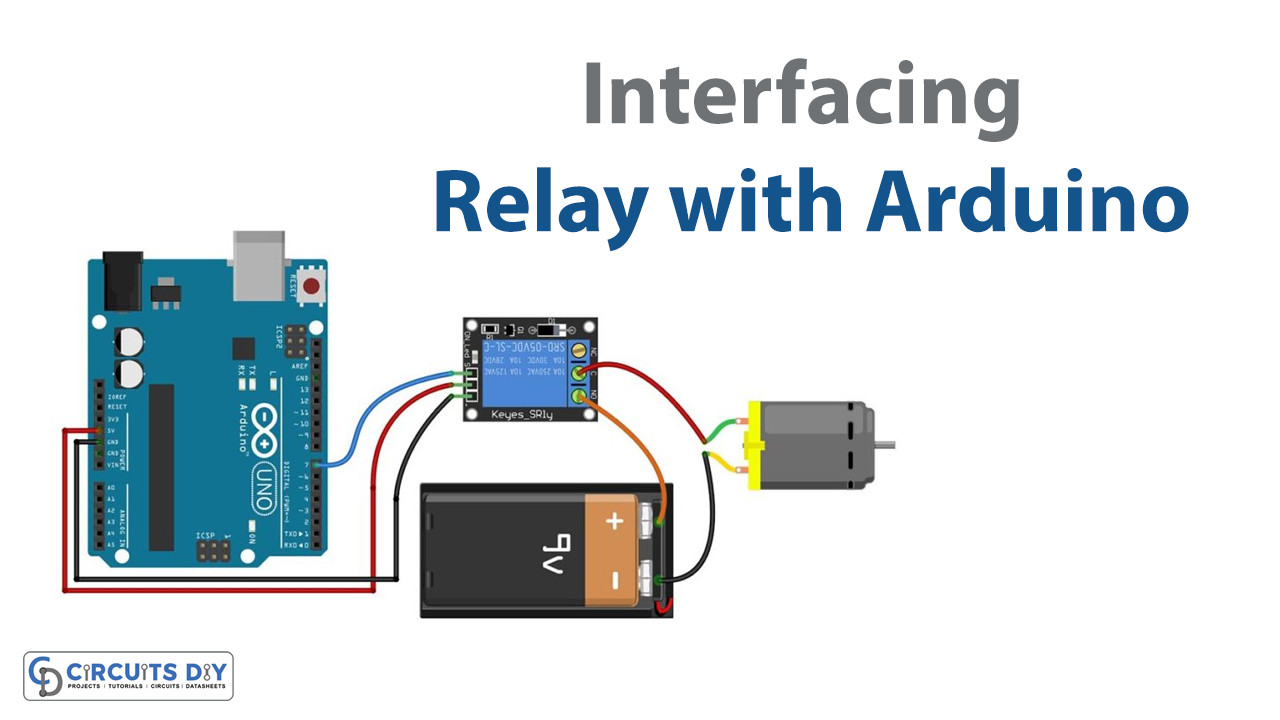
Make connections according to the circuit diagram given below.
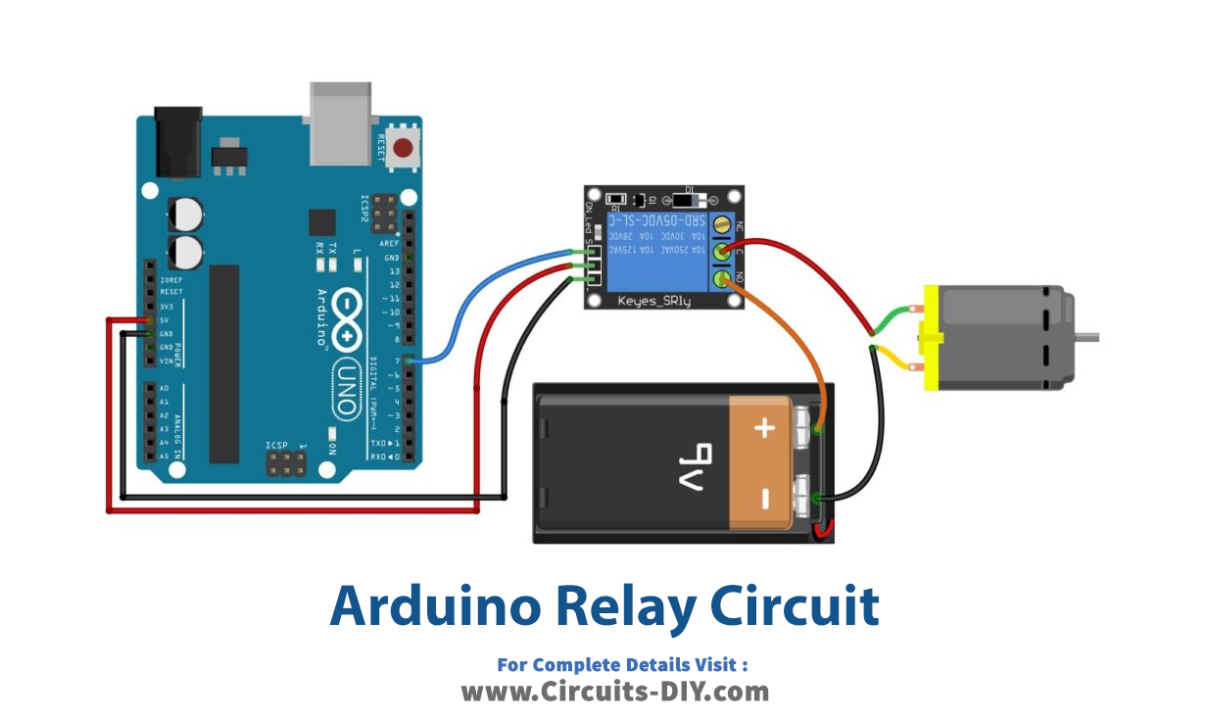
Wiring / Connections
| Arduino | Relay Module |
|---|---|
| 5V | +Ve Pin |
| GND | -Ve Pin |
| D7 | S Pin |
Installing Arduino IDE
First, you need to install Arduino IDE Software from its official website Arduino. Here is a simple step-by-step guide on “How to install Arduino IDE“.
Code
Now copy the following code and upload it to Arduino IDE Software.
#define RELAY_PIN 7

void setup() {
  // initialize digital pin RELAY_PIN as an output.
  pinMode(RELAY_PIN, OUTPUT);
}

// the loop function runs over and over again forever
void loop() {
  digitalWrite(RELAY_PIN, HIGH);   // turn the RELAY on
  delay(1000);                     // wait for a second
  digitalWrite(RELAY_PIN, LOW);    // turn the RELAY off
  delay(1000);                     // wait for a second
}
Let’s Test It
It’s now time to test the circuit. So, after making the connection you need to upload the code in Arduino. Once the code gets uploaded you will observe the turning on and off of the relay
Working Explanation
Understand the code to understand the circuit:
- We first define the Arduino pin that is connected with the relay and we name it RELAY_PIN. It’s digital pin 7 in our case.
- Then in void setup, to run the code at once, we declared the RELAY_PIN as output. For this, we use the function pinMode.
- In the void loop, we make RELAY_PIN high then we give a little delay of 1 sec and then we make RELAY_PIN low and again we give a delay. Since the code in the void loop runs again and again, therefore relay would turn on and off again and again until the power gets off.
Applications
- Home appliances
- Lighting control systems
- Electric motor controllers, tools
- Air-conditioning systems, etc
Conclusion
We hope you have found this How To Use A Relay With Arduino Circuit very useful if you feel any difficulty in making it feel free to ask anything in the comment section.