Introduction
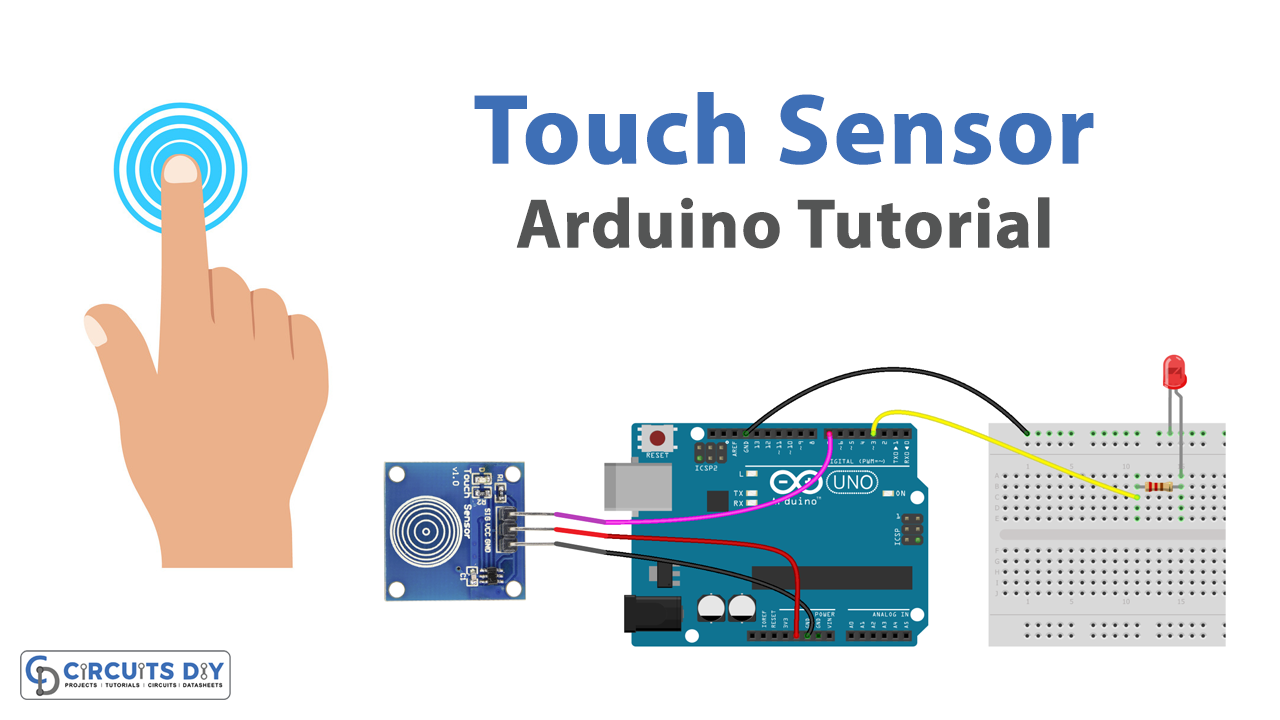
A touch sensor toggle LED using an Arduino UNO is a system that allows a user to control a light fixture such as an LED by interacting with a touch sensor. The touch sensor is connected to an MCU unit such as an Arduino, which reads the value of the sensor and uses it to turn the LED on or off.
The touch sensor that we will be using for this program is a TTP223B touch sensor. A TTP223B touch sensor is a capacitive touch sensor, which means that it detects touch events by measuring the relevant changes in the capacitance of the sensor. When a finger touches the sensor, it changes the capacitance of the sensor, which is detected by the internal circuitry and output as a digital signal.
Hardware Components
You will require the following hardware for Touch Sensor Toggle LED with Arduino.
| S.no | Component | Value | Qty |
|---|---|---|---|
| 1. | Arduino UNO | – | 1 |
| 2. | USB Cable Type A to B | – | 1 |
| 3. | Touch Sensor | TTP223B | 1 |
| 4. | 9V Power Adapter for Arduino | – | 1 |
| 5. | LED | – | 1 |
| 6. | Resistor | 220Ω | 1 |
| 7. | Breadboard | – | 1 |
| 8. | Jumper Wires | – | 1 |
Touch Sensor Toggle LED with Arduino
- Start by connecting the TTP223B Touch Sensor to the Arduino UNO as follows:
- Connect the power pin of the TTP223B (usually labeled as VCC or +) to 3.3V or 5V on the Arduino UNO.
- Connect the ground pin of the TTP223B (usually labeled as GND or -) to GND on the Arduino UNO.
- Connect the output pin of the TTP223B (usually labeled as OUT or S) to a digital pin (e.g. D2) on the Arduino UNO.
- Open the Arduino IDE and create a new sketch by clicking on File > New.
- Define the constants and variables needed in the sketch. For example:
const int LED_PIN = 13; // The pin that the LED is connected to
const int TOUCH_PIN = 2; // The pin that the touch sensor is connected to
int ledState = LOW; // The state of the LED (LOW or HIGH)
int touchState = LOW; // The state of the touch sensor (LOW or HIGH)
- In the setup() function, set the LED pin as an output and the touch pin as an input. For example:
void setup() {
  pinMode(LED_PIN, OUTPUT);
  pinMode(TOUCH_PIN, INPUT);
}
- In the loop() function, read the state of the touch sensor and toggle the state of the LED based on the touch sensor state. For example:
void loop() {
  touchState = digitalRead(TOUCH_PIN); // Read the state of the touch sensor

  if (touchState == HIGH) { // If the touch sensor is touched
    ledState = !ledState; // Toggle the state of the LED
  }

  digitalWrite(LED_PIN, ledState); // Set the state of the LED
  delay(10); // Delay for a small amount of time to debounce the touch sensor
}
- Upload the sketch to the Arduino UNO by clicking on the “Upload” button in the Arduino IDE.
- Test the touch sensor toggle LED by touching the touch sensor. The LED should turn on and off every time you touch the sensor.
Schematic
Make connections according to the circuit diagram given below.

Wiring / Connections
| Arduino | Touch Sensor |
|---|---|
| 5V | VCC |
| GND | GND |
| D7 | SIG |
Installing Arduino IDE
First, you need to install Arduino IDE Software from its official website Arduino. Here is a simple step-by-step guide on “How to install Arduino IDE“.
Code
Now copy the following code and upload it to Arduino IDE Software.
const int TOUCH_SENSOR_PIN  = 7; // Arduino pin connected to touch sensor's pin
const int LED_PIN           = 3; // Arduino pin connected to LED's pin

// variables will change:
int ledState = LOW;    // the current state of LED
int lastTouchState;    // the previous state of touch sensor
int currentTouchState; // the current state of touch sensor

void setup() {
  Serial.begin(9600);               // initialize serial
  pinMode(TOUCH_SENSOR_PIN, INPUT); // set arduino pin to input mode
  pinMode(LED_PIN, OUTPUT);         // set arduino pin to output mode

  currentTouchState = digitalRead(TOUCH_SENSOR_PIN);
}

void loop() {
  lastTouchState    = currentTouchState;             // save the last state
  currentTouchState = digitalRead(TOUCH_SENSOR_PIN); // read new state

  if(lastTouchState == LOW && currentTouchState == HIGH) {
    Serial.println("The sensor is touched");

    // toggle state of LED
    ledState = !ledState;

    // control LED arccoding to the toggled state
    digitalWrite(LED_PIN, ledState);
  }
}
Working Explanation
The coding workflow of a TTP223B Touch Sensor toggle LED is as follows, the void setup() function is used to set the input pin for the touch sensor and the output pin for the LED. It may also be used to set the initial state of the LED (off or on).
The void loop() function continually checks the state of the touch sensor. If the touch sensor is being pressed, the LED is turned on. If the touch sensor is not being pressed, the LED is turned off. This creates a toggle effect, where the LED can be turned on and off by pressing the touch sensor.
Applications
- UI/UX design in consumer electronics
- Security
- Home automation
- Toys
- Education
Conclusion.
We hope you have found this Touch Sensor Tutorial very useful. If you feel any difficulty in making it feel free to ask anything in the comment section.