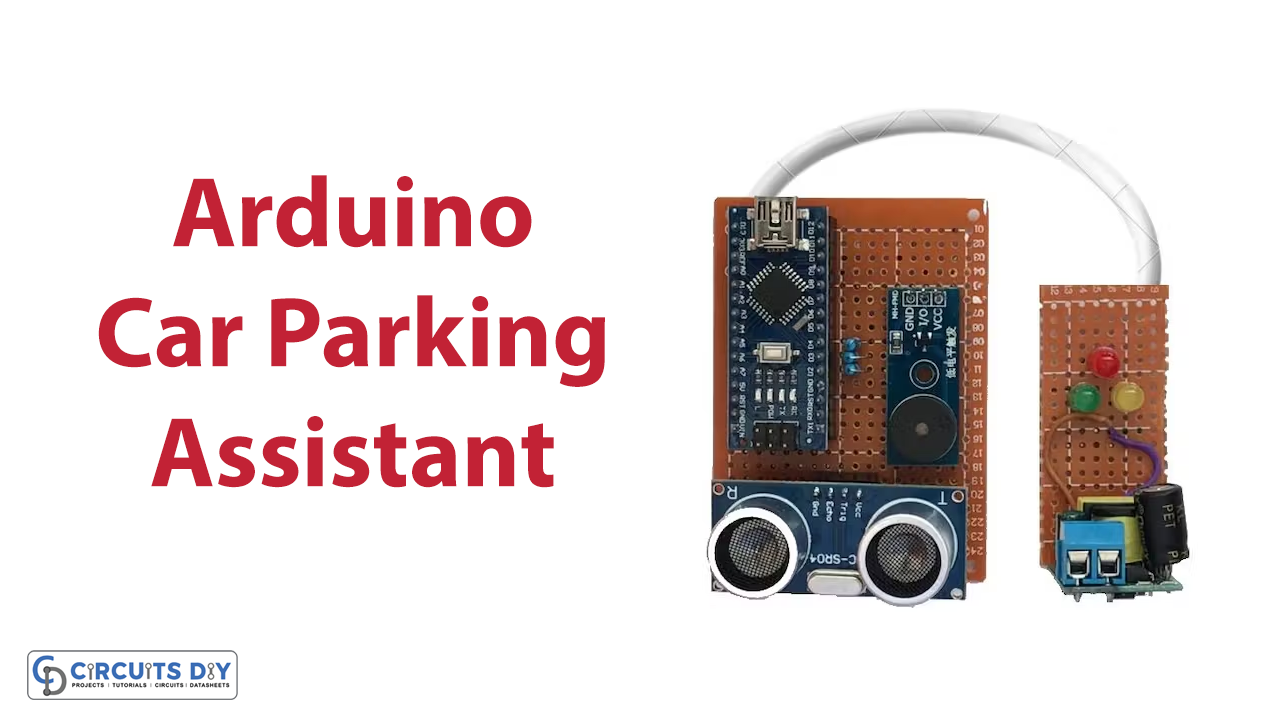
Introduction
A technology-based approach to managing car parking is necessary due to the rapidly changing nature of urban areas and the enormous rise in the number of cars in developing cities. However, it is sometimes difficult for drivers to park their cars. With the help of an ultrasonic sensor and the distance you choose, you can create your Arduino Car Parking Assistant at home using this guide.
Parking may be challenging for the majority of drivers, particularly inexperienced drivers. An automobile bumping might occur as a result of the driver’s poor vision in the vehicle’s rear. When a car is backed up, this parking assistant device alerts the driver if it detects an obstruction nearby.
What is Car Parking Assistant?
The phrase “park assist,” refers to an automatic parking assistance system that makes use of technology and sensors. Utilizing guiding system technology aids drivers in parking with higher accuracy. While parked in a parking lot or along the curb, it enables the automobile to perform the majority of the job by itself.
Hardware Components
You will require the following hardware for making Arduino Car Parking Assistant.
| S.no | Component | Value | Qty |
|---|---|---|---|
| 1. | Arduino UNO | – | 1 |
| 2. | Ultrasonic Sensor | HC-SR04 | 1 |
| 3. | Buzzer Module | – | 1 |
| 4. | LED | – | 1 |
| 5. | Resistor | 220Ω | 3 |
| 6. | Breadboard | – | 1 |
| 7. | Jumper Wires | – | 1 |
Steps for Making a Car Parking Assistant
In the table above, a list of necessary components is provided to make this DIY Project. Once you have them all, proceed as follows.
Schematic
Make connections according to the circuit diagram given below.
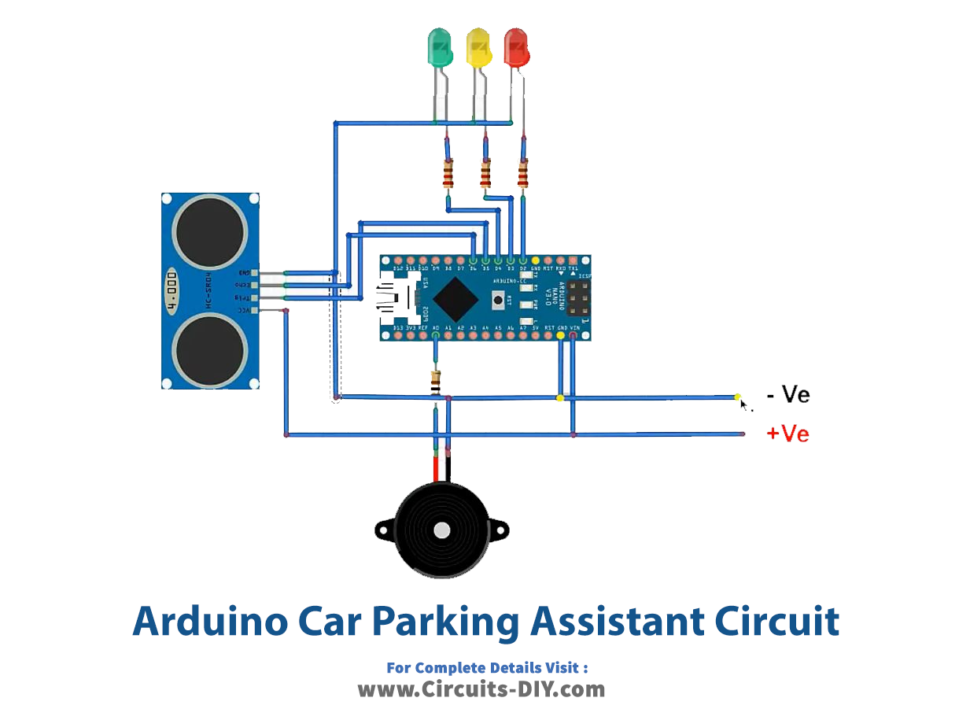
Wiring / Connections
| Arduino | Ultrasonic Sensor | Buzzer |
|---|---|---|
| 5V | VCC | |
| GND | GND | -ve |
| A4 | Echo | |
| A5 | Trig | |
| A0 | +ve |
Installing Arduino IDE
First, you need to install Arduino IDE Software from its official website Arduino. Here is a simple step-by-step guide on “How to install Arduino IDE“.
Code
Now copy the following code and upload it to Arduino IDE Software.
int trigPin       = PD5;  // Sensor Trip pin connected to Arduino pin D5
int echoPin       = PD6;  // Sensor Echo pin connected to Arduino pin D6
int redLED        = PD2;  // Red LED connected to pin D2
int yellowLED     = PD3;  // Yellow LED connected to pin D3
int greenLED      = PD4;  // Green LED connected to pin D4
int buzzer        = A0;   // Buzzer connected to Analogue pin A0
long TempDistance = 0;    // A variable to store the temporary distance
int counter       = 0;    // Counter value to check if the object has stopped moving

void setup() {

  Serial.begin(9600);
  pinMode(trigPin, OUTPUT);
  pinMode(echoPin, INPUT);

  pinMode(redLED, OUTPUT);
  pinMode(greenLED, OUTPUT);
  pinMode(yellowLED, OUTPUT);

  pinMode(buzzer, OUTPUT);

}

void loop() {

  long duration, Distance;
  digitalWrite(trigPin, LOW);
  delayMicroseconds(2);
  digitalWrite(trigPin, HIGH);
  delayMicroseconds(10);
  digitalWrite(trigPin, LOW);
  duration = pulseIn(echoPin, HIGH);
  Distance = (duration/2) / 74;     // Distance in Inches

  if(counter < 20){                             // Do the rest if the car is still moving
    if (Distance > 200) {                       // Nothing in the garrage
        turnThemAllOff();
    }
    if ((Distance > 55) && (Distance <= 200)) { // Turn on Green LED
        digitalWrite(greenLED, HIGH);
        digitalWrite(yellowLED, LOW);
        digitalWrite(redLED, LOW);
        noTone(buzzer);
    }
    if ((Distance > 15) && (Distance <= 55)) {  // Turn on Yellow LED
        digitalWrite(yellowLED, HIGH);
        digitalWrite(redLED, LOW);
        digitalWrite(greenLED,LOW);
        noTone(buzzer);
    }
    if (Distance <= 15) {                       // Turn on Red LED
        digitalWrite(redLED, HIGH);
        digitalWrite(greenLED,LOW);
        digitalWrite(yellowLED, LOW);
        noTone(buzzer);
    }
    if (Distance < 8) {                         // Item is way to close - start the buzzer
        tone(buzzer, 500);
    }
  }

  if ((Distance == TempDistance) || ((Distance+1) == TempDistance) || ((Distance-1) == TempDistance)){
     if(counter >= 20){   // Turn off the lights if the object hasn't moved for 20 cycles (no change in distance)
        Serial.println("No movement detected, turning off the lights");
        turnThemAllOff();
     } else {
        counter++;
     }
  } else {
     counter = 0;         // Reset counter if there is a movement
  }
  TempDistance = Distance;

  Serial.print(Distance);
  Serial.println(" inches");

  Serial.print("Counter : ");
  Serial.println(counter);
  delay(500);
}

// Function to turn the LEDs off
void turnThemAllOff(){
  digitalWrite(redLED, LOW);
  digitalWrite(greenLED,LOW);
  digitalWrite(yellowLED, LOW);
  noTone(buzzer);
}
Let’s Test It
It’s now time to test the sensor. So, power up the Arduino. Now When you approach the sensor too closely, the light turns from green to yellow to red, and eventually, the buzzer activates.
Working Explanation
Let’s dig into the code to understand the working:
- Before writing code, we define constants and global variables that are going to utilize.
- The setup part of the code then declares the pin modes. Then add a function that turns off the buzzer and the LEDs.
- Now, by reading the data obtained from the Ultrasonic Sensor, determine the “Distance” in inches.
- The LEDs will then be turned on and off dependent on how far away the object is by examining the value of the “Distance” parameter. It Turns off the buzzer and the LEDs if the distance is more than 200 as the object is out of reach. Otherwise, it turns on the green LED if the value is between 55 and 200; turns on the yellow LED if the object is between 15 and 55 inches away, and turns on the red LED until the object is 8 inches away if it is closer than 15 inches. The buzzer and red LED are turned on when the distance is less than 8.
- The next section of the code determines the counter’s value based on the movement of the automobile, which then determines when to turn off the LEDs. If the values are the same means the object hasn’t moved, and the counter is incremented. Otherwise, it compares the value of “Distance” with the “TempDistance”. During this procedure, if the object moves at any point, the counter is reset to 0. Next, “TempDistance” is set to “Distance” as its value. We must additionally determine whether the counter value has exceeded 20 just before comparing the distances
- The last step is to simply add a little delay to our code to temporarily pause the code before it takes another reading.
Applications
- Vehicles and Automobiles
Conclusion
We hope you have found this DIY Project very useful. If you feel any difficulty in making it feel free to ask anything in the comment section.
Related posts:
 Interfacing DS3231 Precision RTC Module with Arduino
 BH1750 Sensor Arduino Interfacing
 How to Interface Nokia 5110 LCD with Arduino UNO
 Measuring Water Flow Rate and Volume using Arduino
 Interfacing BYGH403 1.65A Stepper Motor with Arduino
 Interfacing Inductive Proximity Sensor LJ12A3-4-Z/BX with Arduino