Have you ever wondered, when your phone exposes to sunshine or high lighting? It automatically adjusts the brightness, according to the lighting conditions. This is because of the ambient light sensor BH1750. Nowadays most display devices, whether it’s a TV or mobile phone. Both have an ambient light sensor inside, to adjust the brightness automatically. It can be easily used for backlight adjustments of mobile phone keypads and LCDs. BH1750 is a digital sensor IC for the I2C bus interface.
This IC is the most suitable to obtain ambient light data, with a wide range and high resolution. This sensor has spectral responsibility, approximately human eye response, and 50Hz / 60Hz light noise reject function. It gives adjustable measurement results, for the influence of optical windows. And by using this sensor, we can detect min. 0.11 lx, max. 100000 lx. And directly gives digital output.
In this article, the BH1750 sensor, Arduino Interfacing, and coding structure are given with examples.
Hardware Required
| S.no | Component | Value | Qty |
|---|---|---|---|
| 1. | Arduino UNO | – | 1 |
| 2. | USB Cable Type A to B | – | 1 |
| 3. | Jumper Wires | – | – |
| 4. | Ambient Light Sensor | BH1750FVI | 1 |
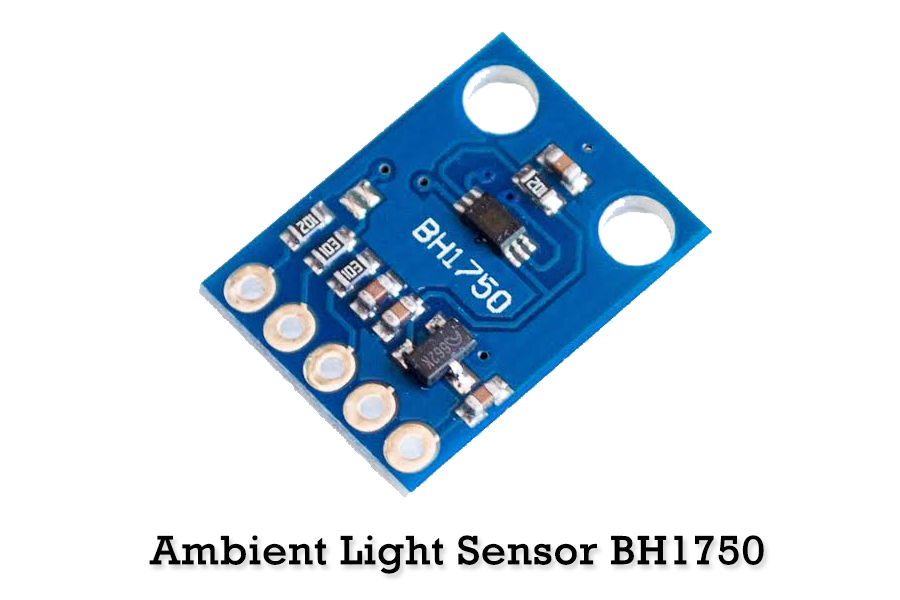
Ambient Light Sensor BH1750FVI
The sensor BH1750 uses an I2C interface, due to which you can easily interface it with microcontrollers. The sensor comes in a WSOF6I package, and utilizing a breakout board or module of BH1750 is recommended. It provides an accurate value and high resolution. We can set its resolution up to 0.5 lx, 1 lx, and 4 lx. This light sensor operates in two modes of operation namely, continuous mode and one-time measurement mode. In continuous mode, as its name suggests, the sensor keeps measuring ambient light value endlessly. On the other hand, in one-time measurement mode, it takes light intensity measurement and shifts into power-down mode.
Furthermore, each mode has three different settings for precisions:
One time Measurement
- 1. Low-Resolution Mode – (4 lx precision, 16ms measurement time)
- 2. High-Resolution Mode – (1 lx precision, 120ms measurement time)
- 3. High-Resolution Mode – (0.5 lx precision, 120ms measurement time)
The sensor takes one sample of measurement data and goes into power-down mode.
Continuous Measurement
- 4. Low-Resolution Mode – (4 lx precision, 16ms measurement time)
- 5. High-Resolution Mode – (1 lx precision, 120ms measurement time)
- 6. High-Resolution Mode – (0.5 lx precision, 120ms measurement time)
BH1750 Sensor Arduino Wiring

Arduino BH1750 Code
BH1750 library for Arduino: https://github.com/claws/BH1750
#include <Wire.h>
#include <BH1750.h>

BH1750 lightMeter;

void setup(){

  Serial.begin(9600);

  // Initialize the I2C bus (BH1750 library doesn't do this automatically)
  // On esp8266 devices you can select SCL and SDA pins using Wire.begin(D4, D3);
  Wire.begin();

  lightMeter.begin();
  Serial.println(F("BH1750 Test"));

}

void loop() {

  uint16_t lux = lightMeter.readLightLevel();
  Serial.print("Light: ");
  Serial.print(lux);
  Serial.println(" lx");
  delay(1000);

}
Serial Monitor output
- Light: 71 lx
- Light: 72 lx
- Light: 57 lx
- Light: 318 lx
- Light: 330 lx
- Light: 336 lx
- Light: 338 lx
Code Explanation
Firstly, we’ve to include header files for BH1750 and I2C protocol.
Inside the setup() function, we initialized the sensor and printed the opening message on the serial monitor. We will open the serial communication at a baud rate of 9600.
In the loop() block, we are printing the real-time lux values. This will be displayed on the serial monitor, after every 1 second.
Once the code is uploaded to Arduino, open the serial monitor and set the baud rate to 9600. It will show the results.
Application
Ambient light sensors are used in lighting and image-related applications:
- Pulse sensors
- Digital cameras, game machines, and LCD display
- Cell phones and smartphones adjust the brightness and backlight of the keyboard.