Introduction
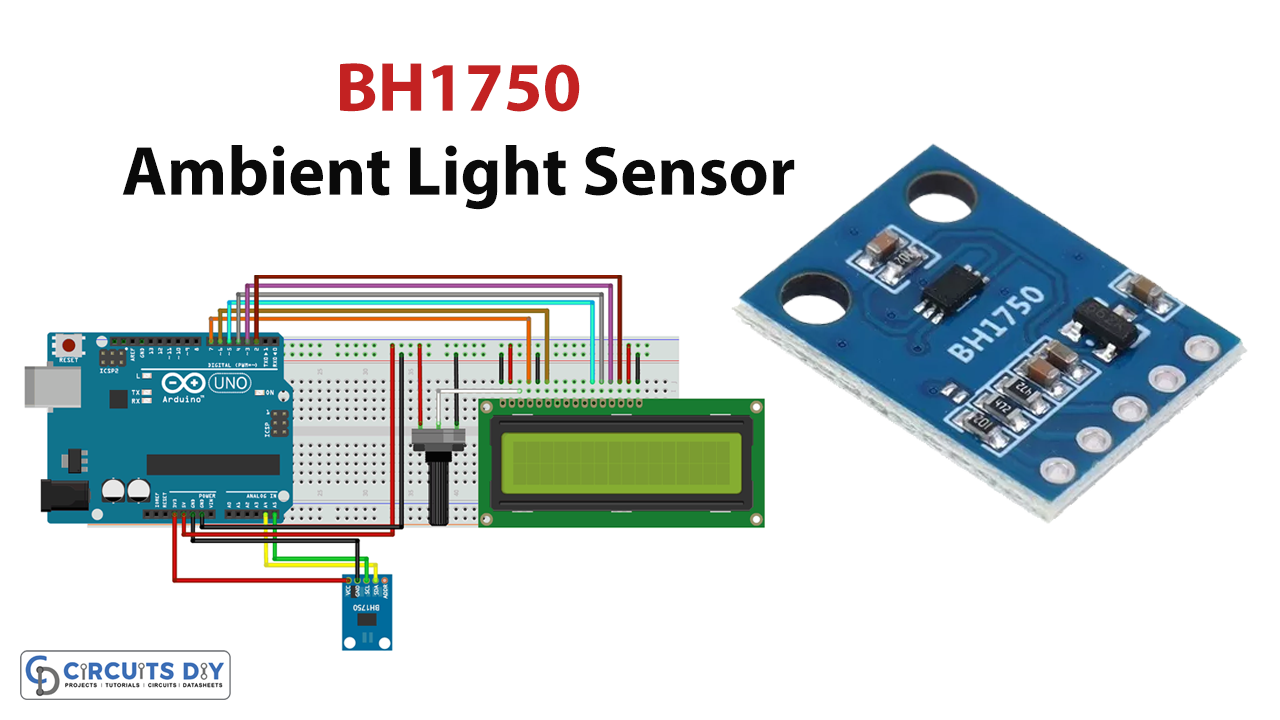
If you’ve ever been curious about how the screen light on your smartphone works, here’s your chance to find out. The reason is the presence of an ambient light detector. Smartphones have a built-in light sensor that adjusts the screen and keypad brightness to match the surrounding lighting conditions. Vehicles also benefit from them since they automatically activate the headlights when it becomes dark. How do these ambient light sensors work? Let’s find out in this article! In this tutorial, we will interface “BH1750 Ambient Light Sensor with Arduino.”
The BH1750 sensor is being used in this circuit, but why? Because it provides a more precise reading of light intensity than light-dependent resistors. As a result, this sensor can be used in situations calling for extreme precision.
Hardware Required
| S.no | Components | Value | Qty |
|---|---|---|---|
| 1 | Arduino | UNO | 1 |
| 2 | USB Cable | Type A to B | 1 |
| 3 | Ambient Light Sensor | BH1750 | 1 |
| 4 | LCD | 16X2 | 1 |
| 5 | Potentiometer | – | 1 |
| 6 | Jumper Wires | – | – |
Steps Interfacing Ambient Light Sensor
A couple of the components mentioned in the hardware section are all needed to build the circuits. When you have all the materials, proceed as follows:
Circuit Diagram

Connection Table
| Arduino Uno | VL53L0X Module |
|---|---|
| 3.3 or 5V | Vin |
| GND | GND |
| A4 | SDA |
| A5 | SCL |
Arduino Code
#include <Wire.h> // adds I2C library
#include <BH1750.h> // adds BH1750 library file
#include<LiquidCrystal.h> // include LCD library function
// Define which pins of Arduino used with 16X2 LCD
LiquidCrystal lcd (7,6,5,4,3,2); //RS, E, D4, D5, D6, D7
// Create an object "lightMeter" from sensor library structure
// Because we can interface multiple sensor
// by giving them different names.
BH1750 lightMeter;

// Initialization of library functions and codes
void setup()
{

  Serial.begin(9600); // set serial buad rate of 9600
  Wire.begin(); // Enable I2C pins of Arduino
  lcd.begin(16,2); // Defines LCD size to 16x2
  lcd.print("Intensity in LUX"); //Print "Intensity in LUX" message on first line LCD
  delay(2000);  // add delay
  // accessing library function through dot operator and object name
  // .begin function start with object name initialize sensor library
  lightMeter.begin();
  delay(2000);

}

void loop()
{

  // readLightLevel() function use to reads light intensity value
  // this line reads light value and store it in float variable "lux")
  float lux = lightMeter.readLightLevel();
  // set the LCD curson to second line and 6th position
  lcd.setCursor(6,1);
  // print lux value on LCD (2nd row and 6th position)
  lcd.print(lux);
  delay(1000);

}
Let’s Test!
The circuit must now be put to the test. The above code may be uploaded to an Arduino board once the necessary libraries have been installed. The circuit will show a numerical value for the brightness of the light on the LCD.
Working Explanation
To understand the working of the circuit, you need to understand the coding. So, let’s explore the code:
- Firstly, we include the required libraries. We then define the Arduino pins that are connected to the LCD. Then we create the LCD object and name it LCD. Then we make a sensor object and name it a lightMeter.
- In the void setup, we initialize the LCD, print the message on LCD, give a little delay, then initialize the sensor to take readings.
- In the void loop, we give the function readLightLevel() to read the light intensity. Then we store the reading in the float variable called lux. We then set the cursor and print that lux value on the LCD. We then give a little delay to get the next readings.
The light is detected by a photodiode inside the sensor, generating an electric current whose strength is proportionate to the light’s intensity.
Application and Uses
- Digital cameras
- Game machine
- LCDs
- Cell phones
- Automatic headlights of vehicles
- Streetlights, etc