Introduction
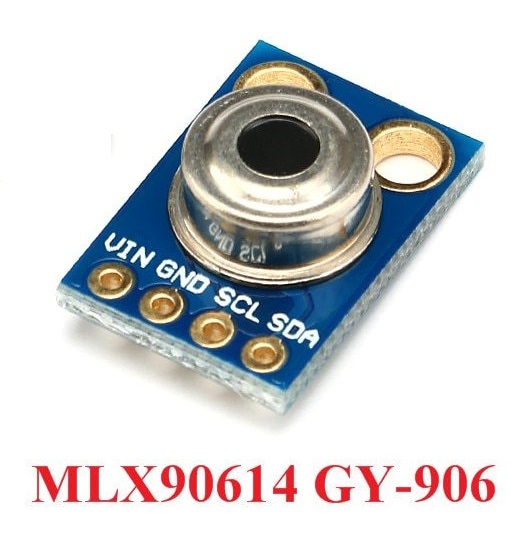
Corona gave us a wealth of knowledge. It had become quite difficult to distinguish between people who are infected by the virus and those who are not, as we had witnessed during that pandemic. Non-contact devices to detect body temperature were frequently utilized to address this problem. Contactless Temperature Sensor MLX90614 is one of those sensors that can be used in those devices. Due to the non-contact IR temperature sensors used in these devices, the body temperature can be measured without any physical touch. Now that the corona has gone, we can still measure viral fevers through them.
When other types of thermometers are impractical or the object is delicate and unsafe to approach, these non-contact temperature measuring tools work effectively.
What is Contactless Temperature Sensor?
These are the devices that take the temperature of an object or person without making contact with them. The infrared radiation released by an object is focused onto one or more photodetectors by these sensors to function. This energy is transformed into an electrical signal by these photodetectors that are proportionate to the infrared energy the item is emitting.
Hardware Components
You will require the following hardware for making Contactless Temperature Sensor.
| S.no | Component | Value | Qty |
|---|---|---|---|
| 1. | Arduino | UNO | 1 |
| 2. | Sensor | MLX90614 | 1 |
| 3. | OLED LCD | 128×32 | 1 |
| 4. | LCD – White on Blue | 16×2 | 1 |
| 5. | Breadboard | – | 1 |
| 6. | Jumper Wires | – | 1 |
Steps for Making Contactless Temperature Sensor
To make, Contactless Temperature Sensor Using Arduino, you need the above-defined temperature sensor and Arduino as the main components. You also need some wires to connect the. Once you get them all; follow the following steps:
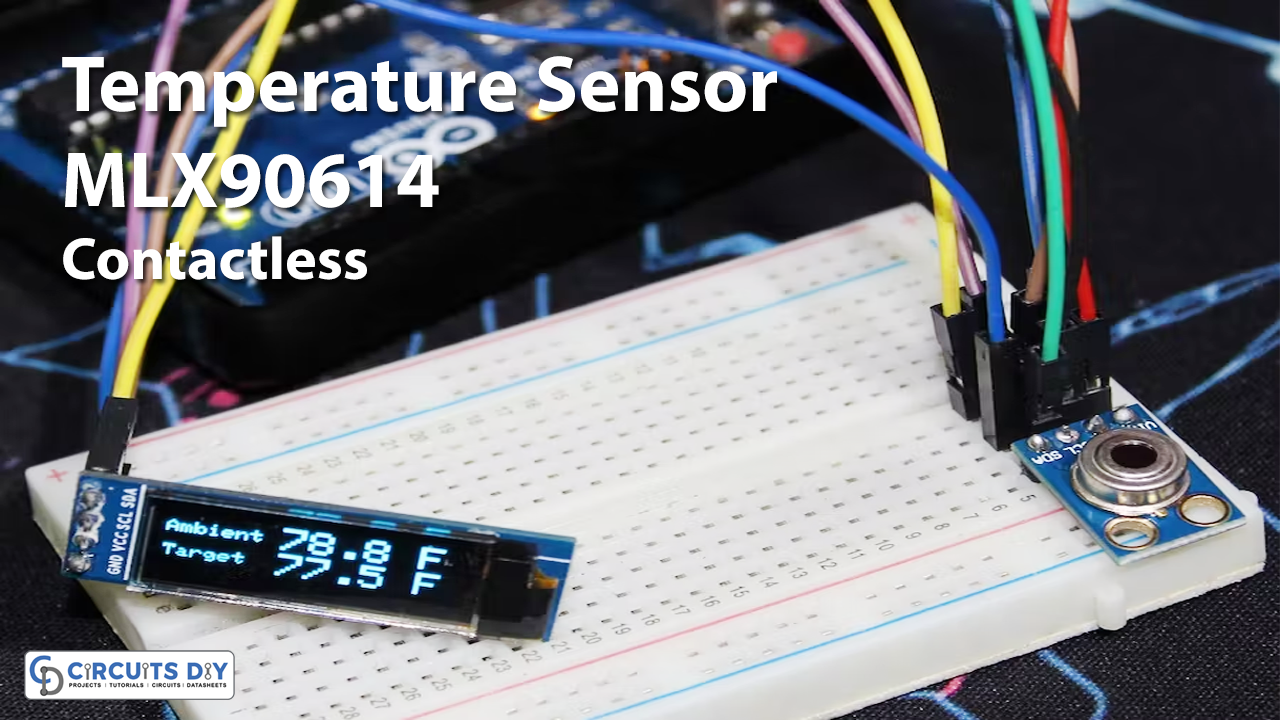
Schematic
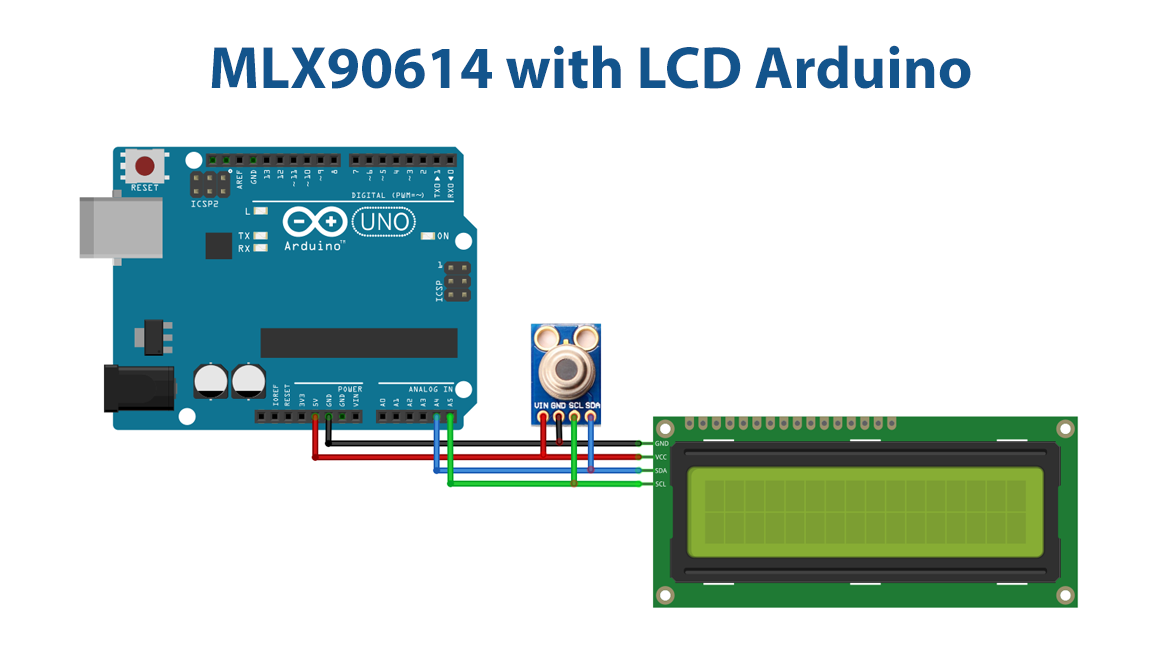
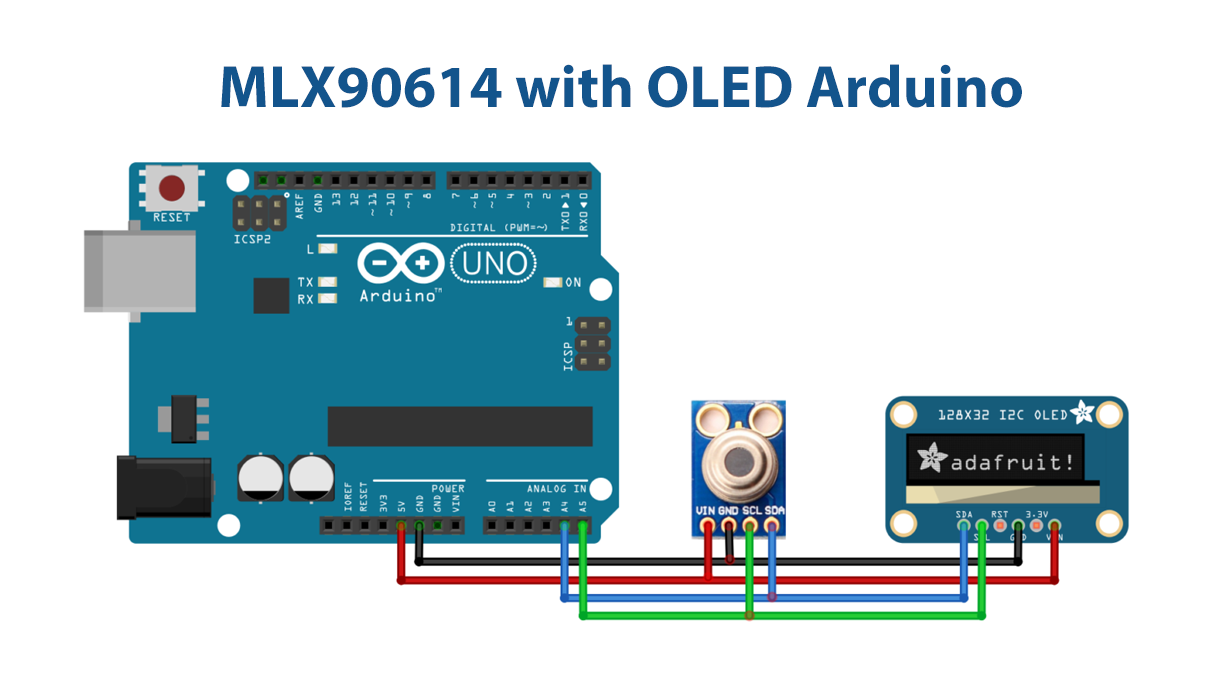
Make connections according to the circuit diagram given below.
With LCD i²c
With OLED
Installing Arduino IDE
First, you need to install Arduino IDE Software from its official website Arduino. Here is a simple step-by-step guide on “How to install Arduino IDE“.
Installing Libraries
Before you start uploading a code, download and unzip the following libraries at /Progam Files(x86)/Arduino/Libraries (default), in order to use the sensor with the Arduino board. Here is a simple step-by-step guide on “How to Add Libraries in Arduino IDE“.
Code
Now copy the following code and upload it to Arduino IDE Software.
Celcius
#include <LiquidCrystal_I2C.h>
#include <Wire.h>
#include <Adafruit_MLX90614.h>

#define I2C_ADDR 0x27 //I2C adress, you should use the code to scan the adress first (0x27) here
#define BACKLIGHT_PIN 3 // Declaring LCD Pins
#define En_pin 2
#define Rw_pin 1
#define Rs_pin 0
#define D4_pin 4
#define D5_pin 5
#define D6_pin 6
#define D7_pin 7

LiquidCrystal_I2C lcd(I2C_ADDR,En_pin,Rw_pin,Rs_pin,D4_pin,D5_pin,D6_pin,D7_pin);
Adafruit_MLX90614 mlx = Adafruit_MLX90614();

void setup() {

  mlx.begin();
  lcd.begin (16,2);
  lcd.setBacklightPin(BACKLIGHT_PIN,POSITIVE);
  lcd.setBacklight(HIGH); //Lighting backlight
  lcd.home ();

}

void loop() {
 lcd.setCursor(0,0);
 lcd.print("Ambient ");
 lcd.print(mlx.readAmbientTempC());
 lcd.print(" C");

 lcd.setCursor(0,1);
 lcd.print("Target  ");
 lcd.print(mlx.readObjectTempC());
 lcd.print(" C");

 delay(1000);
}
Fahrenheit
/* This code works with MLX90614 (GY906) and OLED screen
 * It measures both ambient and object temperature in Fahrenheit and display it on the screen
 * Please visit www.surtrtech.com for more details
 */

#include <Adafruit_GFX.h>
#include <Adafruit_SSD1306.h>
#include <Wire.h>
#include <Adafruit_MLX90614.h>

#define SCREEN_WIDTH 128 // OLED display width, in pixels
#define SCREEN_HEIGHT 32 // OLED display height, in pixels
#define OLED_RESET    -1 // Reset pin # (or -1 if sharing Arduino reset pin)

Adafruit_SSD1306 display(SCREEN_WIDTH, SCREEN_HEIGHT, &Wire, OLED_RESET); //Declaring the display name (display)
Adafruit_MLX90614 mlx = Adafruit_MLX90614();

void setup() {
  mlx.begin();
  display.begin(SSD1306_SWITCHCAPVCC, 0x3C); //Start the OLED display
  display.clearDisplay();
  display.display();
}

void loop() {
  display.clearDisplay();

  display.setTextSize(1);
  display.setTextColor(WHITE);
  display.setCursor(0,4);
  display.println("Ambient");

  display.setTextSize(2);
  display.setCursor(50,0);
  display.println(mlx.readAmbientTempF(),1);

  display.setCursor(110,0);
  display.println("F");

  display.setTextSize(1);
  display.setTextColor(WHITE);
  display.setCursor(0,20);
  display.println("Target");

  display.setTextSize(2);
  display.setCursor(50,17);
  display.println(mlx.readObjectTempF(),1);

  display.setCursor(110,17);
  display.println("F");

  display.display();

  delay(1000);
}
Let’s Test It
It’s time to test the circuit now that the code has been uploaded. When you turn on the Arduino, you’ll notice that your LCD is receiving readings. When you place your palm over the sensor, the readings may differ.
Working Explanation
Understand the coding to understand the working of this project:
- First, we include the required libraries:
- Wire.h library for 12C communication
- The LiquidCrystal_I2C.h for LCD
- Adafruit MLX90614.h library for improved communication with the MLX90614 Temperature sensor.
- We then define the Arduino pins that are connected to the LCD
- The MLX90614 sensor is then called by defining the variable “mlx.” To this variable, we call the Adafruit MLX90614() function.
- In the void setup, the function mlx.begin()” is given to initialize the sensor. After that, we initialize the LCD.
- In the void loop, we print the text Ambient first, followed by the temperature detected by the sensor. we utilize the function mlx.readObjectTempC() In order to show the output unit as Celsius we print C. Then we print ‘Target”. mlx.readobjectTempC() is used to read the target object temperature. ” We give a little delay to get the next readings.
Applications
- Infrared thermometers
- Non-contact temperature sensing devices
Conclusion.
We hope you have found this Contactless Temperature Sensor MLX90614 Circuit very useful. If you feel any difficulty in making it feel free to ask anything in the comment section.