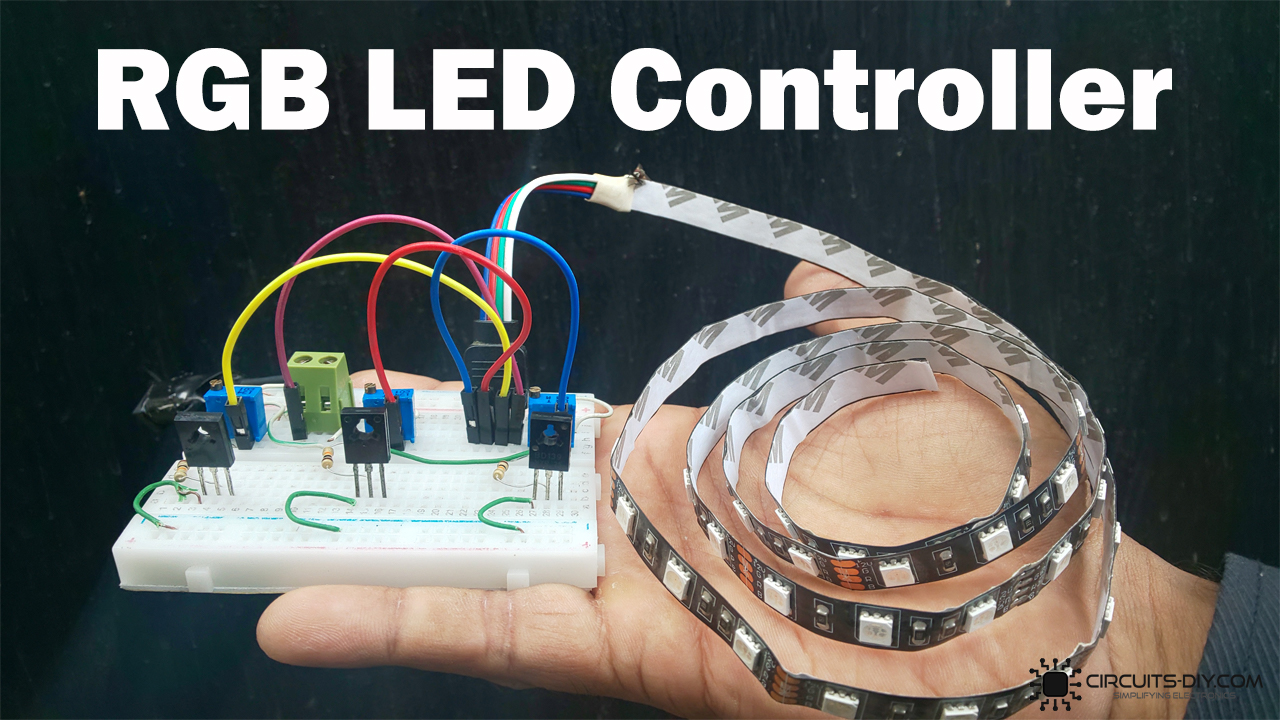
IoT (Internet of Things) projects are all about connecting everyday devices to the internet. In this tutorial, we’ll use an Arduino Nano 33 IoT and an RGB LED module to create a simple yet powerful WiFi-based RGB controller.
With just a web browser, you’ll be able to change the LED color in real-time using a color picker interface — no need for extra apps!
PCBWay now offers a free purple solder mask at no extra charge, making your boards stand out in style. PCBWay provides high-quality PCB prototyping and assembly at an affordable price, starting at just $5 for 5 PCBs. With fast turnaround, great customer support, and easy online ordering, it’s a top choice for hobbyists and professionals alike.

Components Required
| Quantity | Component | Description |
|---|---|---|
| 1 | Arduino Nano 33 IoT | Microcontroller board with built-in WiFi (ideal for IoT projects) |
| 1 | RGB LED Module (Common Cathode) | LED module with Red, Green, and Blue channels |
| 1 | Breadboard | For easy wiring and prototyping |
| 1 | Micro-USB Cable | To power and program the Arduino |
| Few | Jumper Wires | For making circuit connections |
Wiring Connections
| Arduino Nano 33 IoT Pin | RGB LED Module Pin | Description |
|---|---|---|
| D3 (PWM) | Red Pin (R) | Controls the Red channel |
| D6 (PWM) | Green Pin (G) | Controls the Green channel |
| D5 (PWM) | Blue Pin (B) | Controls the Blue channel |
| GND | GND | Common ground |
⚡ Important: This project uses PWM pins so that the LED brightness can be controlled smoothly for each color channel.
How the Project Works
- The Arduino Nano 33 IoT connects to your WiFi network.
- It runs a simple web server that hosts a control page.
- On the webpage, you’ll see a color picker widget powered by the Iro.js library.
- When you select a new color, the webpage sends RGB values (0–255) to the Arduino via an HTTP request.
- The Arduino then adjusts the PWM duty cycle on each pin to mix the chosen color on the RGB LED.
Arduino Code
Here’s the complete tested code for the project:
#include <WiFiNINA.h>

// WiFi credentials
char ssid[] = "Wi-Fi DCB367 2.4G";
char pass[] = "tsTSP2SG";

WiFiServer server(80);

// RGB LED pins (PWM capable)
const int redPin = 3;
const int greenPin = 6; // swapped
const int bluePin = 5;  // swapped

int rValue = 0, gValue = 0, bValue = 0;

void setup() {
  Serial.begin(9600);

  pinMode(redPin, OUTPUT);
  pinMode(greenPin, OUTPUT);
  pinMode(bluePin, OUTPUT);

  // Connect to WiFi
  while (WiFi.begin(ssid, pass) != WL_CONNECTED) {
    Serial.print(".");
    delay(1000);
  }
  Serial.println("\nConnected to WiFi");
  Serial.print("IP Address: ");
  Serial.println(WiFi.localIP());

  server.begin();
}

void loop() {
  WiFiClient client = server.available();
  if (client) {
    String request = client.readStringUntil('\r');
    client.flush();

    // Handle /setColor requests
    if (request.indexOf("/setColor?") >= 0) {
      int rIndex = request.indexOf("r=");
      int gIndex = request.indexOf("g=");
      int bIndex = request.indexOf("b=");

      if (rIndex > 0 && gIndex > 0 && bIndex > 0) {
        rValue = request.substring(rIndex + 2, request.indexOf("&", rIndex)).toInt();
        gValue = request.substring(gIndex + 2, request.indexOf("&", gIndex)).toInt();
        bValue = request.substring(bIndex + 2, request.indexOf(" ", bIndex)).toInt();
      }

      // Update LED
      analogWrite(redPin, rValue);
      analogWrite(greenPin, gValue);
      analogWrite(bluePin, bValue);

      // Respond with OK
      client.println("HTTP/1.1 200 OK");
      client.println("Content-Type: text/plain");
      client.println("Connection: close");
      client.println();
      client.println("OK");
      client.stop();
      return;
    }

    // Serve control webpage
    client.println("HTTP/1.1 200 OK");
    client.println("Content-type:text/html");
    client.println("Connection: close");
    client.println();

    client.println("<!DOCTYPE HTML><html>");
    client.println("<head><meta name=\"viewport\" content=\"width=device-width, initial-scale=1\">");
    client.println("<script src=\"https://cdn.jsdelivr.net/npm/@jaames/iro@5\"></script>");
    client.println("<style>");
    client.println("body{display:flex;flex-direction:column;justify-content:center;align-items:center;height:100vh;margin:0;font-family:Arial;}");
    client.println("h1{margin-bottom:20px;font-size:24px;color:#333;}");
    client.println("</style>");
    client.println("</head><body>");
    client.println("<h1>RGB LED Controller</h1>");
    client.println("<div id=\"picker\"></div>");

    client.println("<script>");
    client.println("var colorPicker=new iro.ColorPicker('#picker',{ width:300, color:'#ff0000'});");
    client.println("colorPicker.on('color:change',function(color){");
    client.println("  var r=color.rgb.r,g=color.rgb.g,b=color.rgb.b;");
    client.println("  var xhr=new XMLHttpRequest();");
    client.println("  xhr.open('GET','/setColor?r='+r+'&g='+g+'&b='+b,true);");
    client.println("  xhr.send();");
    client.println("});");
    client.println("</script>");

    client.println("</body></html>");
    client.stop();
  }
}
Uploading & Testing
- Open Arduino IDE and install the WiFiNINA library.
- Replace the WiFi credentials (
ssidandpass) in the code with your own. - Upload the code to your Arduino Nano 33 IoT.
- Open the Serial Monitor (9600 baud) → copy the IP Address shown.
- Enter the IP in any web browser on the same WiFi network.
- Use the color picker to change the LED color in real-time.
Demo Output
- The webpage displays a circular color wheel.
- Selecting any color instantly updates the RGB LED.
- Smooth transitions are achieved using PWM on D3, D6, and D5.
Conclusion
In this project, we built a WiFi-controlled RGB LED system using Arduino Nano 33 IoT. With just a browser-based color picker, you can mix millions of colors in real-time.
Possible improvements:
- Add sliders for brightness control.
- Save the last selected color in EEPROM.
- Extend this project to control multiple RGB LEDs or strips.
This simple project is a great starting point for learning IoT and web-based device control!