Introduction
Let’s dive into the world of sensing temperature and humidity with Arduino. The DHT21/AM2301 sensor is a powerful tool for measuring the ambient conditions in any given environment. This guide will walk you through interfacing this sensor with an Arduino board and demonstrate how to use the data it provides to make real-time temperature and humidity measurements.
First, we will wire the sensor to the Arduino board, ensuring the connections are secure and correctly made. Then, we will upload the code to the Arduino, allowing it to communicate with the sensor and collect data. With this guide, you’ll be able to explore the possibilities of this sensor and create your unique projects with it.
What is Temperature Humidity Sensor?
A device or gadget is referred to as a temperature and humidity sensor capable of converting temperature and humidity into electrical signals that can easily be measured and processed.
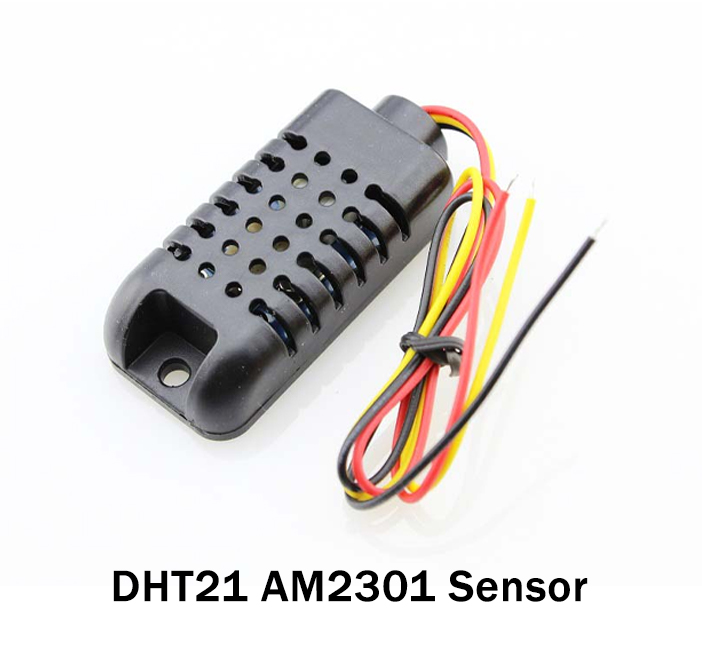
Hardware Components
You will require the following hardware for Interfacing DHT21 / AM2301 Temperature Humidity Sensor with Arduino.
| S.no | Component | Value | Qty |
|---|---|---|---|
| 1. | Arduino UNO | – | 1 |
| 2. | Temperature Sensor | DHT21, AM2301 | 1 |
| 3. | Breadboard | – | 1 |
| 4. | Jumper Wires | – | 1 |
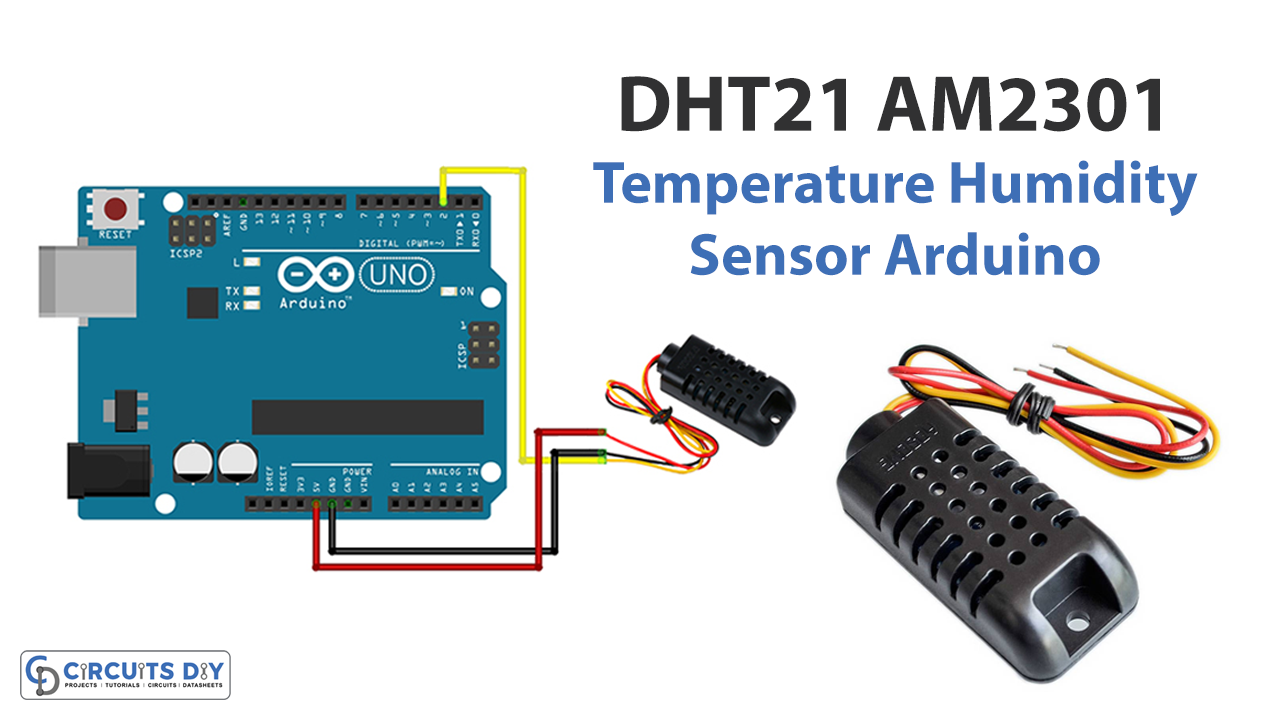
DHT21 / AM2301 Sensor with Arduino
Now follow the given steps for DHT21 / AM2301 Temperature Humidity Sensor with Arduino:
Schematic
Make connections according to the circuit diagram given below.
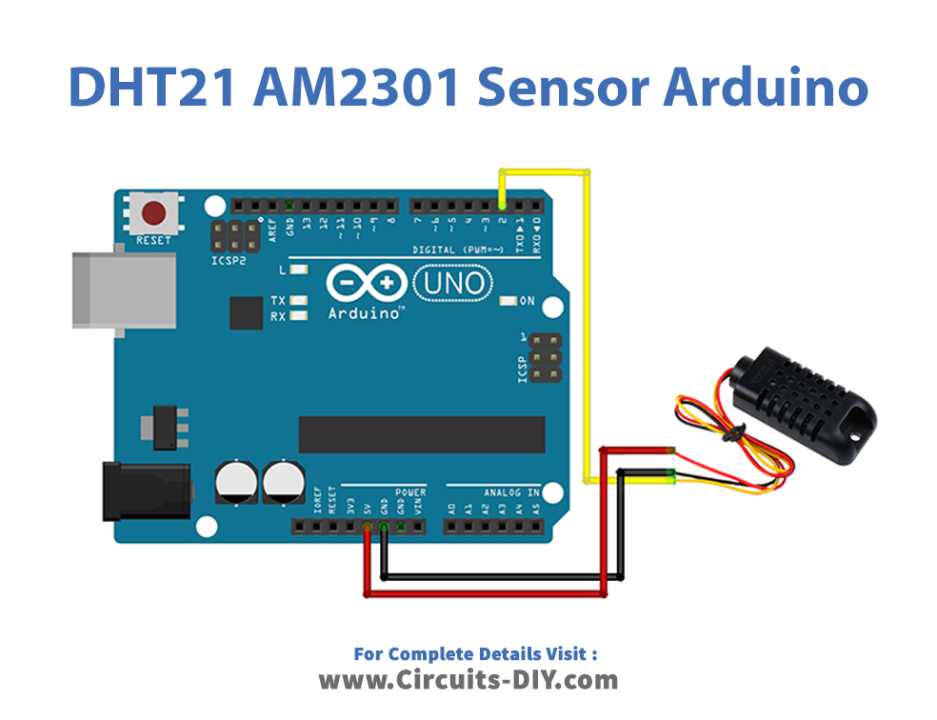
Wiring / Connections
| Arduino | DHT21 Temperature Sensor |
|---|---|
| 5V | VCC |
| GND | GND |
| A4 | DATA |
Installing Arduino IDE
First, you need to install Arduino IDE Software from its official website Arduino. Here is a simple step-by-step guide on “How to install Arduino IDE“.
Installing Libraries
Before you start uploading a code, download and unzip the following libraries at /Progam Files(x86)/Arduino/Libraries (default), in order to use the sensor with the Arduino board. Here is a simple step-by-step guide on “How to Add Libraries in Arduino IDE“.
Code
Now copy the following code and upload it to Arduino IDE Software.
//Libraries
#include <DHT.h>;

//Constants
#define DHTPIN 2            //what pin we're connected to
#define DHTTYPE DHT21       //DHT 21  (AM2301)
DHT dht(DHTPIN, DHTTYPE);   //Initialize DHT sensor for normal 16mhz Arduino


//Variables
float hum;  //Stores humidity value
float temp; //Stores temperature value

void setup()
{
  Serial.begin(9600);
  dht.begin();
}

void loop()
{
  //Read data and store it to variables hum and temp
  hum = dht.readHumidity();
  temp= dht.readTemperature();

  //Print temp and humidity values to serial monitor
  Serial.print("Humidity: ");
  Serial.print(hum);
  Serial.print("%,  Temperature: ");
  Serial.print(temp);
  Serial.println(" Celsius");

  delay(2000); //Delay 2 sec.
}
Let’s Test It
Once the connections have been made, and the code has been uploaded to the Arduino board, it’s time to test the sensor and ensure it’s working correctly. Here are some steps to check the functionality of the sensor:
- Open the Serial Monitor in the Arduino IDE. Ensure the baud rate is set to 9600, which is the same as the one used in the code.
- Power on the Arduino board and wait for a few seconds. The sensor will start sending temperature and humidity values to the serial monitor, which will be displayed in the serial monitor in the format of “Humidity: %, Temperature: Celsius”
- If the sensor is not working correctly, make sure that the connections between the sensor and the Arduino board are secure and that the code has been uploaded correctly.
Working Explanation
Let’s dive into the code. The code includes several key components:
- Libraries: The first line of the code includes a library called DHT.h, a library specifically designed for the DHT21/AM2301 sensor. This library contains pre-written code that simplifies interfacing with the sensor and makes it easier to read and interpret the data it provides.
- Constants: The next section of the code defines two constants: DHTPIN and DHTTYPE. DHTPIN is set to 2, which means that the sensor is connected to digital pin 2 on the Arduino board. DHTTYPE is set to DHT21, which specifies that the sensor being used is a DHT21 sensor (AM2301)
- Variables: The code then declares two variables, hum and temp, which will store the humidity and temperature values read from the sensor.
- Setup and Loop functions: The setup() function initializes the serial communication and the DHT sensor. The loop() function is called repeatedly after the setup function is completed. It reads the humidity and temperature values from the sensor using the dht.readHumidity() and dht.readTemperature() functions, respectively, and stores them in the hum and temp variables. Then it prints the humidity and temperature values to the serial monitor and waits for 2 seconds before doing the next reading.
Applications
- Relative humidity and temperature measurement devices
Conclusion.
We hope you have found this Interfacing DHT21 / AM2301 Temperature Humidity Sensor with Arduino Circuit very useful. If you feel any difficulty in making it feel free to ask anything in the comment section.
Related posts:
 Multiple I2C Devices to Arduino Using TCA9548A
 Interface MPU6050 Accelerometer and Gyroscope Sensor with Arduino
 Water Flow Sensor Interfacing with Arduino – Measure Flow Rate
 PIR Sensor Arduino Tutorial
 Joystick Controlled Mouse with Arduino
 Interfacing VL530LX Laser Ranging Time of Flight Distance Sensor with Arduino


