Introduction
Imagine you want to make an environmental monitoring system. You can use multiple I2C sensors to measure temperature, humidity, pressure, and other variables in your environment. There may be different sensors that you utilize. So, to get the readings from various sensors and connect them to a single 12C bus, you need to have a device called a 12C multiplexer.
An I2C multiplexer is a device that allows you to connect multiple I2C devices to a single I2C bus. This can be useful when you have a limited number of I2C connections available on your microcontroller and need to connect more I2C devices than can be directly supported
It is often necessary to connect more than one I2C device to an Arduino microcontroller. This lets you add sensors, and other I2C-based peripherals to your project, which gives it more capabilities.
What is Multiplexer TCA9548A?
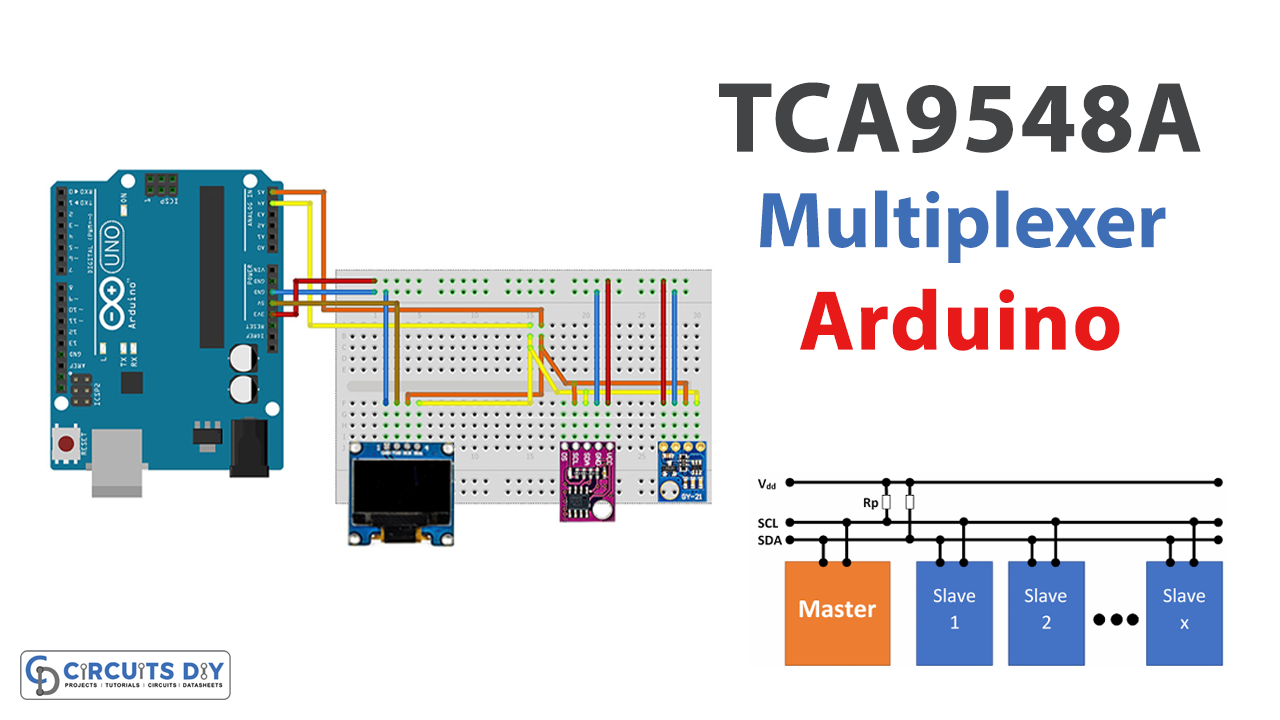
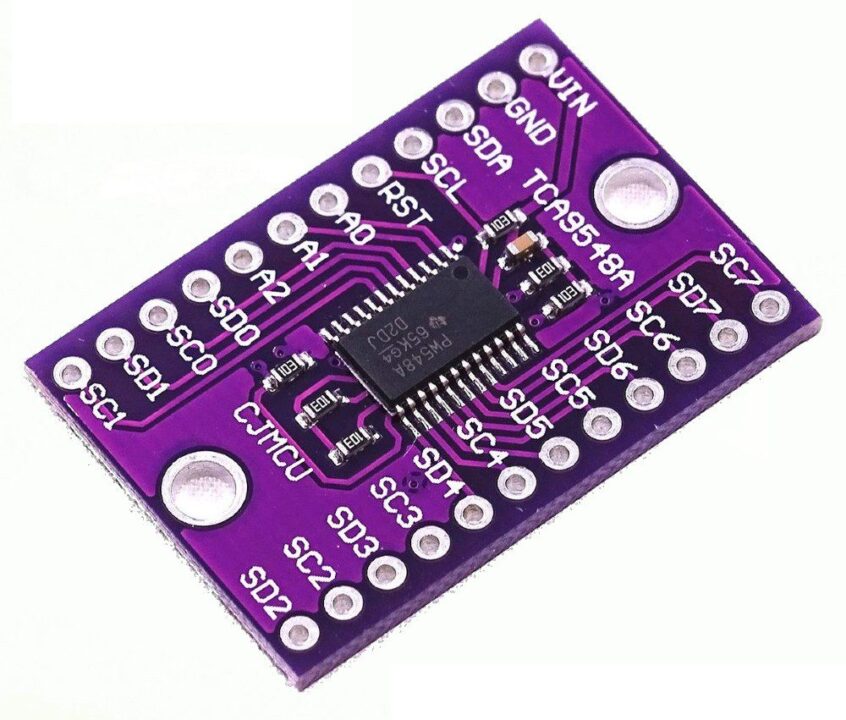
The TCA9548A is an I2C multiplexer that lets you connect up to 8 I2C devices to a single bus, increasing the number that may be connected to a microcontroller. It contains one input and eight 12C outputs. You can utilize the I2C control lines to select the output to connect to the input. This lets you link many I2C devices to a microcontroller using a single I2C bus. The TCA9548A is helpful when there aren’t enough I2C buses on a microcontroller to connect several I2C devices.
Hardware Components
You will require the following hardware to Connect Multiple I2C Devices to Arduino Using I2C Multiplexer TCA9548A.
| S.no | Component | Value | Qty |
|---|---|---|---|
| 1. | Arduino UNO | – | 1 |
| 2. | OLED Display withDriver | 0.96 INCH I2C, SSD1306 | 1 |
| 3. | Temperature & Humidity | GY-21 SI7021 | 1 |
| 4. | Temperature & Humidity Sensor | GY-213V HTU21 | 1 |
| 5. | Temperature & Humidity Sensor | SHT20 | 1 |
| 6. | Temperature Sensor | LM75 | 1 |
| 7. | I2C Expansion Module | TCA9548A | 1 |
| 8. | Jumper Wires | – | 1 |
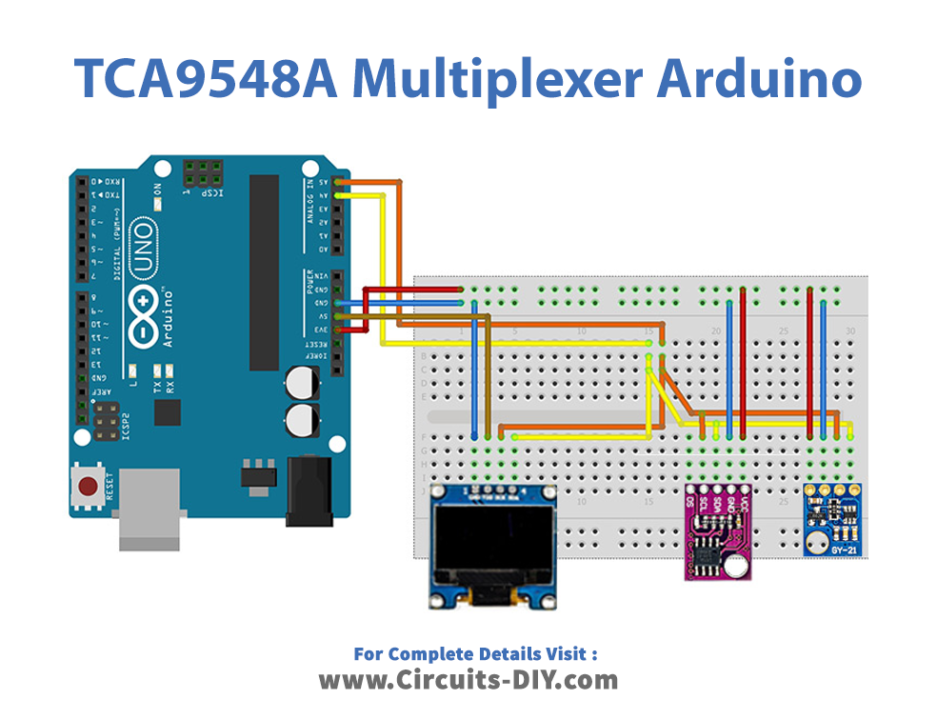
Connecting Multiple I2C Devices to Arduino
To Connect Multiple I2C Devices to Arduino Using I2C Multiplexer TCA9548A, you need to follow the given steps:
Schematic
Make connections according to the circuit diagram given below.
Installing Arduino IDE
First, you need to install Arduino IDE Software from its official website Arduino. Here is a simple step-by-step guide on “How to install Arduino IDE“.
Installing Libraries
Before you start uploading a code, download and unzip the following libraries at /Progam Files(x86)/Arduino/Libraries (default), in order to use the sensor with the Arduino board. Here is a simple step-by-step guide on “How to Add Libraries in Arduino IDE“.
Code
Now copy the following code and upload it to Arduino IDE Software.
#include <Wire.h>

void setup() {
  Wire.begin();

  Serial.begin(9600);
  while (!Serial); // Leonardo: wait for serial monitor
  Serial.println("\nI2C Scanner");
}

void loop() {
  int nDevices = 0;

  Serial.println("Scanning...");

  for (byte address = 1; address < 127; ++address) {
    // The i2c_scanner uses the return value of
    // the Write.endTransmisstion to see if
A device did acknowledge the address.
    Wire.beginTransmission(address);
    byte error = Wire.endTransmission();

    if (error == 0) {
      Serial.print("I2C device found at address 0x");
      if (address < 16) {
        Serial.print("0");
      }
      Serial.print(address, HEX);
      Serial.println("  !");

      ++nDevices;
    } else if (error == 4) {
      Serial.print("Unknown error at address 0x");
      if (address < 16) {
        Serial.print("0");
      }
      Serial.println(address, HEX);
    }
  }
  if (nDevices == 0) {
    Serial.println("No I2C devices found\n");
  } else {
    Serial.println("done\n");
  }
  delay(5000); // Wait 5 seconds for next scan
 }
Let’s Test It
It’s now time to test the circuit! Once you are done with connections and the uploading of code, open the serial monitor and observe the readings.
Working Explanation
We need to understand the code in order to understand the working of the circuit.
- The code first uses the Wire library that provides functions for communicating over I2C.
- The void setup starts by calling the Wire.begin() function to initialize the I2C bus and then begins a void loo loop that runs indefinitely. Inside the loop, the code initializes a variable called “nDevices” to 0, and then begins a for loop that iterates through all possible I2C addresses.
- For each address, the sketch attempts to communicate with a device by calling the Wire.beginTransmission() function and passing in the address as an argument. It then calls the Wire.endTransmission() function to end the transmission and check the status of the transmission.
- If the transmission was successful (i.e. error == 0), the sketch increments the “nDevices” variable and prints out the address of the device. If the transmission failed with an error code of 4, the sketch prints out an error message.
- After the for loop finishes, the sketch checks if any devices were found (i.e. if nDevices > 0) and print a message indicating whether or not any devices were found.
- In the end, the code waits for 5 seconds.
Applications
- Monitoring systems
- To control multiple devices
Conclusion.
We hope you have found this Connect Multiple I2C Devices to Arduino Using I2C Multiplexer TCA9548A Circuit very useful. If you feel any difficulty in making it feel free to ask anything in the comment section.
Related posts:
 How to Interface RF Transmitter/Receiver Module With Arduino UNO
 FSR402 Force Sensing Resistor - Arduino Tutorial
 How to Interface Tilt Sensor (Inclinometer) with Arduino UNO
 Interfacing Force Sensing Resistor (FSR) with Arduino UNO
 Interfacing 315/433 MHz RF Transmitter-Receiver with Arduino
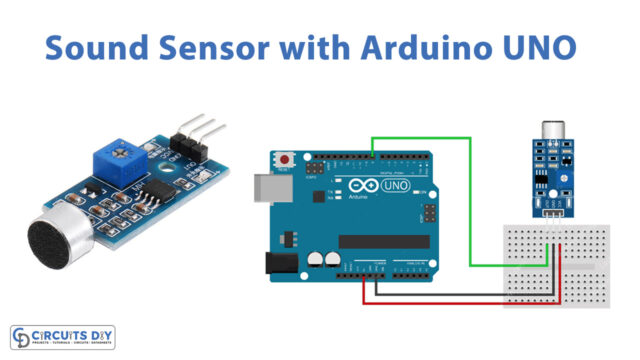 Interface Sound Sensor with Arduino UNO


