Introduction
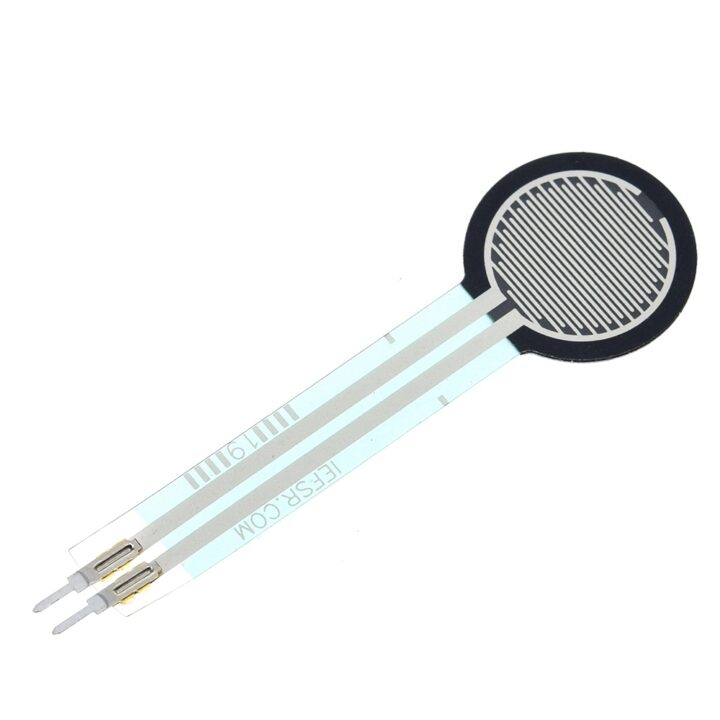
To measure the physical pressure or weight, the gaming devices, electronic drums, and smartphones use this sensor named, the Force sensing resistor. The sensor is more economical in price and reliable to use. Moreover, the sensor is very light in weight and requires very few external components. Therefore, easy to handle with any microcontroller. This component is available in different sizes and has therefore been utilized in embedded systems for so many years. So, in this article, we will share that how you can interface “Force Sensing Resistor with Arduino UNO”
An Overview about FSR
The technology was invented in 1977 to measure pressure. Primarily, the two-terminal device sensor works on the principle of changing resistance. The sensor has a polymer in it that changes its resistance according to the applied force. In other words, the sensor’s resistance varies by varying the pressure or the force applied. The sensor has a sensing film having conductive and non-conductive particles on it. these particles improve the mechanical properties and reduce the temperature dependence.
Working Principle of FSR
Primarily, the FSR module is the variable resistor whose terminal resistance changes on the pressure. With higher pressure, the resistance would be below and with the lower pressure resistance would be higher. In other words, the sensor changes the pressure into the resistance parameter. And then, this resistance parameter gets converted into voltage for convenience. And for this purpose, we use a voltage divider circuit.
Specification of Force Sensing Resistors
- The sensor has a sensitivity range of up to 20N.
- The sensor is light in weight and ultra-thin.
- The module is easy to handle and integrate.
- The operating temperature range of the module is -40 degrees to 85 degrees.
- It has a non-actuated resistance of 10Mohms.
- The bend resistance range of the module is about 100k to 1K, depending on the force.
- The module is cheaper and cost-effective.
Hardware Required
| S.no | Component | Value | Qty |
|---|---|---|---|
| 1. | Arduino | UNO | 1 |
| 2. | USB Cable Type A to B | – | 1 |
| 3. | Jumper Wires | – | 1 |
| 4. | Force Sensing Resistor | – | 1 |
Circuit Diagram
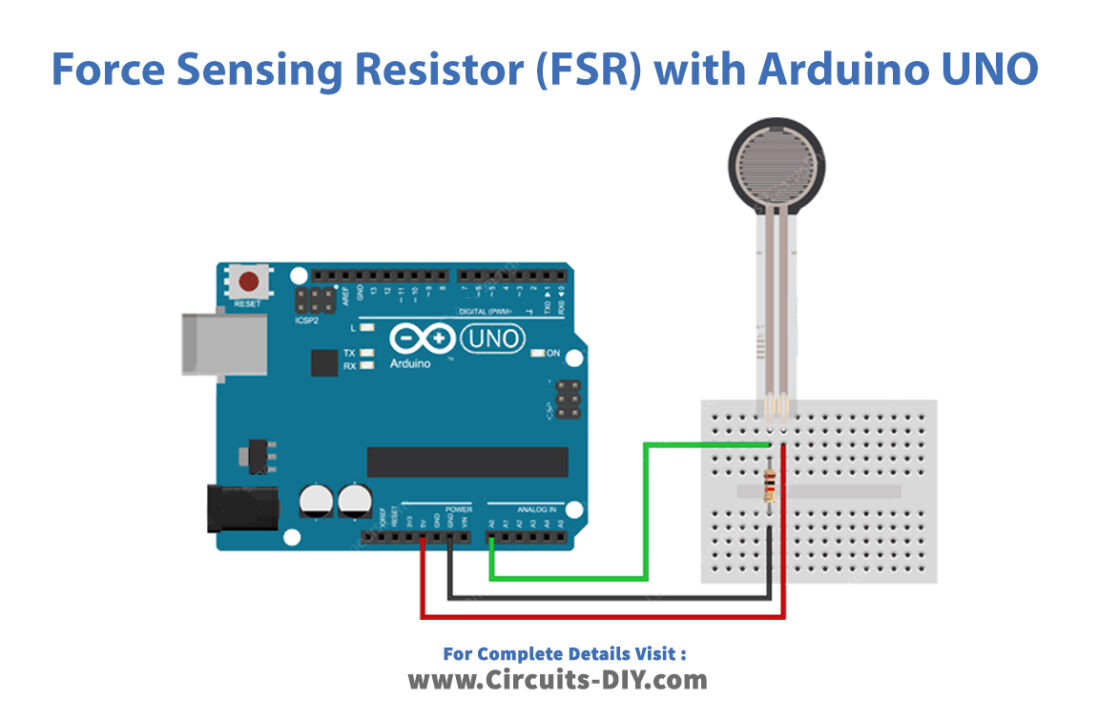
Connection Table
| Arduino | Force Sensing Resistor |
|---|---|
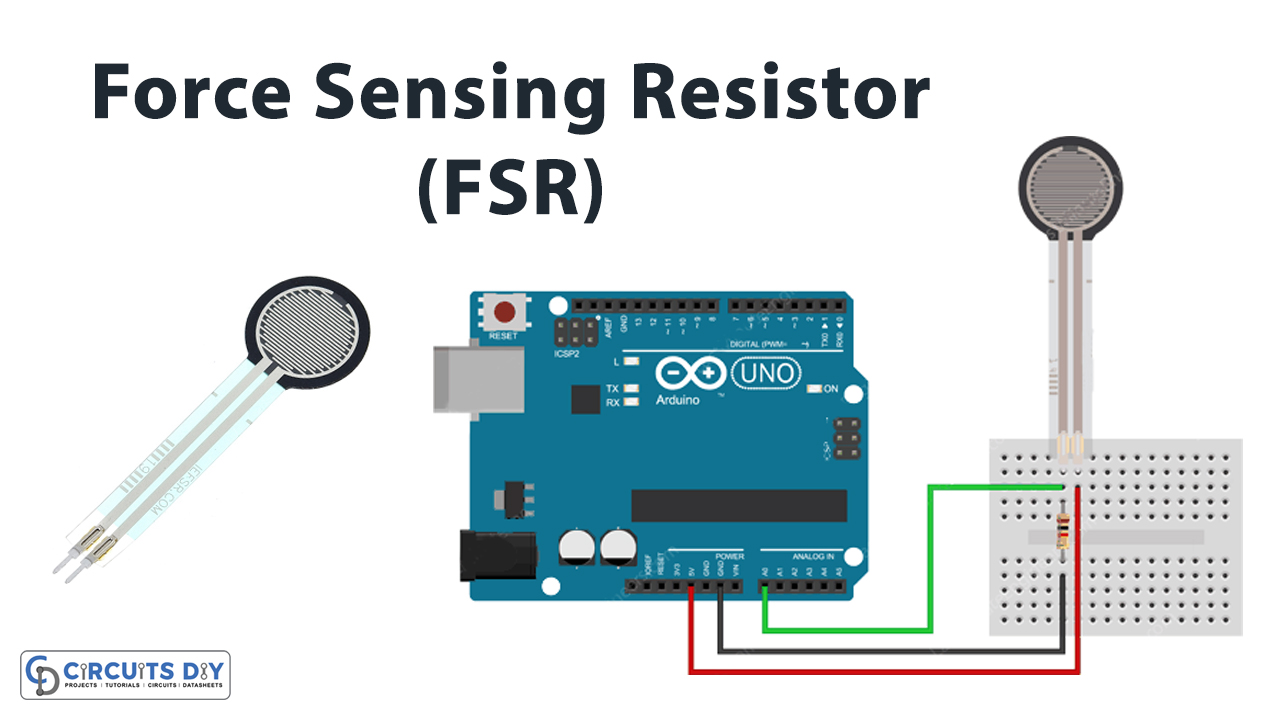
| A0 | P1 |
| 5V | P2 |
| GND | P2 |
Arduino Code
int fsrPin = 0;     // the FSR and 10K pulldown are connected to a0
int fsrReading;     // the analog reading from the FSR resistor divider

void setup(void) {
  Serial.begin(9600);
}

void loop(void) {
  fsrReading = analogRead(fsrPin);

  Serial.print("Analog reading = ");
  Serial.print(fsrReading);     // print the raw analog reading

  if (fsrReading < 10) {
    Serial.println(" - No pressure");
  } else if (fsrReading < 200) {
    Serial.println(" - Light touch");
  } else if (fsrReading < 500) {
    Serial.println(" - Light squeeze");
  } else if (fsrReading < 800) {
    Serial.println(" - Medium squeeze");
  } else {
    Serial.println(" - Big squeeze");
  }
  delay(1000);
}
Working Explanation
Firstly, connect Force Sensing Resistor (FSR) with Arduino UNO according to the schematic given above. Now, copy the above-mentioned code and paste it into the Arduino IDE. After that, upload the code to the Arduino UNO. Further, Apply some pressure on the sensor and analyze the reading on the Serial monitor.
Code Explanation
- First, declare the Arduino pins that are connected with the FSR and the pull-down pins of the sensor are connected. Define the variable fsrReading to hold the analog reading of the sensor.
- Now, in the void setup, start serial communication by writing Serial.begin( ).
- Further, in the void loop. take the Analog reading that is coming from the FSR sensor by using analogRead( ). After that, Print those readings by using Serial.print( ). As we know that when there is no pressure the output is 0 Volts. Hence, the sensor gives the output analog voltage. So, if we convert this into digital, it becomes the 10-bit numbers having a range from 0 10 1023 which will be seen in the serial monitor. Also, print the qualitatively measured pressure by using the if-else condition.
Application and Uses
- It can be used to build touch control load switches.
- Also, in the musical instruments.
- Further, in gaming devices and smartphones.
- Moreover, in the car sensors.
- It can also be used to detect pressure.
- it has applications in the medical devices

