Introduction
For agriculturalists and farmers, moisture is a huge difficulty. Unnecessarily high moisture levels can harm the soil. As a result, yield is reduced, and seed loss is a negative effect. Crops and plants are in jeopardy. It also has an impact on the irrigation system. As a response, the designers created a tiny and portable soil moisture sensor to prevent mild moisture concerns. The sensor with interfacing with Arduino calculates the volumetric content of the water and displays the result. So, in this tutorial, we are going to interface ” Soil Moisture Sensor with Arduino UNO”. But, before making the circuit, let us briefly discuss the soil moisture sensor.
An Overview of Soil Moisture Sensor
A Soil Moisture Sensor is an electronic sensor that detects the moisture content of the soil. The volumetric level of water within the soil can be measured with this sensor. The Sensing Probs and the Sensor Module are the two primary components of this sensor. The probes enable current to flow through the soil, and the resistance value is calculated based on the moisture content of the soil. The Sensor Module collects data from sensor probes, examines it, and transforms it into a digital or analog output. As a result, the Sensor can produce both digital and analog output.
Pinouts of Soil Moisture Sensor
| Pin Number | Pin Name | Description |
| 1 | VCC | +5 v power supply |
| 2 | GND | Ground (-) power supply |
| 3 | DO | Digital Output (0 or 1) |
| 4 | AO | Analog Output (range 0 to 1023) |

Hardware Required
| S.no | Component | Value | Qty |
|---|---|---|---|
| 1. | Arduino | UNO | 1 |
| 2. | USB Cable Type A to B | – | 1 |
| 3. | Jumper Wires | – | – |
| 4. | Soil Moisture Sensor | – | 1 |
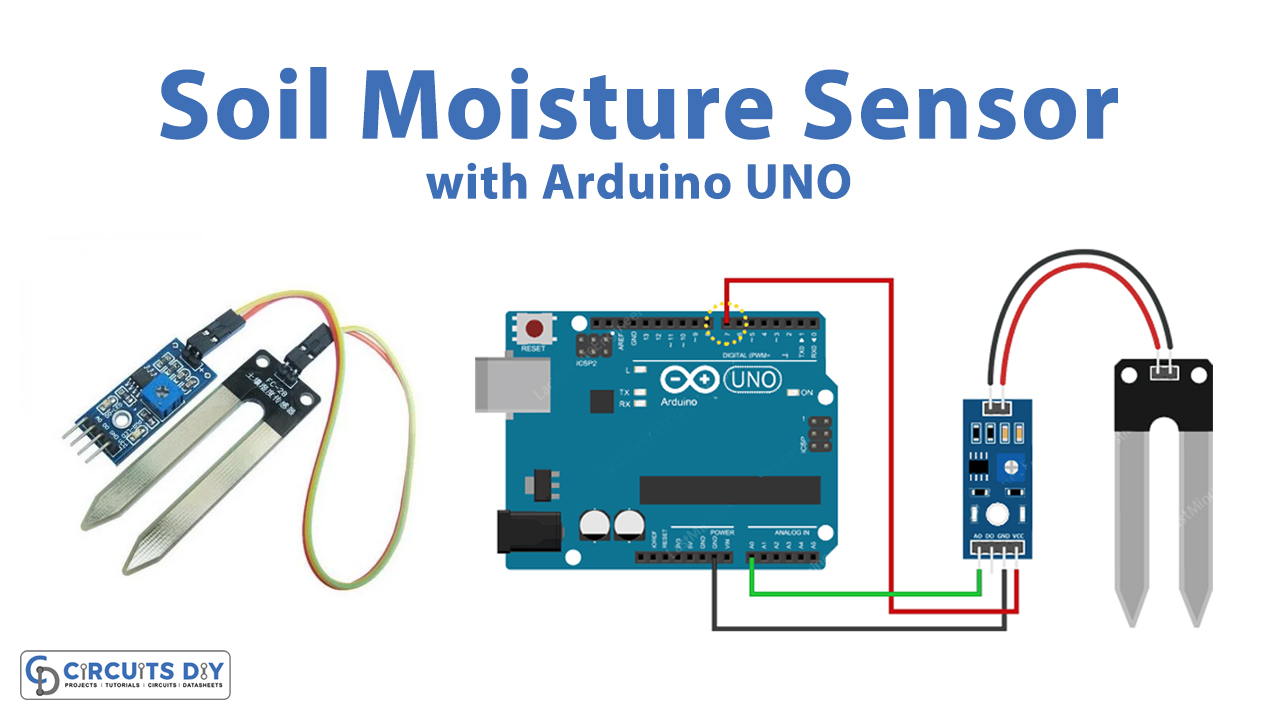
Circuit Diagram
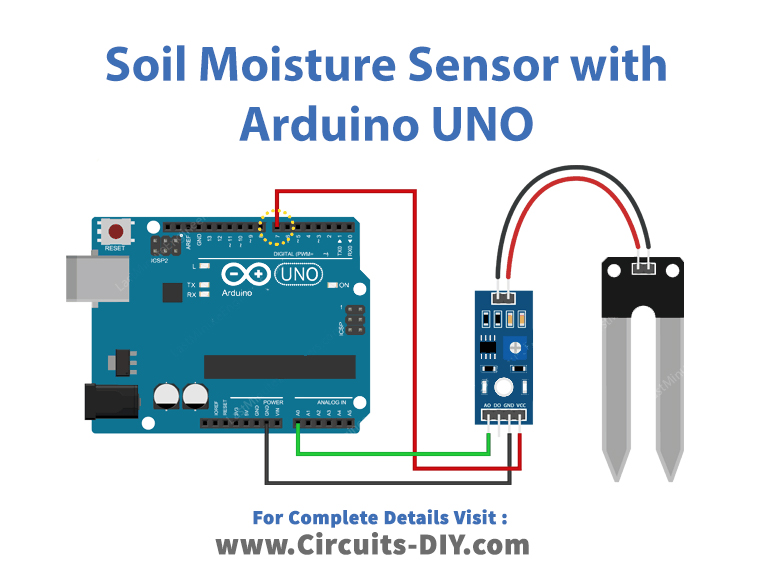
Connection Table
| Arduino | Soil Moisture Sensor |
|---|---|
| A0 | A0 |
| – | D0 |
| GND | GND |
| D7 | VCC |
Arduino Code
// Sensor pins
#define sensorPower 7
#define sensorPin A0

void setup() {
	pinMode(sensorPower, OUTPUT);

	// Initially keep the sensor OFF
	digitalWrite(sensorPower, LOW);

	Serial.begin(9600);
}

void loop() {
	//get the reading from the function below and print it
	Serial.print("Analog output: ");
	Serial.println(readSensor());

	delay(1000);
}

//  This function returns the analog soil moisture measurement
int readSensor() {
	digitalWrite(sensorPower, HIGH);	// Turn the sensor ON
	delay(10);							// Allow power to settle
	int val = analogRead(sensorPin);	// Read the analog value form sensor
	digitalWrite(sensorPower, LOW);		// Turn the sensor OFF
	return val;							// Return analog moisture value
}
Working Explanation
Connect the Arduino to the soil moisture sensor. In the Arduino IDE, paste the above code. Then the code should be uploaded into Arduino. Using the potentiometer, one can adjust the threshold value. Insert the soil moisture sensor into the soil. The reading will begin to show on the serial monitor. The sensor works in a way that the more water in the soil, the greater the conductivity and the lower the resistance. The lower the water content in the soil, the worse the conductivity and the higher the resistance. The sensor generates an output voltage based on the resistance, which may be used to estimate the moisture level by monitoring it.
Code Explanation
- At first, we have defined the sensor pins that are connected with the arduino.
- In the void loo, we have defined one of those pin as the output and to keep that low initially, we use the digitalWrite function. after that initialize the serial monitor by using serial.begin function.
- in the void loop, we make the variable val in which we store the integer valiue coming from the sensor. To get the sensor value we give the function readsensor(). Then we print that value by using the Serial.print function. Then to determine the status of sensor we give the if condition, . When the sensor value is val, the Serial monitor will print that Status: Soil is too dry – time to water!, other wise, it will print Status: Soil moisture is perfect. Then we give some delay. then the same. then we do the same procedure to get analog, utilizing other analog sensor pin.
Application and Uses
Agriculture is the primary use for this sensor. Farmers, planters, and researchers utilize it for this reason. It may be used to improve the efficiency of landscape irrigation systems.