Introduction
What happens when the rain starts while you are traveling in your car. The wiper gets turned ON. This happens because of the rain-sensing system in the car. The system uses a sensor that enables it to sense the presence of water on the glass of the windshield. So, practically, the rain sensor is a device that gets activated when rain happens. Therefore, it helps in automatic irrigation systems and water conservation devices. Thus, In this tutorial, we are going to interface “Rain Sensor FC-37 or YL-83 with Arduino UNO”.
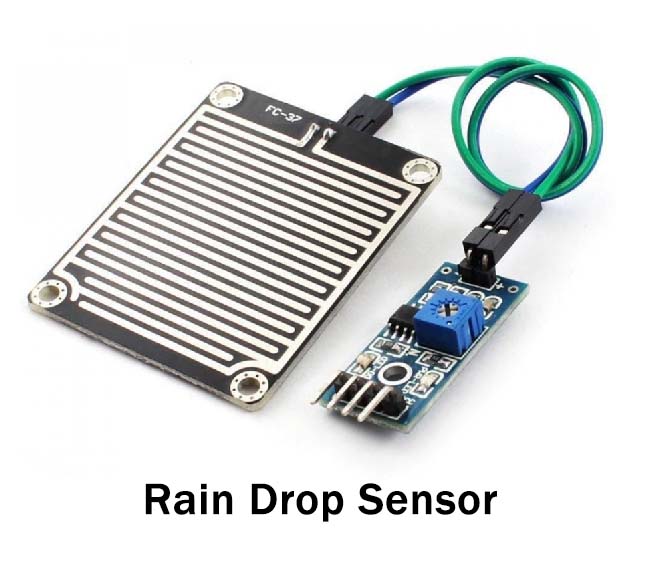
Working principle of Rain Sensor
The sensor works with resistance. When there is no rain, means the resistance is lower. Therefore the output voltage is higher. When the raindrop appears on the sensor, the resistance gets higher. And, the output voltage gets lower.
Features about the Rain Sensors
- The working voltage of the sensor is 5Volts.
- It uses an LM39 voltage comparator
- The sensor has a potentiometer to adjust the sensitivity.
- The board dimension is 3.2cm×1.4cm
- Inexpensive and Reliable
Hardware Required
| S.no | Component | Value | Qty |
|---|---|---|---|
| 1. | Arduino | UNO | 1 |
| 2. | USB Cable Type A to B | – | 1 |
| 3. | Jumper Wires | – | 1 |
| 4. | Rain Sensor | FC-37 or YL-83 | 1 |
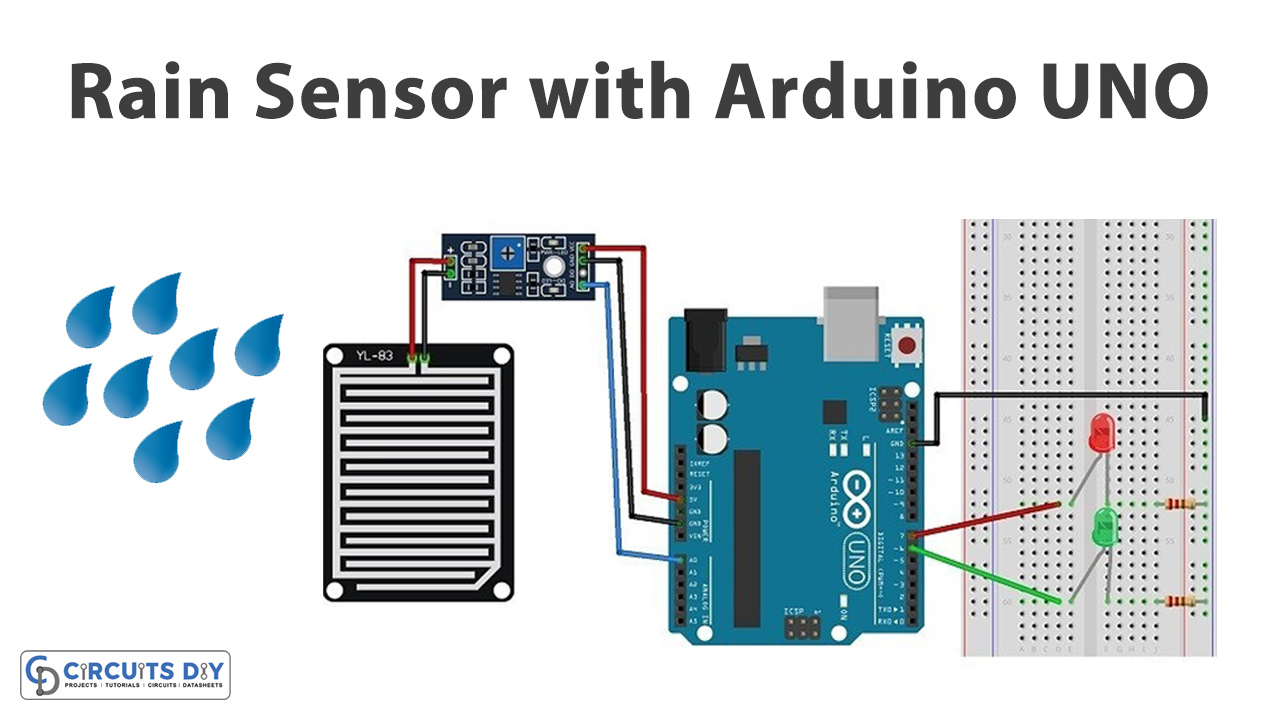
Circuit Diagram
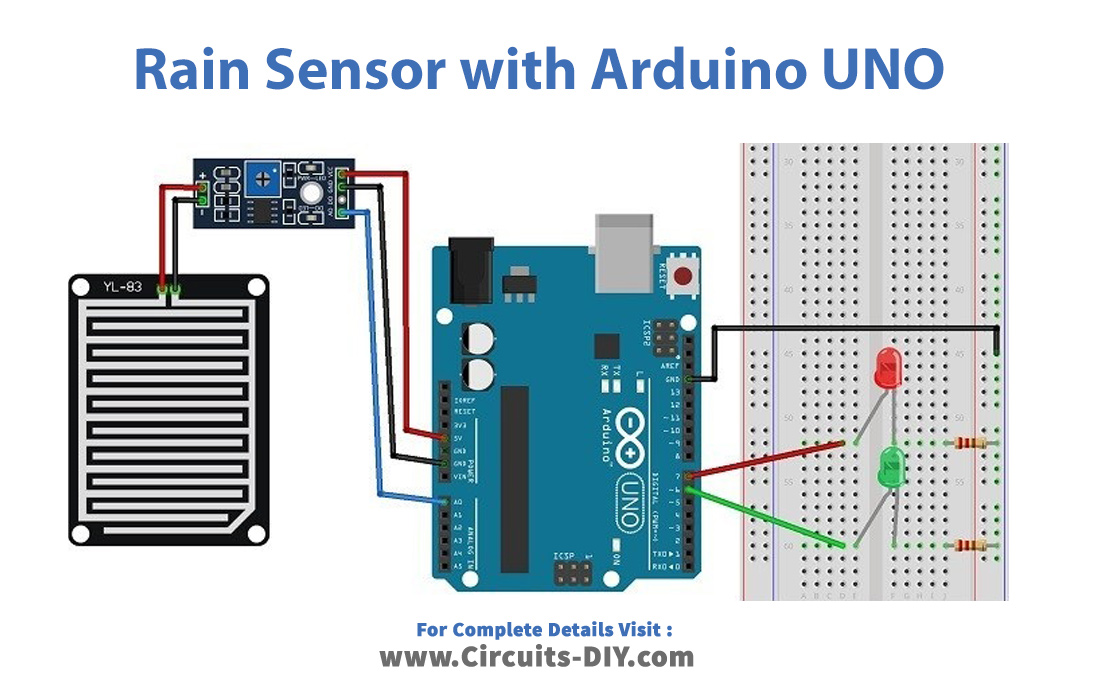
Connection Table
| Arduino | Rain Sensor FC-37 or YL-83 |
|---|---|
| Analog Pin | A0 |
| Digital Pin | D0 |
| GND | GND |
| 5V | VCC |
Arduino Code
// Circuits DIY
 // For Complete Details Visit -> https://circuits-diy.com
int rainPin = A0;
int greenLED = 6;
int redLED = 7;
// you can adjust the threshold value
int thresholdValue = 500;

void setup(){
  pinMode(rainPin, INPUT);
  pinMode(greenLED, OUTPUT);
  pinMode(redLED, OUTPUT);
  digitalWrite(greenLED, LOW);
  digitalWrite(redLED, LOW);
  Serial.begin(9600);
}

void loop() {
  // read the input on analog pin 0:
  int sensorValue = analogRead(rainPin);
  Serial.print(sensorValue);
  if(sensorValue < thresholdValue){
    Serial.println(" - It's wet");
    digitalWrite(greenLED, LOW);
    digitalWrite(redLED, HIGH);
  }
  else {
    Serial.println(" - It's dry");
    digitalWrite(greenLED, HIGH);
    digitalWrite(redLED, LOW);
  }
  delay(500);
}
Working Explanation
Assemble Rain Sensor with Arduino according to the diagram. Now upload the above code in an Arduino Uno. Open the serial monitor. Drop the water on the sensor. You will see that the serial monitor will print its wet and the red LED will start glowing. When there is no water drop green LED will glow.
Code Explanation
- Firstly, we have defined the pins of Arduino that are connected with sensors and LEDs. And, defined the threshold value, adjusted by the potentiometer.
- In the void setup, we have declared that the sensor is working as an input. While LEDs are the output. Initially, both the pins are at a low level. Further, we have initialized the serial monitor
- In the void loop, we have given the function according to which if the sensor value got greater than the threshold value, it prints: It’s wet. And, the red led get high. if the sensor value got decreased than the threshold value, it prints: It’s dry. And, the green led will get high level.