Introduction
Looking to improve your projects with accurate and dependable environmental sensing? With the SHT20 sensor, aid is at hand. This tutorial will guide you about connecting the SHT20 humidity and temperature sensor to an Arduino. With impressive precision and stability, this temperature and humidity sensor can read and show the conditions in your immediate environment.
With the knowledge you gain from this tutorial, you’ll be able to take accurate temperature and humidity readings with an Arduino and interpret the data meaningfully.
So, let’s get right in and use Arduino and temperature and humidity sensors to learn about the fascinating field of environmental sensing!
What is the Temperature Sensor?
Sensors that record, monitor, or indicate changes in temperature by taking readings from their surroundings are known as temperature sensors. Numerous varieties of temperature sensors are available. Some temperature sensors must make physical contact with the thing whose temperature is being measured, whereas others may take that information without really touching the object (non-contact temperature sensors).
The SHT20 is a contact temperature sensor, requiring physical contact with the object’s surface whose temperature is being measured.

Hardware Components
You will require the following hardware for interfacing the SHT20 Temperature and Humidity Sensor with Arduino.
| S.no | Component | Value | Qty |
|---|---|---|---|
| 1. | Arduino UNO | – | 1 |
| 2. | Temperature and Humidity Sensor | SHT20 | 1 |
| 3. | Breadboard | – | 1 |
| 4. | Jumper Wires | – | 1 |
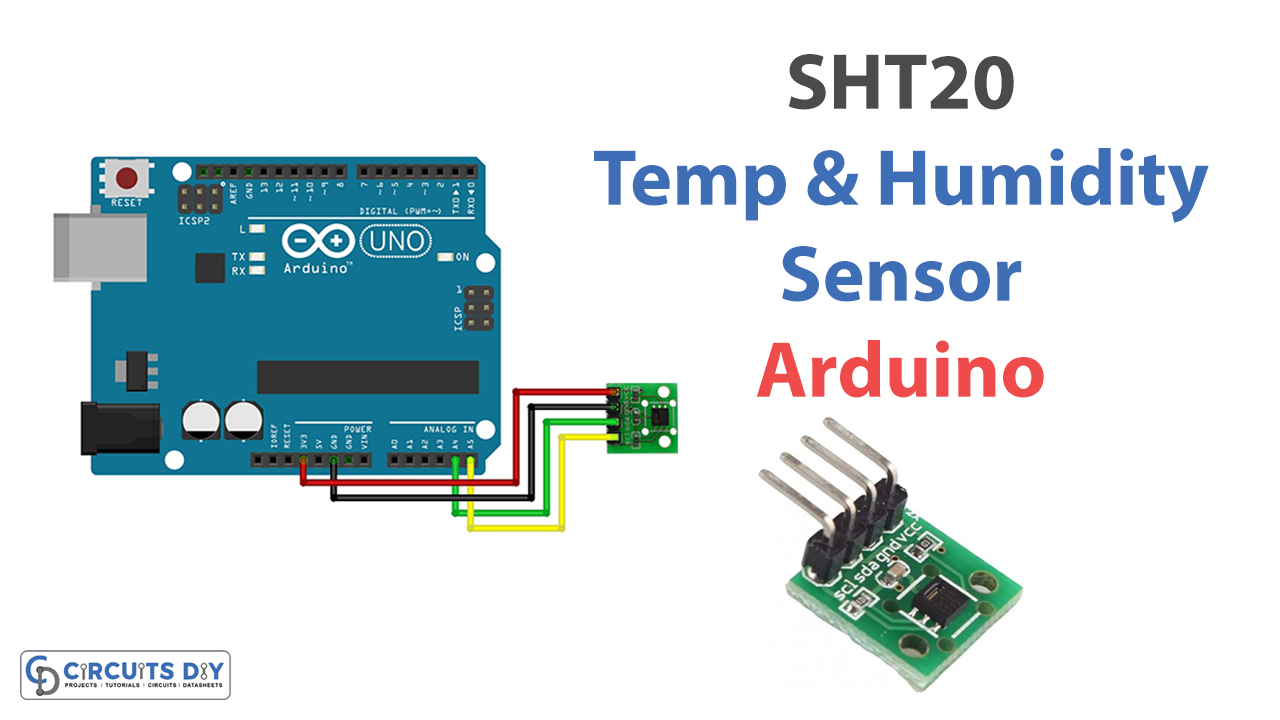
SHT20 Temperature and Humidity Sensor Arduino
Once you have all the components, follow the given steps:
Schematic
Make connections according to the circuit diagram given below.
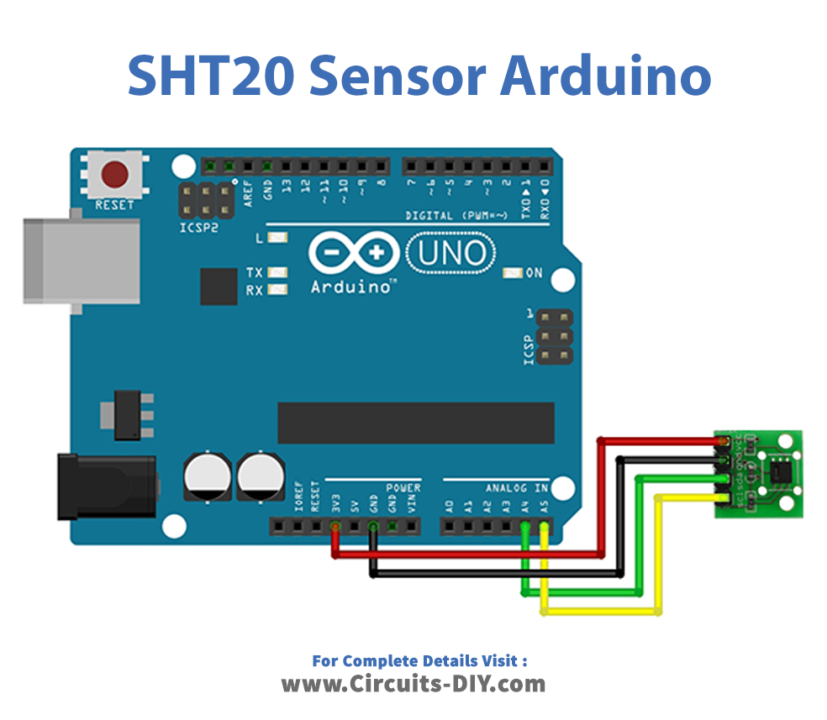
Wiring / Connections
| Arduino | SHT20 Sensor |
|---|---|
| 3.3V | VCC |
| GND | GND |
| A4 | SDA |
| A5 | SCL |
Installing Arduino IDE
First, you need to install Arduino IDE Software from its official website Arduino. Here is a simple step-by-step guide on “How to install Arduino IDE“.
Installing Libraries
Before you start uploading code, download and unzip the following libraries at /Program Files (x86)/Arduino/Libraries (default) to use the sensor with the Arduino board. Here is a simple step-by-step guide on “How to Add Libraries in the Arduino IDE.”
Code
Now copy the following code and upload it to Arduino IDE Software.
#include <Wire.h>
#include "DFRobot_SHT20.h"

DFRobot_SHT20 sht20;

void setup()
{
    Serial.begin(9600);
    Serial.println("SHT20 Example!");
    sht20.initSHT20();                         // Init SHT20 Sensor
    delay(100);
    sht20.checkSHT20();                        // Check SHT20 Sensor
}

void loop()
{
    float humd = sht20.readHumidity();         // Read Humidity
    float temp = sht20.readTemperature();      // Read Temperature
    Serial.print(" Temperature: ");
    Serial.print(temp, 1);
    Serial.print("C");
    Serial.print("\t Humidity: ");
    Serial.print(humd, 1);
    Serial.println("%");
    delay(1000);
}
Let’s Test It
Now that you have built the connections and uploaded the code to Arduino, it’s time to test the circuit!
So, open the serial monitor and once the Arduino gets the power, the readings of temperature and humidity would start appearing on the Serial monitor
Working Explanation
Let’s look at the code explanation to understand the workings of the circuit.
- The code includes the necessary library files and defines a function called “setup” that initializes the sensor and a function called “loop” that reads the temperature and humidity data from the sensor in a continuous loop.
- In the void setup function, the SHT20 sensor is initialized using the “initSHT20” function and then checked for proper operation using the “checkSHT20” function.
- In the void loop function, the temperature and humidity are read using the “readTemperature” and “readHumidity” functions, respectively, and the data is printed to the serial monitor. The code also includes a delay of 1000 milliseconds between readings to allow the sensor time to stabilize.
Applications
- Temperature and humidity measurement
- Environmental monitoring
Conclusion.
We hope you have found this “Interfacing SHT20 Temperature and Humidity Sensor with Arduino Circuit” very useful. If you have any difficulty making it, feel free to ask anything in the comment section.