Introduction
LEDs are an integral part of today’s electronics with their use encompassing the utilization of lighting to the visualization of discrete signals. from a beginner’s perspective, the control of LEDs through an Arduino is an important tool as it serves as a pivotal point in learning and understanding the Arduino Uno.
LEDs are small, powerful lights that are used in many different applications. An Arduino Uno incorporates LEDs for a wide variety of tasks, such as signaling the state of a sensor and validating the state of the switch, etc. In this tutorial, we are going to learn how to run simply on and off LED using the Arduino UNO MCU.
Hardware Components
You will require the following hardware for Arduino LED Blink
| S.no | Component | Value | Qty |
|---|---|---|---|
| 1. | Arduino UNO | – | 1 |
| 2. | USB Cable Type A to B | – | 1 |
| 3. | 9V Power Adapter for Arduino | – | 1 |
| 4. | LED | – | 1 |
| 5. | Resistor | 220Ω | 1 |
| 6. | Breadboard | – | 1 |
| 7. | Jumper Wires | – | 1 |
Steps for LED Blink with Arduino UNO
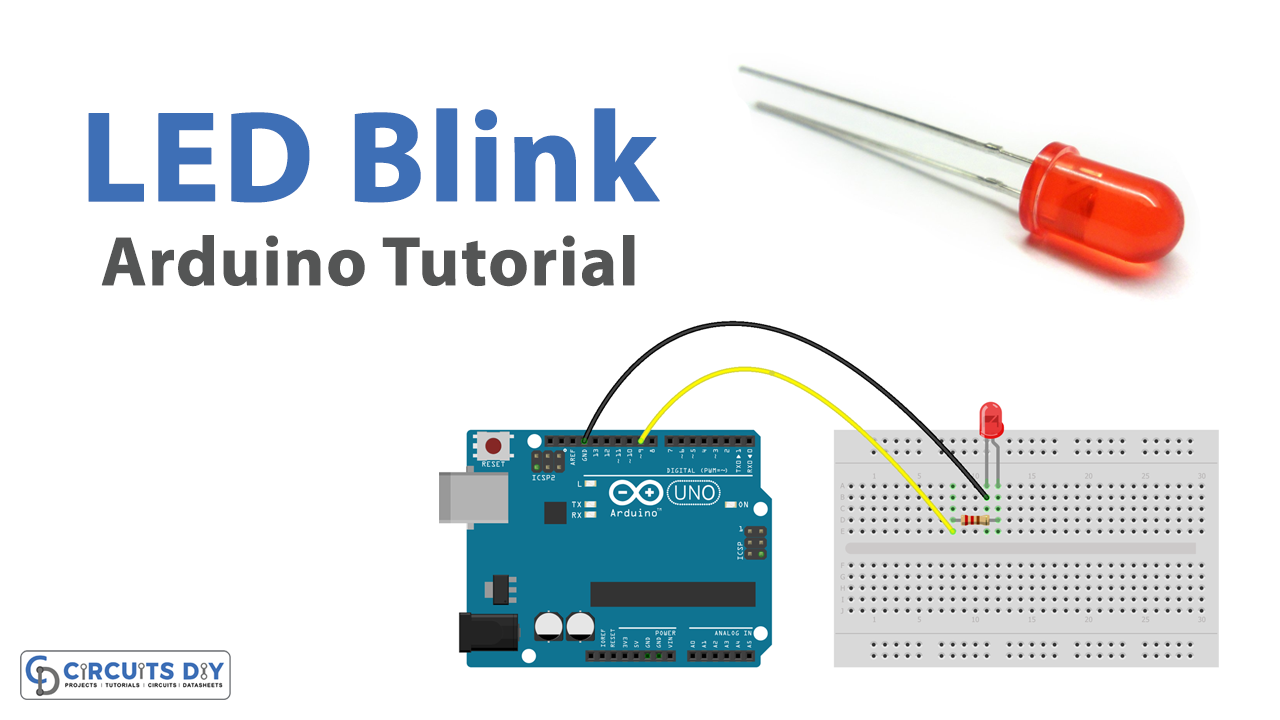
- Connect the LED to the breadboard. Connect the longer leg of the LED to a row on the breadboard, and the shorter leg to a different row.
- Connect the 220-ohm resistor to the breadboard. Connect one end of the resistor to the same row as the shorter leg of the LED, and the other end to a different row.
- Connect one end of a jumper wire to the row with the longer leg of the LED and the other end to a digital pin on the Arduino board.
- Connect the other end of the resistor to a ground pin on the Arduino board.
- Open the Arduino software on your computer.
- Create a new sketch by clicking on “File” and then “New.”
- Set the pin mode for the digital pin that the LED is connected to by adding the following line of code at the beginning of the sketch:
pinMode(pinNumber, OUTPUT); - Replace “pinNumber” with the actual number of the digital pin that the LED is connected to.
- In the loop function, add the following lines of code to turn the LED on and off:
digitalWrite(pinNumber, HIGH);

delay(1000);
digitalWrite(pinNumber, LOW);
delay(1000);- Replace “pinNumber” with the actual number of the digital pin that the LED is connected to.
- Upload the sketch to the Arduino board by clicking the “Upload” button in the Arduino software.
Schematic
Make connections according to the circuit diagram given below.

Wiring / Connections
| Arduino | LED |
|---|---|
| 5V | Long led with 220 resistor |
| GND | GND |
Installing Arduino IDE
First, you need to install Arduino IDE Software from its official website Arduino. Here is a simple step-by-step guide on “How to install Arduino IDE“.
Code
Now copy the following code and upload it to Arduino IDE Software.
void setup() {
  // initialize digital pin LED_BUILTIN as an output.
  pinMode(LED_BUILTIN, OUTPUT);
}

// the loop function runs over and over again forever
void loop() {
  digitalWrite(LED_BUILTIN, HIGH);   // turn the LED on (HIGH is the voltage level)
  delay(1000);                       // wait for a second
  digitalWrite(LED_BUILTIN, LOW);    // turn the LED off by making the voltage LOW
  delay(1000);                       // wait for a second
}
Working Explanation
The code starts by setting the pin mode for the digital pin that the LED is connected to. This is done with the pinMode function, which takes two arguments: the pin number and the mode (either INPUT or OUTPUT). In this case, the pin mode is set to OUTPUT because the LED will be connected to an output pin on the Arduino board.
Next, the code enters a loop that will run indefinitely. Inside the loop, the code uses the digitalWrite function to turn the LED on by setting the pin to a high level (HIGH). It then uses the delay function to pause for one second. After the delay, the code turns the LED off by setting the pin to a low level (LOW) and again using the delay function to pause for one second. This process repeats over and over, resulting in the LED blinking on and off at a rate of one second per blink.
Applications
- Indicating the status of a device
- Debugging
- Visual effects
- User Feedback
- Power conservation
- Security
Conclusion.
We hope you have found this Arduino LED Blink tutorial very simple. If you feel any difficulty in making it feel free to ask anything in the comment section.