Introduction
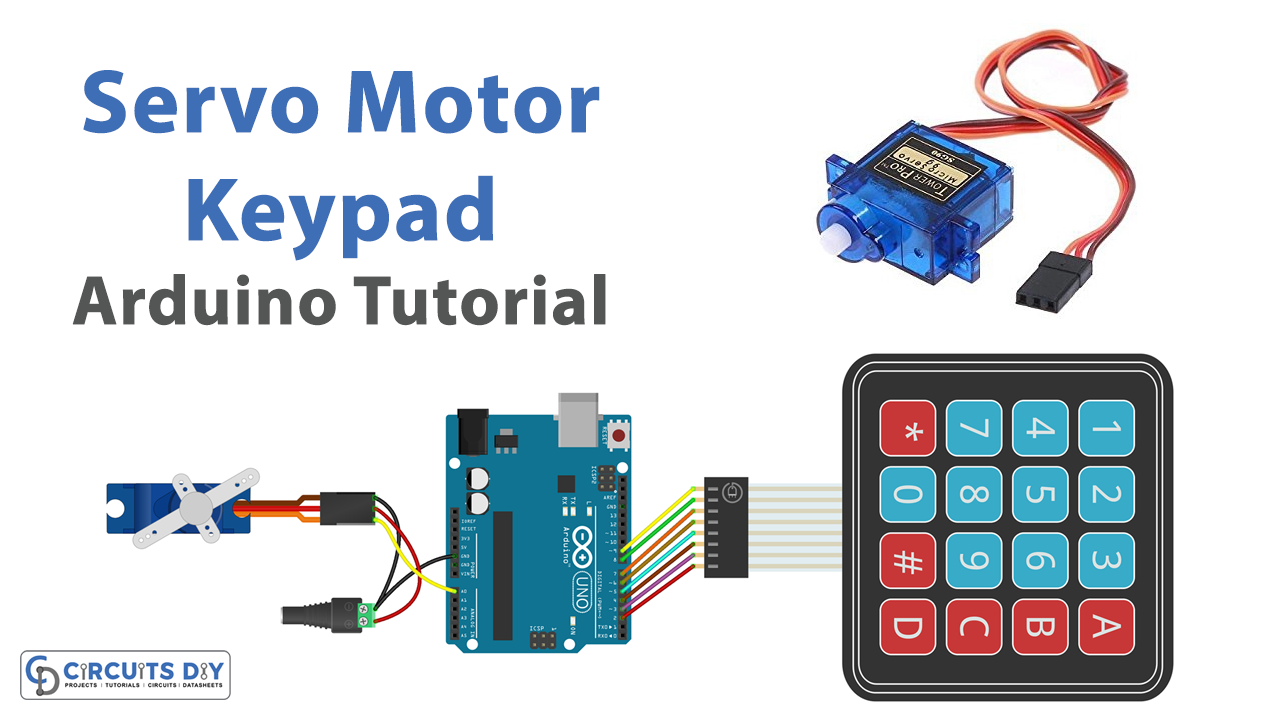
The password-controlled SG51R servo motor system using a 16-key 4×4 membrane switch Arduino keypad and an Arduino UNO microcontroller is a versatile and secure solution for controlling the movement of an SG51R servo motor. The system utilizes an Arduino UNO microcontroller to interface with a keypad that allows for easy input of a password. The keypad is connected to the microcontroller using digital pins and the inputs are read by the Arduino.
The SG51R servo motor is known for its high precision and fast response, making it ideal for applications that require accurate and precise movement. This system is a great choice for projects that require an additional layer of security such as Automated machines, security doors, or any other application where access control is needed.
Hardware Components
You will require the following hardware for Interfacing Arduino – Keypad – Servo Motor with Arduino.
| S.no | Component | Value | Qty |
|---|---|---|---|
| 1. | Arduino UNO | – | 1 |
| 2. | USB Cable Type A to B | – | 1 |
| 3. | Keypad | – | 1 |
| 4. | servo motor | – | 1 |
| 5. | Power Adapter | 5V | 1 |
| 6. | DC Power Jack | – | 1 |
| 7. | Power Adapter for Arduino | 9V | 1 |
| 8. | Jumper Wires | – | 1 |
Servo Motor Keypad with Arduino
- Connect the keypad to the Arduino using the digital pins specified in the keypad’s documentation. Connect the servo motor to digital pin 9 of the Arduino.
- In the Arduino IDE, include the Servo library and the Keypad library at the beginning of the sketch:
#include <Servo.h>
#include <Keypad.h>
- Declare the Servo object, the Keypad object, and variables for storing the keypad input and password:
Servo servo;
const byte ROWS = 4;
const byte COLS = 4;
char keys[ROWS][COLS] = {
  {'1','2','3','A'},
  {'4','5','6','B'},
  {'7','8','9','C'},
  {'*','0','#','D'}
};
byte rowPins[ROWS] = {9, 8, 7, 6};
byte colPins[COLS] = {5, 4, 3, 2};
Keypad keypad = Keypad( makeKeymap(keys), rowPins, colPins, ROWS, COLS );

String password = "1234";
String input = "";
- In the setup() function, attach the servo to its corresponding pin and initialize the serial communication:
servo.attach(9);
Serial.begin(9600);
- In the loop() function, read the keypad input and check it against the password:
char key = keypad.getKey();
if (key != NO_KEY) {
  input += key;
  if (input == password) {
    servo.write(180);
    Serial.println("Unlocked!");
  } else if (input.length() >= password.length()) {
    input = "";
    Serial.println("Incorrect password!");
  }
}
- Send the keypad input and servo position values to the serial monitor:
Serial.print("Keypad input: ");
Serial.println(input);
Serial.print("Servo position: ");
Serial.println(servo.read());
Schematic
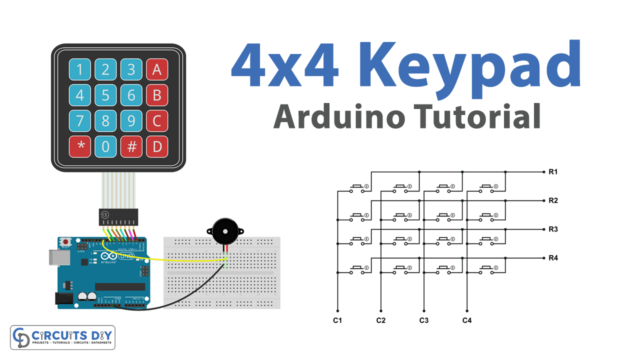
Make connections according to the circuit diagram given below.

Wiring / Connections
| Arduino | 4×4 Keypad | Motor |
|---|---|---|
| 5V | RED | |
| GND | GND | |
| D9 | R1 | |
| D8 | R2 | |
| D7 | R3 | |
| D6 | R4 | |
| D5 | C1 | |
| D4 | C2 | |
| D3 | C3 | |
| D2 | C4 | |
| A0 | YELLOW |
Installing Arduino IDE
First, you need to install Arduino IDE Software from its official website Arduino. Here is a simple step-by-step guide on “How to install Arduino IDE“.
Installing Libraries
Before you start uploading a code, download and unzip the following libraries at /Progam Files(x86)/Arduino/Libraries (default), in order to use the sensor with the Arduino board. Here is a simple step-by-step guide on “How to Add Libraries in Arduino IDE“.
Code
Now copy the following code and upload it to Arduino IDE Software.
#include <Keypad.h>
#include <Servo.h>

#define ROW_NUM    4  // four rows
#define COLUMN_NUM 4  // four columns
#define SERVO_PIN  A0 // // the Arduino pin, which connects to the servo motor

Servo servo; // servo motor

char keys[ROW_NUM][COLUMN_NUM] = {
  {'1', '2', '3', 'A'},
  {'4', '5', '6', 'B'},
  {'7', '8', '9', 'C'},
  {'*', '0', '#', 'D'}
};

byte pin_rows[ROW_NUM] = {9, 8, 7, 6}; //connect to the row pinouts of the keypad
byte pin_column[COLUMN_NUM] = {5, 4, 3, 2}; //connect to the column pinouts of the keypad

Keypad keypad = Keypad( makeKeymap(keys), pin_rows, pin_column, ROW_NUM, COLUMN_NUM );

const String password_1 = "ABC1234"; // change your password here
const String password_2 = "5642B";   // change your password here
const String password_3 = "9765";    // change your password here
String input_password;

int angle = 0; // the current angle of servo motor
unsigned long lastTime;

void setup() {
  Serial.begin(9600);
  input_password.reserve(32); // maximum password size is 32, change if needed

  servo.attach(SERVO_PIN);
  servo.write(0); // rotate servo motor to 0°
  lastTime = millis();
}

void loop() {
  char key = keypad.getKey();

  if (key) {
    Serial.println(key);

    if (key == '*') {
      input_password = ""; // reset the input password
    } else if (key == '#') {
      if (input_password == password_1 || input_password == password_2 || input_password == password_3) {
        Serial.println("The password is correct, rotating Servo Motor to 90°");
        angle = 90;
        servo.write(angle);
        lastTime = millis();
      } else {
        Serial.println("The password is incorrect, try again");
      }

      input_password = ""; // reset the input password
    } else {
      input_password += key; // append new character to input password string
    }
  }

  if (angle == 90 && (millis() - lastTime) > 5000) { // 5 seconds
    angle = 0;
    servo.write(angle);
    Serial.println("Rotating Servo Motor to 0°");
  }
}
Working Explanation
The Arduino sketch starts by including the Servo library and the Keypad library at the beginning of the sketch and declaring the Servo object, the Keypad object, and variables for storing the keypad input and password. The keypad object is attached to the digital pins of the Arduino UNO board, specified in the keypad’s documentation.
The setup() function initializes the serial communication and the servo motor’s pin. In the loop() function, the keypad input is read by calling the getKey() function of the Keypad object. The input is then stored in a variable and it is compared with the predefined password. If the input matches the password, the servo motor rotates to a specific angle by calling the write() function on the Servo object. If the input does not match the password, the input variable is reset and the servo motor remains in its current position.
Applications
- Security doors
- Access control
- Robotics
- Industrial control
- Home Automation
- Medical equipment
Conclusion
We hope you have found this Servo Motor Keypad Circuit very useful. If you feel any difficulty in making it feel free to ask anything in the comment section.