Introduction
A push button-controlled 5V SPDT relay using an Arduino Uno microcontroller is a system that uses a mechanical pushbutton to control the state of an SPDT relay, which is connected to the Arduino board.
The relay is connected to the digital output pin of the Arduino Uno microcontroller, and the pushbutton is connected to a digital input pin. In this setup, the relay can be controlled by the push button. Pressing the pushbutton closes the switch and sends a signal to the relay to change its state, and releasing the button opens the switch and sends the opposite signal, changing the state of the relay back to its previous state.
Hardware Components
You will require the following hardware for relay control with Arduino
| S.no | Component | Value | Qty |
|---|---|---|---|
| 1. | Arduino UNO | – | 1 |
| 2. | USB Cable Type A to B | – | 1 |
| 3. | Button | – | 1 |
| 4. | Relay | – | 1 |
| 5. | Power Adapter | 12V | 1 |
| 6. | DC Power Jack | – | 1 |
| 7. | Power Adapter for Arduino | 9V | 1 |
| 8. | Breadboard | – | 1 |
| 9. | Jumper Wires | – | 1 |
Relay control with Button
- Connect the pushbutton and relay to the Arduino board. The pushbutton should be connected to a digital input pin, and the relay should be connected to a digital output pin. Also, you can connect the VCC of the relay to the 5V of Arduino, and the GND to the GND of the Arduino.
- In the “setup()” function, set the digital input pin for the pushbutton and digital output pin for the relay using the “pinMode()” function and open the serial communication with the computer for monitoring the state of the relay. For example, you could connect the pushbutton to digital pin 2 and the relay to digital pin 3.
void setup() {
  pinMode(2, INPUT);  // Set digital pin 2 as an input for pushbutton
  pinMode(3, OUTPUT); // Set digital pin 3 as an output for relay
  Serial.begin(9600); // Open serial communication at 9600 baud
}
- In the “loop()” function, read the state of the pushbutton using the “digitalRead()” function.
void loop() {
    int buttonState = digitalRead(2);  // Read digital pin 2 for pushbutton
- Check the state of the pushbutton, if the pushbutton is pressed the state will be LOW.
if(buttonState == LOW) {
        // pushbutton is pressed
        digitalWrite(3,HIGH); // turn on the relay
        Serial.println("Relay is ON");
    } else {
        digitalWrite(3,LOW); // turn off the relay
        Serial.println("Relay is OFF");
    }
- The relay will turn on when the button is pressed and turn off when the button is not pressed and will print the state of the relay in the serial monitor.
- End the loop function
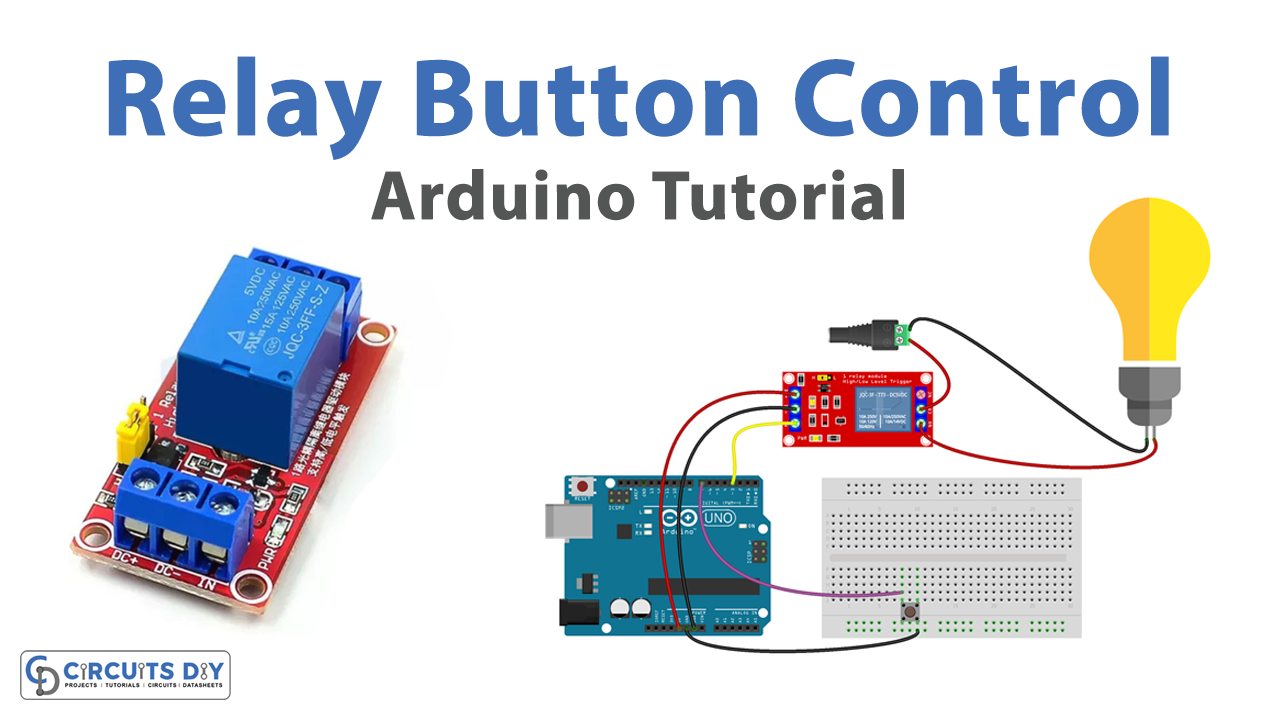
Schematic
Make connections according to the circuit diagram given below.

Wiring / Connections
| Arduino | Relay | Button |
|---|---|---|
| 5V | VCC | |
| GND | GND | GND |
| D3 | SIG | |
| D7 | PIN1 |
Installing Arduino IDE
First, you need to install Arduino IDE Software from its official website Arduino. Here is a simple step-by-step guide on “How to install Arduino IDE“.
Code
Now copy the following code and upload it to Arduino IDE Software.
const int BUTTON_PIN = 7; // Arduino pin connected to button's pin
const int RELAY_PIN  = 3; // Arduino pin connected to relay's pin

void setup() {
  Serial.begin(9600);                // initialize serial
  pinMode(BUTTON_PIN, INPUT_PULLUP); // set arduino pin to input pull-up mode
  pinMode(RELAY_PIN, OUTPUT);        // set arduino pin to output mode
}

void loop() {
  int buttonState = digitalRead(BUTTON_PIN); // read new state

  if (buttonState == LOW) {
    Serial.println("The button is being pressed");
    digitalWrite(RELAY_PIN, HIGH); // turn on
  }
  else
  if (buttonState == HIGH) {
    Serial.println("The button is unpressed");
    digitalWrite(RELAY_PIN, LOW);  // turn off
  }
}
Working Explanation
The core focus of the code is to control the behavior of the relay module using an Arduino Uno microcontroller. It reads the state of a pushbutton connected to a digital pin and uses this information to control the state of a relay module connected to other digital pins. The relay is activated by setting the corresponding pin to a high state and deactivated by setting it to a low state. This causes the relay to switch the load as per its configuration. The code continuously reads the state of the pushbutton and updates the state of the relay in a loop, ensuring that the relay is activated or deactivated in response to the pushbutton input.
Applications
- Home Automation
- Industrial Control
- Automotive
- Robotics
- Safety and Emergency Systems
- Medical Equipment
Conclusion.
We hope you have found this Relay control tutorial very useful. If you feel any difficulty in making it feel free to ask anything in the comment section.