

Introduction
Many times in current automation, you’ve probably seen that practically every robot reverses its route when it encounters a stumbling block. And, if you’re interested in robotics, you’ve probably figured out that this is because of the sensor that is wired in the robot, which is commonly referred to as an ‘ultrasonic sensor.’ Ultrasonic sensors assist in the detection of high-pitched pulse impulses or vibrations that are inaudible to humans. Humans can hear frequencies between 20Hz to 20KHz, as we all know. Ultrasonic sensors can detect values that are outside of this range. So, here in this article, we are going to make Ultrasonic Range Finder With an ATtiny85 (With Shield)
By emitting ultrasonic waves, an ultrasonic sensor can measure the object’s distance. It then converted the inaudible sound waves into electrical signals. As a result, the sensor has two components: a transmitter and a receiver. A piezoelectric crystal emits the waves from the transmitter. While the receiver is being hit by that sound wave.
JLCPCB is the foremost PCB prototype & manufacturing company in china, providing us with the best service we have ever experienced regarding (Quality, Price Service & Time).
Hardware Components
The following components are required to make Ultrasonic Range Finder Circuit
ATtiny85 Pinout
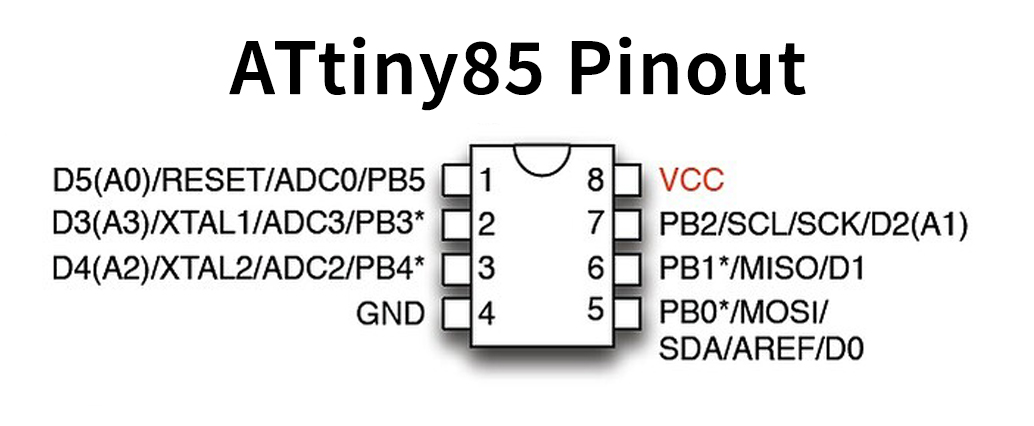
For a detailed description of pinout, dimension features, and specifications download the datasheet of ATtiny85
Ultrasonic Range Finder Circuit
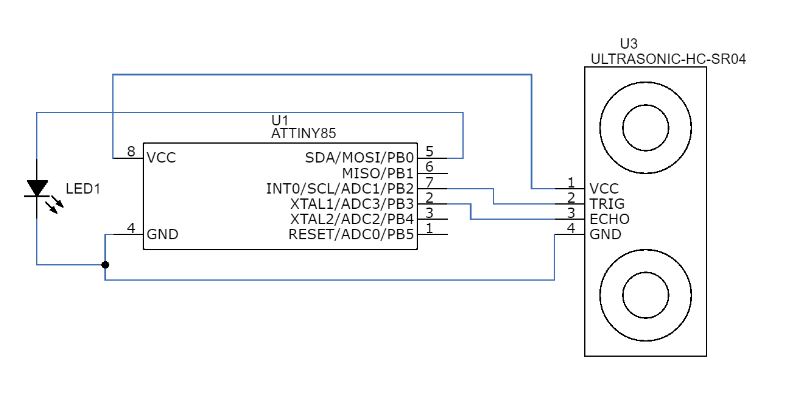
Connection Table
| LED | HC-SR04 Ultrasonic Sensor | ATtint85 |
|---|---|---|
| GND | GND | GND |
| +V | – | PB0 |
| – | Trig | PB2 |
| – | Echo | PB3 |
| – | 5V | VCC |
Code
#include "Ultrasonic.h"

int LED1 = 0;  // LED1 Pin
int TRIG = 2; // Trigger Pin
int ECHO = 3; // Echo Pin
int Range; // The range of the object from the HC-SR04 Ultarsonic Module
int Dist; // The Distance value

Ultrasonic ultrasonic(TRIG,ECHO); // Create and initialize the Ultrasonic object.

void setup() {
  pinMode(LED1, OUTPUT);
  Dist = 2;
}

void loop() {
  //Range = ultrasonic.Ranging(CM); // Range is calculated in Centimeters.
  Range = ultrasonic.Ranging(INC); // Range is calculated in Inches.

  if (Range < Dist) {
    digitalWrite(LED1, HIGH);
  } else if (Range > Dist) {
    digitalWrite(LED1, LOW);
  }
Working Explanation
In this Ultrasonic Range Finder With an ATtiny85 (With Shield) we are using HC-SR04 to find the range. The transmitter and receiver are integrated into the HC-SR04. The sensor’s working voltage is roughly 5 volts. It can theoretically measure distances ranging from 2 cm to 450 cm. However, in practice, it is estimated to be between 2 and 80 cm. The angle of measurement is less than 15 degrees. It can readily run at a 40Hz frequency. The sensor’s operational current range is also less than 15mA.
Now you make connections properly and power the circuit, The LED will light up when an object is within 2 inches of the range finder.
Code Explanation
- First, you need to download and include the library for the ultrasonic sensors.
- Now define the pins that are connected with Arduino. Also, define integers that you will use in the further code.
- In the void loop, define LEd as your output. Also, define your distance range and save it in the pre-defined integer.
- In a void loop, calculate the range in centimeters and in inches. Moreover, provide the condition, that if the distance is greater than that range, LEd will turn On, else, it will remain OFF.
Application and Uses
- Robots, avoid obstacles and detect the path.
- For the devices, that are used to map the objects.
- In the security devices like alarm circuits, etc.
Related posts:
 How to make YouTube Play Button - Electronics Projects
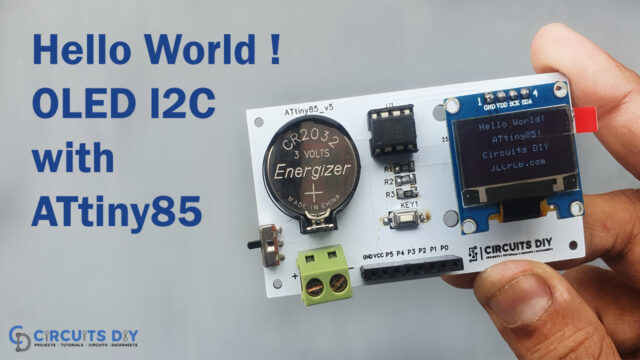 OLED (I2C) with ATtiny85 - Hello World Program
 How to Make a Simple Fire Alarm Circuit using LM358 IC - Electronics Projects
 Sensitive Clap Switch Circuit Using CD4017 Decade Counter
 How To Make a Multi-Level Proximity Sensor Using LM358 Op-Amp IC
 Small Wind Turbine for Home


