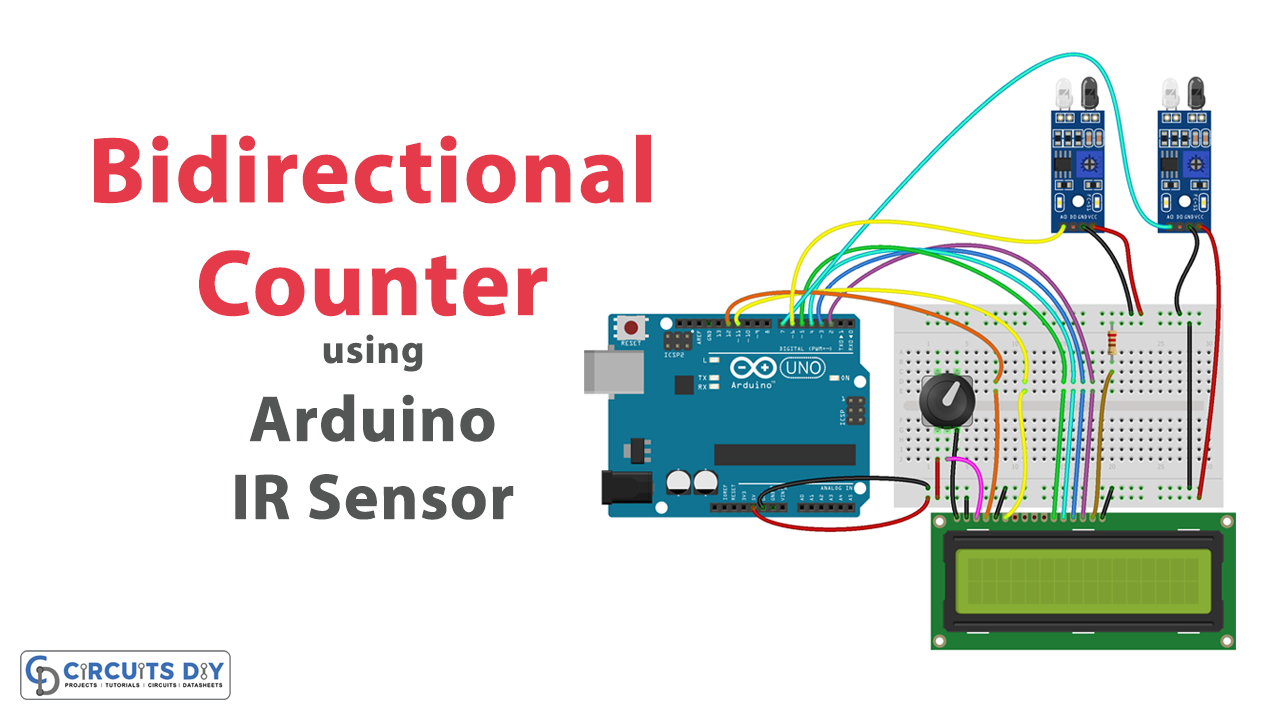
Introduction
A bidirectional counter using Arduino and IR sensors is a project that allows you to count objects or people passing through a certain point in two directions, such as a gate or a door. It uses an IR sensor to detect the presence of an object and an Arduino board to keep track of the counts in both directions. This project has numerous practical applications, such as in security systems, traffic monitoring, and occupancy sensing. By using simple components and basic programming skills, anyone can build this project and have a functional bidirectional counter in no time.
An Arduino IR sensor module is a device that detects the presence of objects or obstacles in its vicinity using infrared light. The module consists of an infrared emitter and receiver pair, which send and receive infrared signals respectively. The emitter sends out a beam of infrared light, which bounces off objects and returns to the receiver. If the receiver detects the reflected light, it indicates the presence of an object in front of the sensor.
Hardware Components
You will require the following hardware for the Bidirectional Counter.
| Components | Value | Qty |
|---|---|---|
| Arduino UNO | – | 1 |
| IR Sensor | – | 1 |
| LCD | 16 X 2 | 1 |
| Potentiometer | – | 1 |
| Resistor | Ω | 1 |
| Breadboard | – | 1 |
| Jumper Wires | – | 1 |
Code Explanation
- First, the necessary libraries are included:
#include <LiquidCrystal.h>- Next, the pin numbers of the LCD are defined:
const int rs = 12, en = 11, d4 = 5, d5 = 4, d6 = 3, d7 = 2;- The input and output pin numbers for the bidirectional counter are defined:
const int in = 6, out = 7;- Variables for storing the values of the inputs and outputs, as well as the net count, are initialized:
int temp = 0, femp = 0, wemp = 0;- An instance of the LiquidCrystal library is created:
LiquidCrystal lcd(rs, en, d4, d5, d6, d7);- The setup function is called, where the LCD is initialized, pins are set as inputs, and the initial values for the display are printed:
void setup() {
  Serial.begin(9600);
  lcd.begin(20,4);
  pinMode(in, INPUT);
  pinMode(out, INPUT);
  pinMode(8, INPUT_PULLUP);
  lcd.print("bidirectional counter");
  lcd.setCursor(0,1);
  lcd.print("IN");
  lcd.setCursor(6,1);
  lcd.print(femp);
  lcd.setCursor(0,2);
  lcd.print("OUT");
  lcd.setCursor(6,2);
  lcd.print(wemp);
  lcd.setCursor(0,3);
  lcd.print("NET");
  lcd.setCursor(6,3);
  lcd.print(temp);
}
- The loop function is called repeatedly, where the input and output values are read, and the net count is updated based on the inputs:
void loop() { int m = digitalRead(8);
if (m == 1) {
if (digitalRead(in) == 1) {
delay(100);
if (digitalRead(out) == 1) {
temp = temp + 1;
femp = femp + 1;
wemp;
lcd.clear();
lcd.print("HOPE SECURITY");
lcd.setCursor(0,1);
lcd.print("IN");
lcd.setCursor(6,1);
lcd.print(femp);
lcd.setCursor(0,2);
lcd.print("OUT");
lcd.setCursor(6,2);
lcd.print(wemp);
lcd.setCursor(0,3);
lcd.print("NET");
lcd.setCursor(6,3);
lcd.print(temp);
delay(1000);
}
}
else if (digitalRead(out) == 1) {
delay(100);
if (digitalRead(in) == 1) {
temp = temp - 1;
femp;
wemp = wemp + 1;
lcd.clear();
lcd.print("HOPE SECURITY");
lcd.setCursor(0,1);
lcd.print("IN");
lcd.setCursor(6,1);
lcd.print(femp);
lcd.setCursor(0,2);
lcd.print("OUT");
lcd.setCursor(6,2);
lcd.print(wemp);
lcd.setCursor(0,3);
lcd.print("NET");
lcd.setCursor(6,3);
lcd.print(temp);
delay(1000);
}
}
}
else
{lcd.clear();
lcd.print("HOPE SECURITY");
femp=0;
temp=0;
wemp=0;
lcd.setCursor(0,1);
lcd.print("IN");
lcd.setCursor(6,1);
lcd.print(femp);
lcd.setCursor(0,2);
lcd.print("OUT");
lcd.setCursor(6,2);
lcd.print(wemp);
lcd.setCursor(0,3);
lcd.print("NET");
lcd.setCursor(6,3);
lcd.print(temp);
}
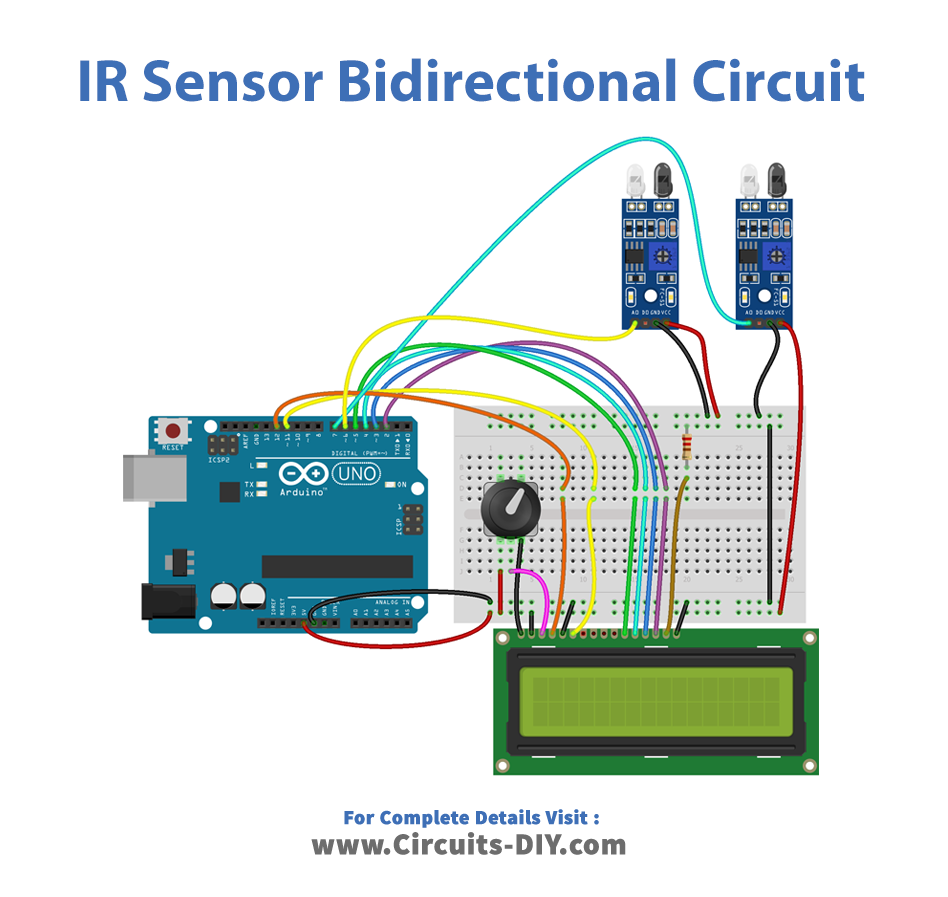
}Schematic
Make connections according to the circuit diagram given below.
Installing Arduino IDE
First, you need to install Arduino IDE Software from its official website Arduino. Here is a simple step-by-step guide on “How to install Arduino IDE“.
Installing Libraries
Before you start uploading a code, download and unzip the following libraries at /Program Files(x86)/Arduino/Libraries (default), in order to use the sensor with the Arduino board. Here is a simple step-by-step guide on “How to Add Libraries in Arduino IDE“.
Code
Now copy the following code and upload it to Arduino IDE Software.
#include<LiquidCrystal.h>

const int rs=12, en=11, d4=5, d5=4, d6=3, d7=2 ;
const int in=6,out=7;
int temp=0,femp=0,wemp=0;
LiquidCrystal lcd(rs,en,d4,d5,d6,d7);

void setup() {
 Serial.begin(9600);
lcd.begin(20,4);
pinMode(in,INPUT);
pinMode(out,INPUT);
pinMode(8, INPUT_PULLUP);
lcd.print("bidirectional counter");
 lcd.setCursor(0,1);
    lcd.print("IN");
    lcd.setCursor(6,1);
     lcd.print(femp);

     lcd.setCursor(0,2);
    lcd.print("OUT");
    lcd.setCursor(6,2);
    lcd.print(wemp);

    lcd.setCursor(0,3);
    lcd.print("NET");
    lcd.setCursor(6,3);
     lcd.print(temp);

}
void loop() {
int m=digitalRead(8);

  if(m==1)
  {

   if(digitalRead(in)==1)
  {
    delay(100);
    if(digitalRead(out)==1)
  {
    temp=temp+1;
    femp=femp+1;
    wemp;

    lcd.clear();

lcd.print("HOPE SECURITY");
 lcd.setCursor(0,1);
    lcd.print("IN");
    lcd.setCursor(6,1);
     lcd.print(femp);

     lcd.setCursor(0,2);
    lcd.print("OUT");
    lcd.setCursor(6,2);
    lcd.print(wemp);

    lcd.setCursor(0,3);
    lcd.print("NET");
    lcd.setCursor(6,3);
     lcd.print(temp);

     delay(1000);
  }}
else if(digitalRead(out)==1)
{   delay(100);
       if(digitalRead(in)==1)
{
   temp=temp-1;
   femp;
    wemp=wemp+1;
  // if(temp<=0)
   //{temp=0;
   //wemp=0;
   //femp=0;
 //    }

   lcd.clear();
lcd.print("HOPE SECURITY");
lcd.setCursor(0,1);
    lcd.print("IN");
    lcd.setCursor(6,1);
     lcd.print(femp);

     lcd.setCursor(0,2);
    lcd.print("OUT");
    lcd.setCursor(6,2);
    lcd.print(wemp);

    lcd.setCursor(0,3);
    lcd.print("NET");
    lcd.setCursor(6,3);
     lcd.print(temp);

      delay(1000);
}}
}
else
{lcd.clear();
lcd.print("HOPE SECURITY");

femp=0;
temp=0;
wemp=0;
lcd.setCursor(0,1);
    lcd.print("IN");
    lcd.setCursor(6,1);
     lcd.print(femp);
     lcd.setCursor(0,2);
    lcd.print("OUT");
    lcd.setCursor(6,2);
    lcd.print(wemp);
    lcd.setCursor(0,3);
    lcd.print("NET");
    lcd.setCursor(6,3);
     lcd.print(temp);
}
}
Working Explanation
The code sets up the LCD and initializes the input and output pins. It then enters the main loop where it checks the value of a button connected to pin 8. If the button is pressed, the code checks the values of the input and output pins.
If the input pin is high and the output pin is also high, it increments the total count and the count of inputs and leaves the count of outputs unchanged. If the output pin is high and the input pin is also high, it decrements the total count and the count of outputs and leaves the count of inputs unchanged. If the button is not pressed, the code clears the LCD display and resets all the count variables to zero.
Applications
- Traffic monitoring
- People counting in public places
- Inventory management
- Automatic door control
- Security systems
- Smart home automation.
Related posts:
 Ultrasonic Sensor with Relay - Arduino Tutorial
 Non-Contact Thermometer using MLX90614 & Arduino
 How to Interface BME680 Environmental Sensor with Arduino UNO
 How to Interface LEDs with IR Remote Control - Arduino UNO
 Interfacing Adafruit Bluefruit LE SPI Friend with Arduino
 Simple Variometer for Paragliding using Arduino