Introduction
As the world has evolved, the techniques of measuring various weather parameters have also evolved. Now, weather stations use different kinds of sensors to measure temperature, pressure, and humidity. Moreover, these sensors just not only help to predict the weather but also plays a vital role in the agriculture industry. For example, humidity sensors help to check the humidity of the soil. Consequently, helping the farmers to run stops the water. Similarly, pressure sensors can check the flow of water. Therefore, favorably assist the planters.
In the same vein, temperature sensors indicate the temperatures of the environment. As a result, it benefits the weather stations. However, there is one more sensor that is BME280. It has the significance to measure all of the above-mentioned parameters. Therefore, In this tutorial, we are going to interface “BME280 Sensor with Arduino UNO”.
An Overview about BME280
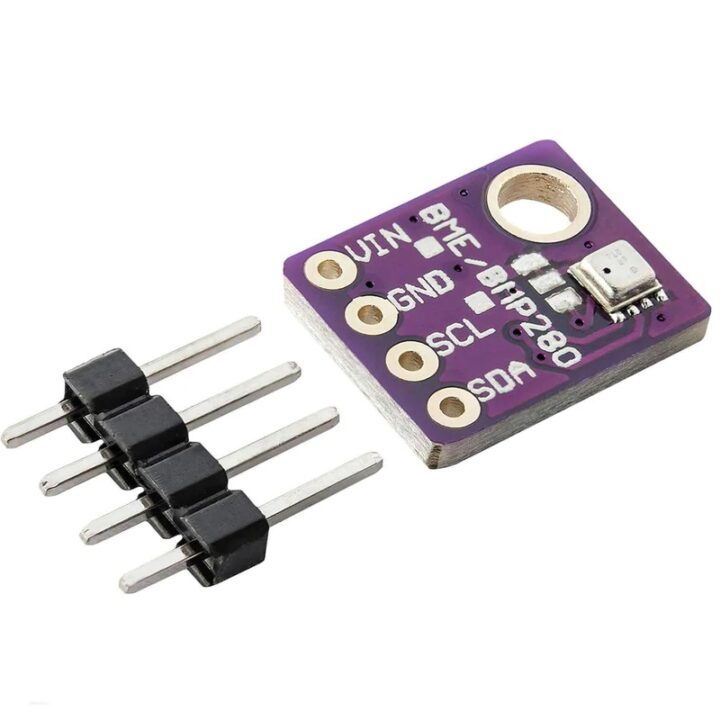
BME280 is the sensor designed to measure temperature, humidity, and pressure developed for compact devices. Consequently, adopted by wearable devices. It consumes very low power. Therefore, it can be favorable for agriculture purposes. Also, the sensor works over a wide range of temperatures with great accuracy.
Hardware Required
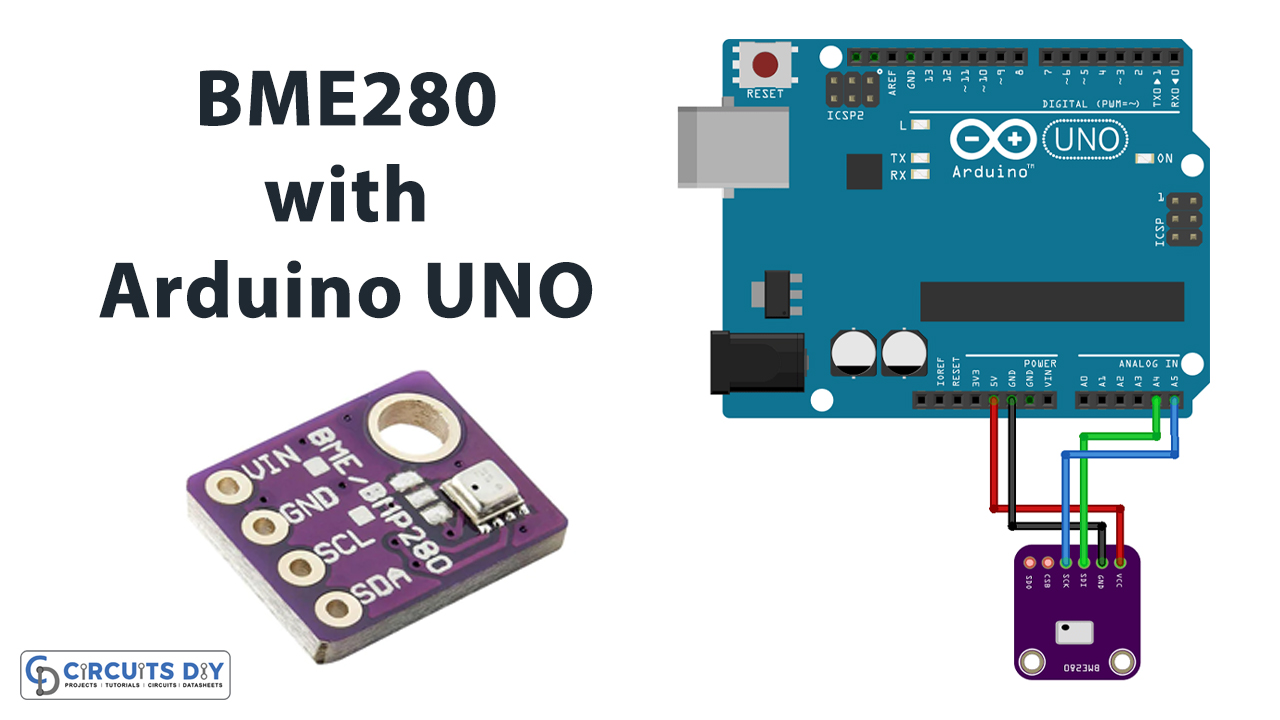
Circuit Diagram
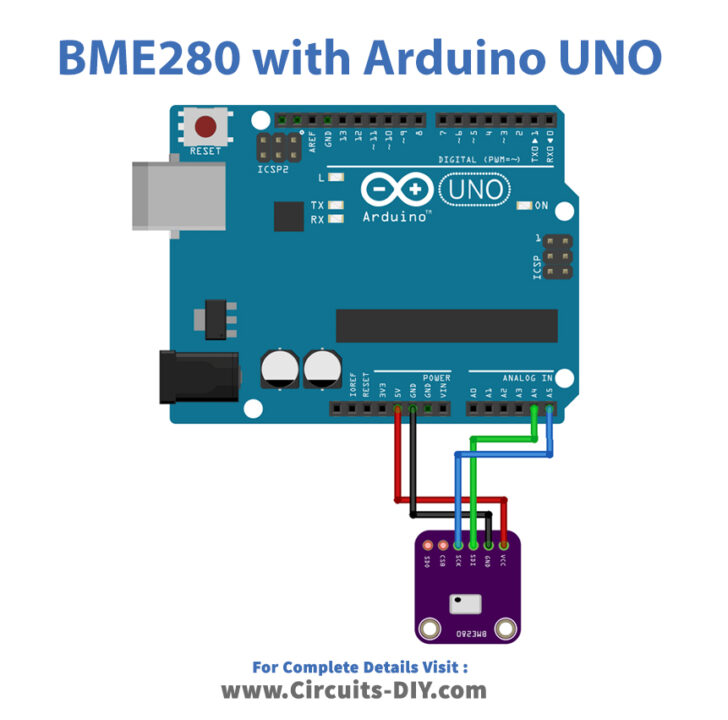
Connection Table
| Arduino | BME280 Sensor |
|---|---|
| 5V | Vin |
| GND | GND |
| A5 | SCL |
| A4 | SDA |
Arduino Code
// Circuits DIY
// For Complete Details Visit -> https://circuits-diy.com
#include <Wire.h>
#include <SPI.h>
#include <Adafruit_Sensor.h>
#include <Adafruit_BME280.h>

#define BME_SCK 13
#define BME_MISO 12
#define BME_MOSI 11
#define BME_CS 10

#define SEALEVELPRESSURE_HPA (1013.25)

Adafruit_BME280 bme; // I2C
//Adafruit_BME280 bme(BME_CS); // hardware SPI
//Adafruit_BME280 bme(BME_CS, BME_MOSI, BME_MISO, BME_SCK); // software SPI

unsigned long delayTime;

void setup() {
  Serial.begin(9600);
  Serial.println(F("BME280 test"));

  bool status;

  // default settings
  // (you can also pass in a Wire library object like &Wire2)
  status = bme.begin();
  if (!status) {
    Serial.println("Could not find a valid BME280 sensor, check wiring!");
    while (1);
  }

  Serial.println("-- Default Test --");
  delayTime = 1000;

  Serial.println();
}


void loop() {
  printValues();
  delay(delayTime);
}


void printValues() {
  Serial.print("Temperature = ");
  Serial.print(bme.readTemperature());
  Serial.println(" *C");

  // Convert temperature to Fahrenheit
  /*Serial.print("Temperature = ");
  Serial.print(1.8 * bme.readTemperature() + 32);
  Serial.println(" *F");*/

  Serial.print("Pressure = ");
  Serial.print(bme.readPressure() / 100.0F);
  Serial.println(" hPa");

  Serial.print("Approx. Altitude = ");
  Serial.print(bme.readAltitude(SEALEVELPRESSURE_HPA));
  Serial.println(" m");

  Serial.print("Humidity = ");
  Serial.print(bme.readHumidity());
  Serial.println(" %");

  Serial.println();
}
Working Explanation
Connect the BME280 Sensor with Arduino UNO according to the schematic. Upload the above-mentioned code in the Arduino. Further, Open the Serial monitor. You’ll see the readings of temperature, pressure, and humidity on the Serial monitor. The readings of these parameters will get change according to the environmental setting.
Code Explanation
- First, the code has installed the mandatory library, needed for the sensor. You can download the library from:
https://github.com/adafruit/Adafruit_BME280_Library/blob/master/Adafruit_BME280.h
- Further, it has defined the SPI pins that are connected with digital pins of an Arduino UNO. Also, it has created the variable SEALEVELPRESSURE_HPA to saves the sea level. Hence, also measures the altitude of temperature. The code then created the Adafruit_BM280 object named bme
- In the void setup, first, there is the command Serial. begin, to start serial communication. Moreover, it has initialized the sensor. In the void loop, the code is added to read the values from the sensor and print the results on the Serial monitor. The command bme.readTemperature( ) has been used to read the temperature. After that, bme.readHumidity ( ) has been used to read the humidity. Further, bme. readPressure ( ) has been used to read the pressure. In adiition, bme.readAltitude( SEALEVELPRESSURE, HPA) has been used to measure pressure at sea level.
Application and Uses
- In the weather station system
- For farming and agriculture techniques
- In wearable devices