
Introduction
These days, there are so many gases around us, some of which are quite dangerous. Hence, it is, therefore, absolutely necessary to identify or monitor certain gases. and, here comes the gas sensor. There are many different types of gas sensors; for example, an MQ-9 gas sensor which we will be discussing and interfacing today with the Arduino.
Gas sensors, however, require more frequent calibration than many other types of sensors because of the ongoing interaction they have with air and other gases. Hence, this article also discusses the calibration of the gas sensor we are using.
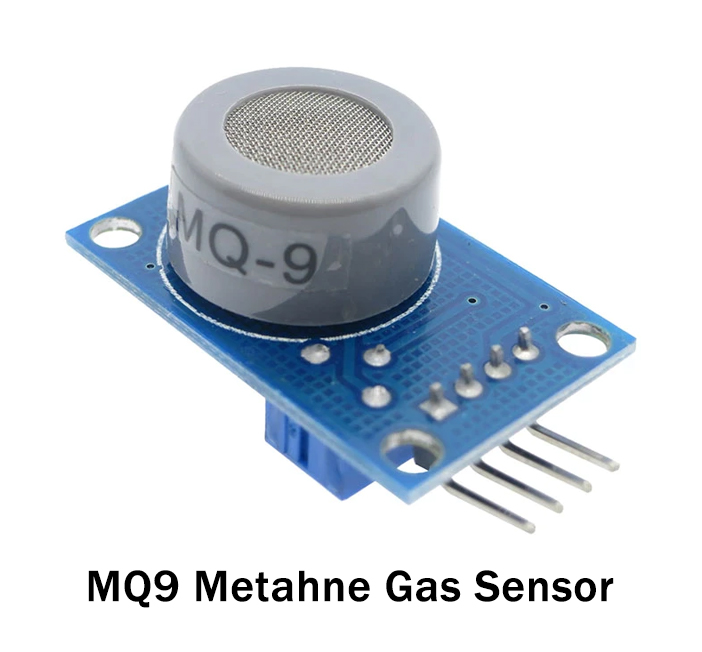
What is an MQ-9 Gas Sensor?
Electronic devices that can detect and distinguish between several types of gases are generally called sensors They are frequently employed to monitor gas concentrations and identify explosive or dangerous gases. The MQ9 is one of those sensors for the detection of methane, carbon monoxide, and LPG gas. Tin dioxide serves as the sensor’s sensing component. Tin dioxide, or SnO2, has a reduced conductivity in clean air.
Hardware Components
You will require the following hardware for Interfacing MQ-9 Gas Sensor with Arduino.
| S.no | Component | Value | Qty |
|---|---|---|---|
| 1. | Arduino | UNO | 1 |
| 2. | Gas Sensor | MQ9 | 1 |
| 3. | Red LED | – | 1 |
| 4. | Resistor | 1KΩ | 1 |
| 5. | Breadboard | – | 1 |
| 6. | Jumper Wires | – | 1 |
Steps Making MQ9 Gas Sensor
To Interface MQ-9 Gas Sensor with Arduino, get the above mention components and then follow the following steps:
Schematic
Make connections according to the circuit diagram given below.
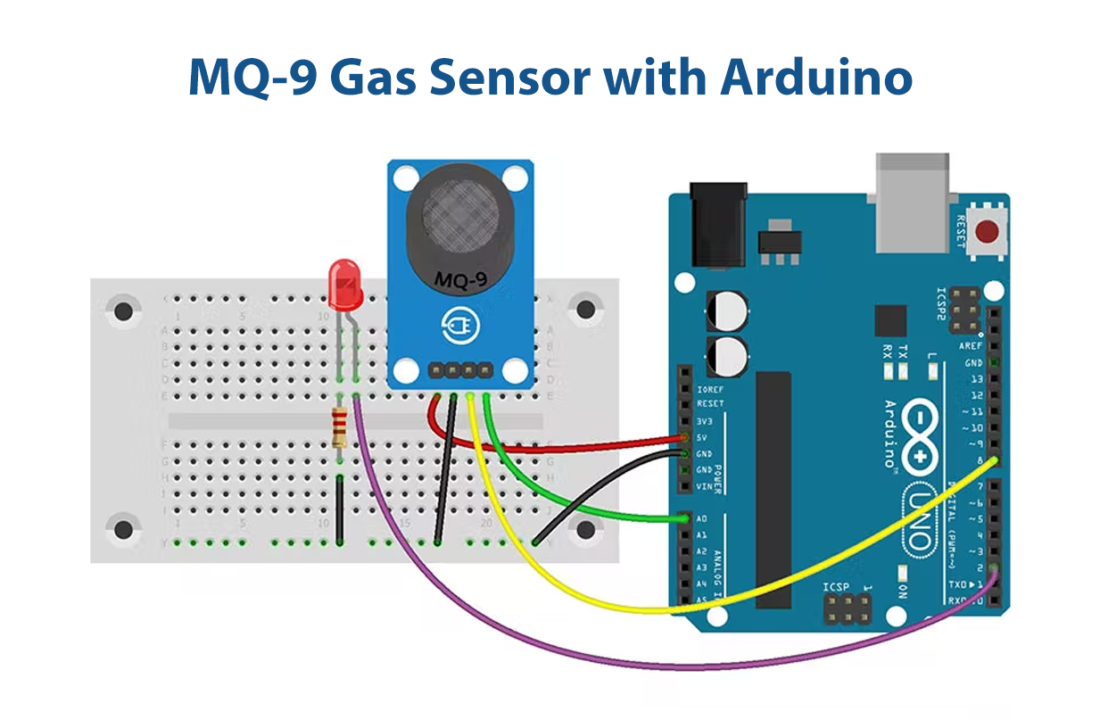
Wiring / Connections
| Arduino | MQ9 Gas Sensor | LED |
|---|---|---|
| 5V | VCC | |
| GND | GND | -ve with Resistor |
| A0 | A0 | |
| D8 | D0 | |
| D2 | Positive |
Installing Arduino IDE
First, you need to install Arduino IDE Software from its official website Arduino. Here is a simple step-by-step guide on “How to install Arduino IDE“.
Code
Now copy the following code and upload it to Arduino IDE Software.
void setup() {
 Serial.begin(9600);
}
void loop() {
 float sensor_volt;
 float RS_air; //  Rs in clean air
 float R0;  // R0 in 1000 ppm LPG
 float sensorValue;
//Average
   for(int x = 0 ; x < 100 ; x++)
 {
   sensorValue = sensorValue + analogRead(A0);
 }
 sensorValue = sensorValue/100.0;
//-----------------------------------------------/
 sensor_volt = (sensorValue/1024)*5.0;
 RS_air = (5.0-sensor_volt)/sensor_volt; // Depend on RL on yor module
 R0 = RS_air/9.9; // According to MQ9 datasheet table
 Serial.print("sensor_volt = ");
 Serial.print(sensor_volt);
 Serial.println("V");
 Serial.print("R0 = ");
 Serial.println(R0);
 delay(1000);
}
const int LED = 2;
const int DO = 8;
void setup() {
Serial.begin(9600);
pinMode(LED, OUTPUT);
pinMode(DO, INPUT);
}
void loop() {
int alarm = 0;
float sensor_volt;
float RS_gas;
float ratio;
//-Replace the name "R0" with the value of R0 in the demo of First Test -/
float R0 = 0.91;
int sensorValue = analogRead(A0);
sensor_volt = ((float)sensorValue / 1024) * 5.0;
RS_gas = (5.0 - sensor_volt) / sensor_volt; // Depend on RL on yor module
ratio = RS_gas / R0; // ratio = RS/R0
//------------------------------------------------------------/
Serial.print("sensor_volt = ");
Serial.println(sensor_volt);
Serial.print("RS_ratio = ");
Serial.println(RS_gas);
Serial.print("Rs/R0 = ");
Serial.println(ratio);
Serial.print("\n\n");
alarm = digitalRead(DO);
if (alarm == 1) digitalWrite(LED, HIGH);
else if (alarm == 0) digitalWrite(LED, LOW);
delay(1000);
}Let’s Test It
Now you need to test the circuit. Once you calibrate the circuit. Upload the second code, and see the gas concentration coming on the serial monitor. If the sensor detects CO, etc; the LED would turn on.
Working Explanation
To get the working circuit, you need to dig into the code. You can see there are two codes given above. The first code is for calibration purposes. After preheating in clean air, upload the first code and wait for R0 to achieve a fixed value for roughly 15 minutes. We averaged 100 data to provide a steady number. After that, we take a sensor voltage reading and determine Rs using RL resistance. R0 can then be determined.
Once you get the R0, placed that in the second code. Based on the resistance ratio, this sensor calculates the gas concentration. The resistance of the sensor lowers when a carbon monoxide, coal, liquefied, or combustible gas sensor is present in the air, and an LED turns on.
Know that, Rs is sensor resistance at 1000 ppm LPG concentration, and R0 is the Internal resistance of the sensor which changes by gas concentration.
Applications
- Industrial gas detectors
- Combustible gas monitoring devices; etc
Conclusion.
We hope you have found this How to Calibrate & Use MQ9 Gas Sensor w/ Arduino Circuit very useful. If you feel any difficulty in making it feel free to ask anything in the comment section.
Related posts:
 Ultrasonic Sensor with Piezo Buzzer - Arduino Tutorial
 BME280 Temperature, Humidity, and Pressure Sensor Module with Arduino
 How to Interface Rain Sensor FC-37 or YL-83 with Arduino UNO
 How to generate Super Mario Theme Song by using Arduino Microcontroller
 HTTPS Request - Arduino Tutorial
 Controlling DC, Stepper & Servo with L293D Motor Driver