Introduction
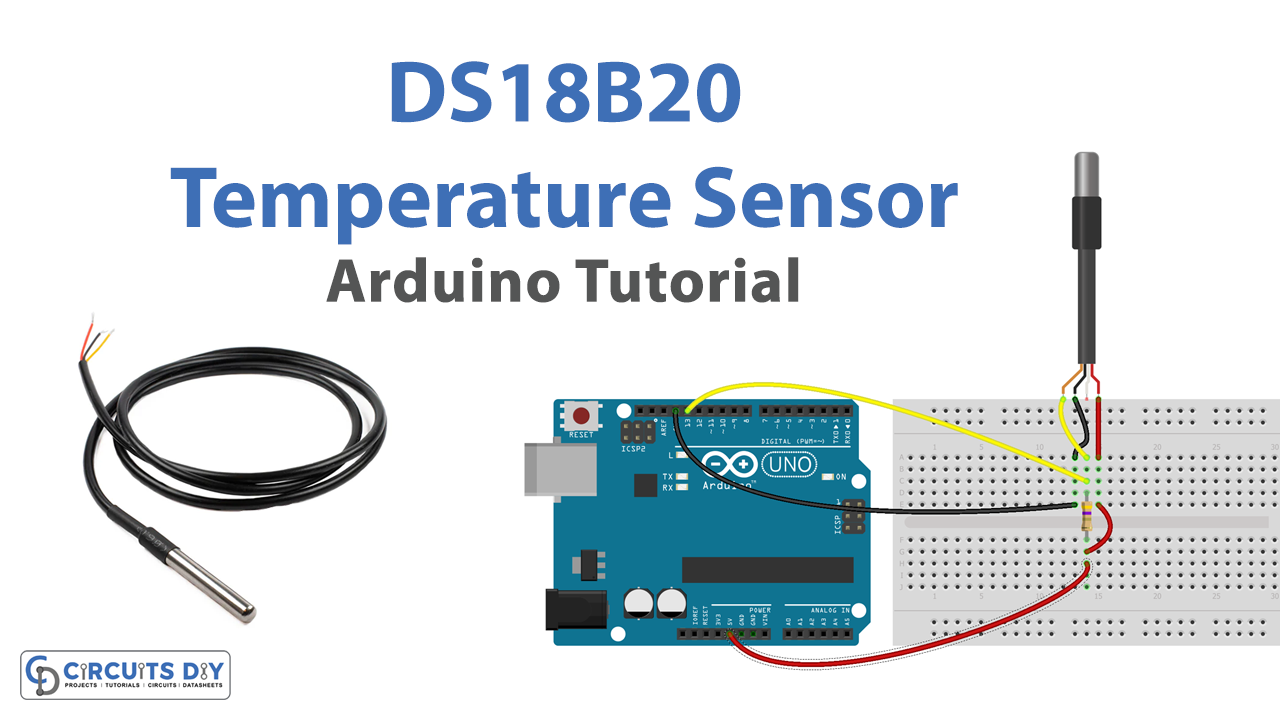
Interfacing a DS18B20 temperature sensor with an Arduino UNO microcontroller is a process of connecting the temperature sensor to the microcontroller and programming it to receive, interpret and display the temperature data. This project is a great introduction to the world of IoT and temperature sensing, as it showcases how a simple temperature sensor can be integrated with a microcontroller to create a functional temperature monitoring system.
The DS18B20 is a digital temperature sensor manufactured by Maxim Integrated. It uses a 1-Wire interface, allowing multiple DS18B20s to be connected together and read using a single microcontroller pin. The DS18B20 has a range of -55°C to +125°C with a resolution of 0.0625°C. It can be powered by a 3.0V to 5.5V supply and provides a digital output representing the temperature in its output. This makes it easy to interface with microcontrollers, including Arduino, for a wide range of temperature-sensing applications.
Hardware Components
You will require the following hardware for Temperature Sensor with Arduino.
| S.no | Component | Value | Qty |
|---|---|---|---|
| 1. | Arduino UNO | – | 1 |
| 2. | USB Cable Type A to B | – | 1 |
| 3. | Temperature Sensor | DS18B20 | 1 |
| 4. | Power Adapter for Arduino | 9V | 1 |
| 5. | Resistor | 4.7kΩ | 1 |
| 6. | Breadboard | – | 1 |
| 7. | Jumper Wires | – | 1 |
Temperature Sensor with Arduino
Step 1: Include the necessary library for the DS18B20 temperature sensor
#include <OneWire.h>
#include <DallasTemperature.h>
Step 2: Define the Pin number where the temperature sensor is connected
#define ONE_WIRE_BUS 2 // the pin number connected to the DS18B20 data pin
Step 3: Create an object for the OneWire library and the DallasTemperature library
OneWire oneWire(ONE_WIRE_BUS);
DallasTemperature sensors(&oneWire);
Step 4: In the setup function, initialize the Serial Monitor and start the temperature sensors
void setup() {
  Serial.begin(9600);
  sensors.begin();
}
Step 5: In the loop function, request a temperature reading from the sensors and print the temperature reading in both Fahrenheit and Celsius on the Serial Monitor.
void loop() {
  sensors.requestTemperatures();
  float temperatureC = sensors.getTempCByIndex(0);
  float temperatureF = (temperatureC * 9.0 / 5.0) + 32.0;
  Serial.print("Temperature in Celsius : ");
  Serial.print(temperatureC);
  Serial.print(" C");
  Serial.print("\tTemperature in Fahrenheit : ");
  Serial.print(temperatureF);
  Serial.println(" F");
  delay(1000);
}
Schematic
Make connections according to the circuit diagram given below.
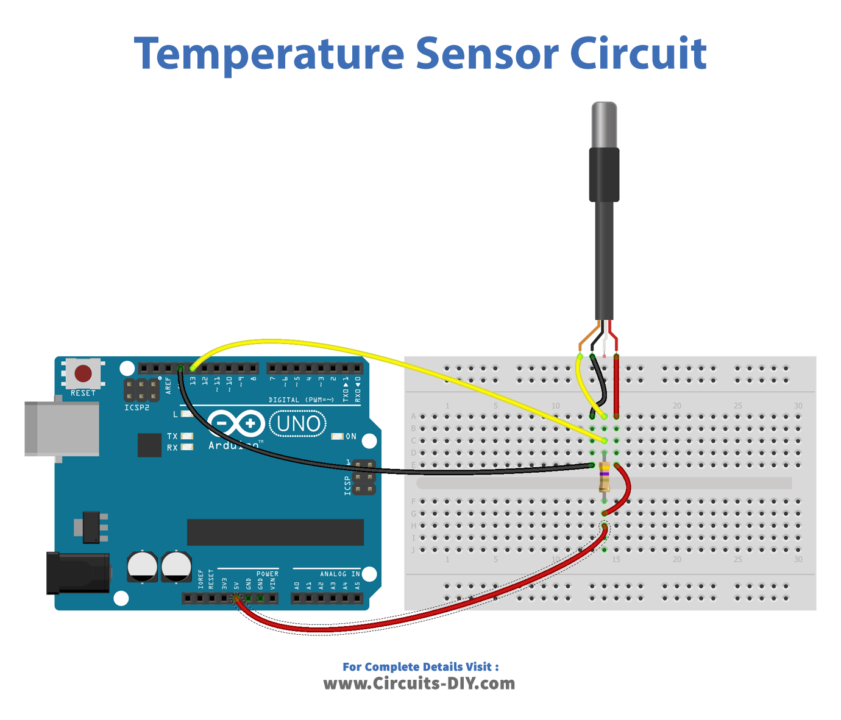
Wiring / Connections
| Arduino | Temperature Sensor |
|---|---|
| 5V | VCC |
| GND | GND |
| D13 | ANALOG OUT |
Installing Arduino IDE
First, you need to install Arduino IDE Software from its official website Arduino. Here is a simple step-by-step guide on “How to install Arduino IDE“.
Installing Libraries
Before you start uploading a code, download and unzip the following libraries at /Progam Files(x86)/Arduino/Libraries (default), in order to use the sensor with the Arduino board. Here is a simple step-by-step guide on “How to Add Libraries in Arduino IDE“.
Code
Now copy the following code and upload it to Arduino IDE Software.
#include <OneWire.h>
#include <DallasTemperature.h>

const int SENSOR_PIN = 13; // Arduino pin connected to DS18B20 sensor's DQ pin

OneWire oneWire(SENSOR_PIN);         // setup a oneWire instance
DallasTemperature tempSensor(&oneWire); // pass oneWire to DallasTemperature library

float tempCelsius;    // temperature in Celsius
float tempFahrenheit; // temperature in Fahrenheit

void setup()
{
  Serial.begin(9600); // initialize serial
  tempSensor.begin();    // initialize the sensor
}

void loop()
{
  tempSensor.requestTemperatures();             // send the command to get temperatures
  tempCelsius = tempSensor.getTempCByIndex(0);  // read temperature in Celsius
  tempFahrenheit = tempCelsius * 9 / 5 + 32; // convert Celsius to Fahrenheit

  Serial.print("Temperature: ");
  Serial.print(tempCelsius);    // print the temperature in Celsius
  Serial.print("°C");
  Serial.print("  ~  ");        // separator between Celsius and Fahrenheit
  Serial.print(tempFahrenheit); // print the temperature in Fahrenheit
  Serial.println("°F");

  delay(500);
}
Working Explanation
The code includes the necessary libraries (OneWire.h and DallasTemperature.h) for the DS18B20 sensor. A constant integer SENSOR_PIN is defined with the value 13, representing the Arduino pin connected to the DS18B20 sensor’s data (DQ) pin. The OneWire instance is set up with the SENSOR_PIN and then passed to the DallasTemperature library to create a tempSensor object.
The variables tempCelsius and tempFahrenheit are defined to store the temperature readings in Celsius and Fahrenheit, respectively. The setup function initializes the serial communication and the temperature sensor. The loop function requests temperature readings from the sensor, converts the reading from Celsius to Fahrenheit, and prints both temperature readings to the serial monitor. A delay of 500 milliseconds is added to the end of the loop.
Applications
- HVAC control systems
- Medical equipment
- Industrial process control
- Agriculture monitoring
- Weather stations
- Greenhouses
- Food and beverage storage monitoring.
Conclusion.
We hope you have found this Temperature Sensor Circuit very useful. If you feel any difficulty in making it feel free to ask anything in the comment section.