Introduction
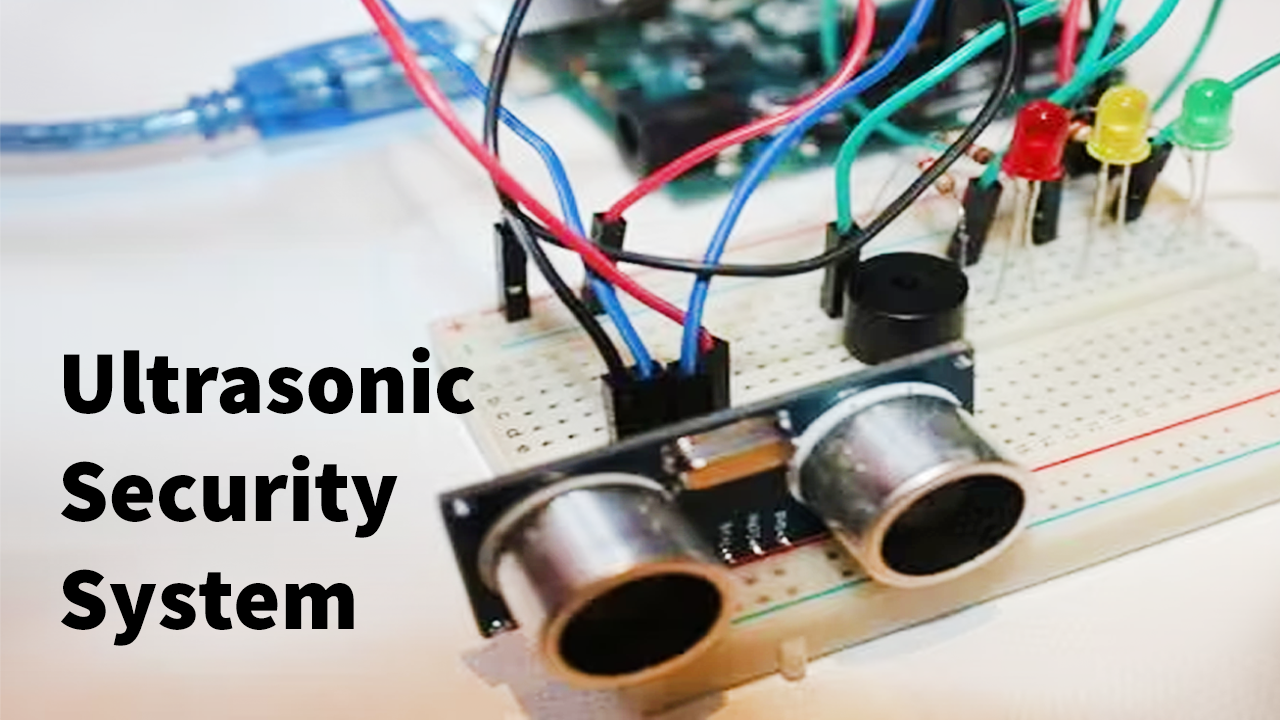
In this tutorial, we are going to show you how to create an “Ultrasonic Security System” using an HC-SR04 sensor and Arduino UNO. This system will send an alarm if it detects any movement in its defined range (0- 5cm). So let’s get started!
Hardware Components
You will require the following hardware to make Ultrasonic Security System.
| S.no | Component | Value | Qty |
|---|---|---|---|
| 1. | Arduino | UNO | 1 |
| 2. | Ultrasonic Sensor | HC-SR04 | 1 |
| 3. | Resistor | 220 Ω | 3 |
| 4. | Buzzer | – | 1 |
| 5. | LED | – | 3 |
| 6. | Breadboard | Mini | 1 |
| 7. | Jumper Wires | – | 1 |
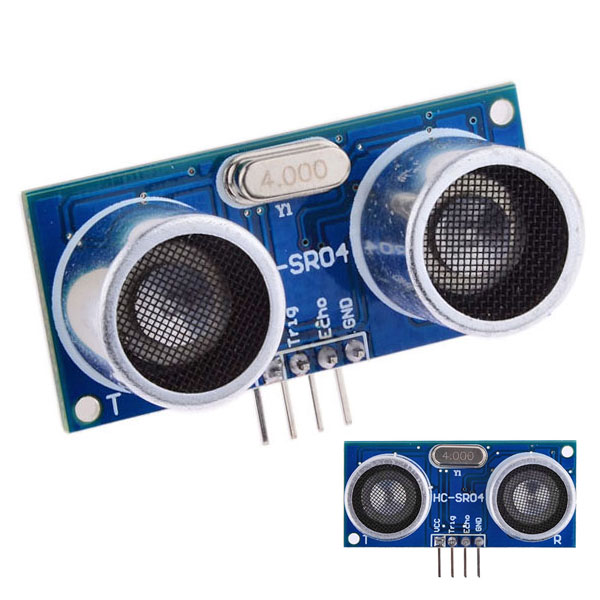
Ultrasonic Sensor HC-SR04
HC-SR04 is an ultrasonic distance sensor. This economical sensor provides a sensing range of 2 to 400cm of non-contact measurement functionality with an accuracy that can reach up to 3mm. Each HC-SR04 module includes an ultrasonic transmitter, a receiver, and a control circuit.
There are only 4 pins that you need to know about the HC-SR04 Sensor: VCC (Power), GND (Ground), Trig (Trigger), and Echo (Receive), and. You will find this sensor very simple and easy to set up and use for your next DIY projects & tutorials.
HC-SR04 Ultrasonic Features
- Operating voltage: +5V
- Theoretical Measuring Distance: 2cm to 450cm
- Practical Measuring Distance: 2cm to 80cm
- Accuracy: 3mm
- Measuring angle covered: <15°
- Operating Current: <15mA
- Operating Frequency: 40Hz
HC-SR04 Ultrasonic Pinout
| Pin Number | Pin Name | Description |
| 1 | Vcc | The Vcc pin powers the sensor, typically with +5V |
| 2 | Trigger | The trigger pin is an Input pin. This pin has to be kept high for 10us to initialize measurement by sending a US wave. |
| 3 | Echo | The echo pin is an Output pin. This pin goes high for a period of time which will be equal to the time taken for the US wave to return back to the sensor. |
| 4 | Ground | This pin is connected to the Ground of the system. |
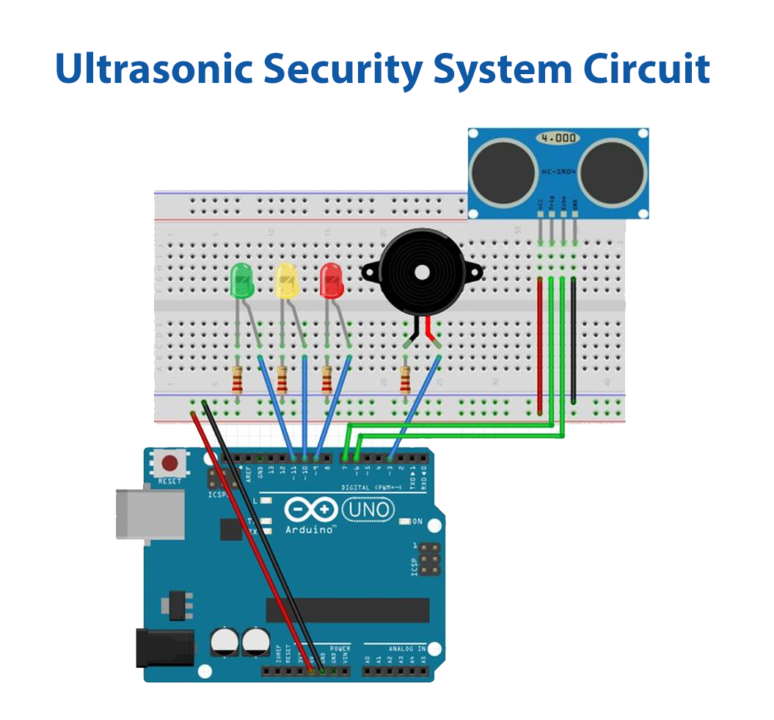
Ultrasonic Security System with Arduino
Working for this project is very simple here we have used 3 LEDs and one buzzer and obviously one ultrasonic sensor to detect distance. When an object is in a range of less than 50cm then Green LED will glow, Similarly, when the object is less than 20cm Yellow LED will glow and if its less than 5cm then Red LED glows and it also alarm buzzer sound
Installing Arduino IDE
First, you need to install Arduino IDE Software from its official website Arduino. Here is a simple step-by-step guide on “How to install Arduino IDE“.
Code
Then copy the following code and upload it to Arduino UNO
#define trigPin 2
#define echoPin 3
#define LEDlampRed 4
#define LEDlampYellow 5
#define LEDlampGreen 6
#define soundbuzzer 7
int sound = 500;

void setup() {
  Serial.begin (9600);
  pinMode(trigPin, OUTPUT);
  pinMode(echoPin, INPUT);
  pinMode(LEDlampRed, OUTPUT);
  pinMode(LEDlampYellow, OUTPUT);
  pinMode(LEDlampGreen, OUTPUT);
  pinMode(soundbuzzer, OUTPUT);
}
void loop() {
  long durationindigit, distanceincm;
  digitalWrite(trigPin, LOW);
  delayMicroseconds(2);
  digitalWrite(trigPin, HIGH);
  delayMicroseconds(10);
  digitalWrite(trigPin, LOW);
  durationindigit = pulseIn(echoPin, HIGH);
  distanceincm = (durationindigit/5) / 29.1;

  if (distanceincm < 50) {
      digitalWrite(LEDlampGreen, HIGH);
}
  else {
      digitalWrite(LEDlampGreen, LOW);
  }

  if (distance < 20) {
    digitalWrite(LEDlampYellow, HIGH);
}
  else {
    digitalWrite(LEDlampYellow,LOW);
  }
  if (distance < 5) {
    digitalWrite(LEDlampRed, HIGH);
    sound = 1000;
}
  else {
    digitalWrite(LEDlampRed,LOW);
  }

  if (distanceincm > 5 || distanceinsm <= 0){
    Serial.println("Outside the permissible range of distances");
    noTone(soundbuzzer);
  }
  else {
    Serial.print(distance);
    Serial.println(" cm");
    tone(buzzer, sound);
  }

  delay(300);
}
Schematic
Now Carefully make connections according to the circuit diagram given below.
Finally, let’s power up Arduino UNO and test this “Ultrasonic Security System” circuit. We hope you found this project useful. If you feel any difficulty in making it feel free to ask anything in the comment section.