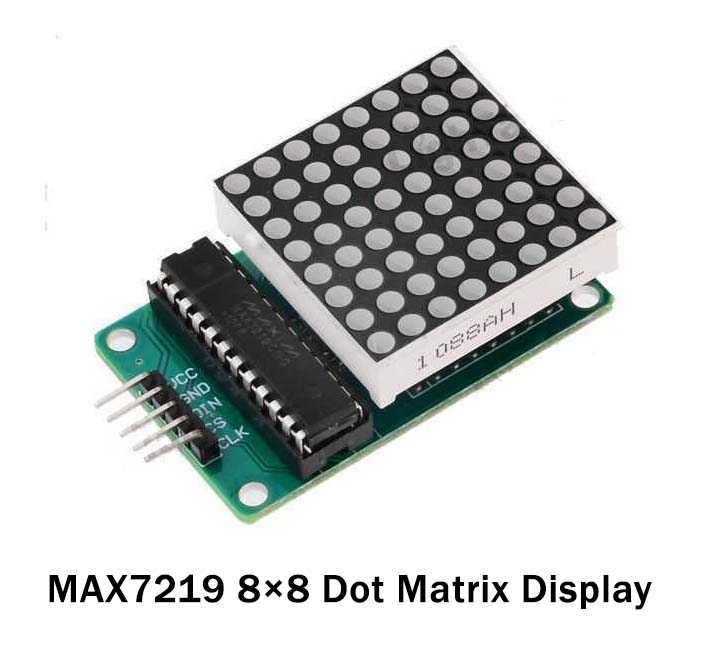
Are you getting bored and is searching for a fascinating project that can develop your interest, or motivates you? If yes, then this tutorial is surely for you. Because, In this tutorial, we are going to interface ” Dot Matrix MAX7219 with Arduino UNO”. 8*8 dot matrix means that it includes 8 rows and 8 columns, hence it has 64 LEDs. Moreover, it contains the MAX7219 integrated circuit that is designed to control the dot matrix. This IC is practically used to convert serial data into parallel data. Basically, it is used as a shift register. The serial data first got sent to the IC. And, once all the data got sent, the IC enables the CS pin. Besides the dot matrix, the IC can be used in memory units, digital systems, networking, etc.
Specifications about MAX7219
- The operating voltage range is from 4Volts to 5.5Volts.
- It draws the minimum current of 100mA.
- It draws the maximum current of 500mA.
- The operating temperature range is from 0 degrees Celsius to 70 degrees Celsius.
- The storage temperature range is from -65 degrees Celsius to 150 degrees Celsius.
Hardware Required
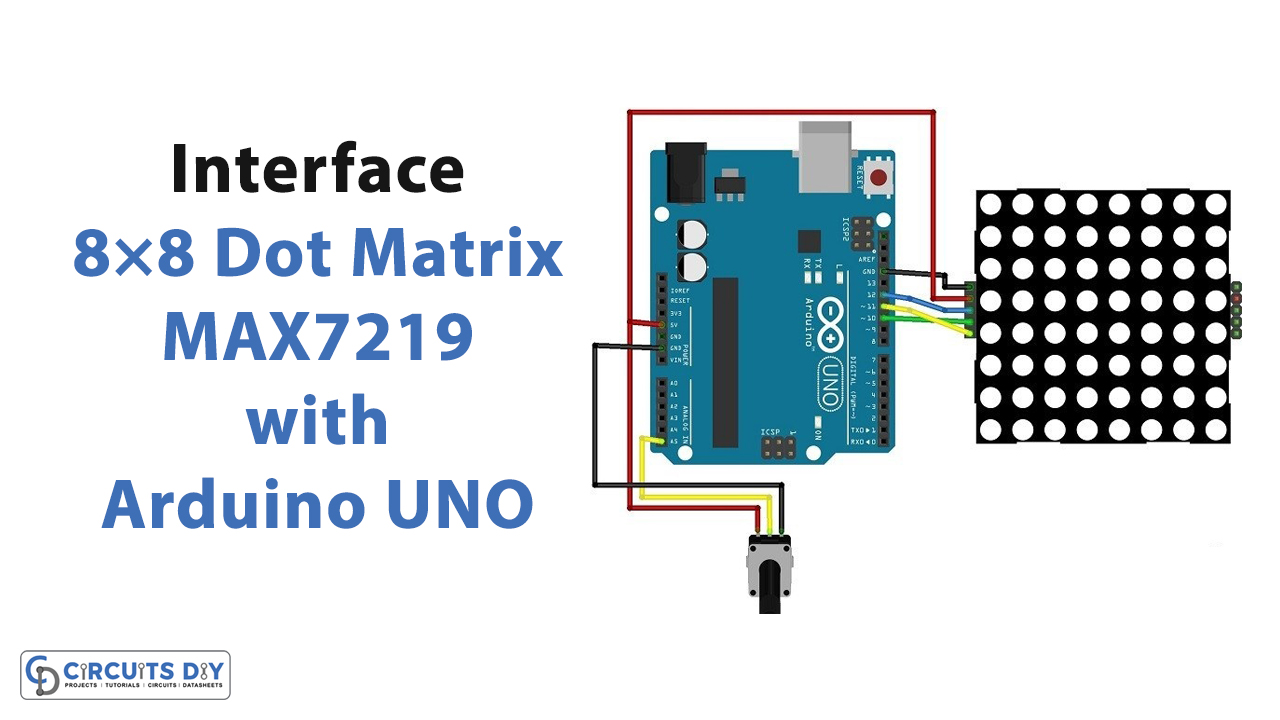
Circuit Diagram

Connection Table
| Arduino | Dot Matrix MAX7219 |
|---|---|
| GND | GND |
| 5V | VCC |
| Digital Pin12 | Din |
| Digital Pin11 | CS |
| Digital Pin10 | CLK |
Arduino Code
// Circuits DIY
 // For Complete Details Visit -> https://circuits-diy.com
#include "LedControl.h"
#include "binary.h"

/*
 DIN connects to pin 12
 CLK connects to pin 11
 CS connects to pin 10
*/
LedControl lc=LedControl(12,11,10,1);

// delay time between faces
unsigned long delaytime=1000;

// happy face
byte hf[8]= {B00111100,B01000010,B10100101,B10000001,B10100101,B10011001,B01000010,B00111100};
// neutral face
byte nf[8]={B00111100, B01000010,B10100101,B10000001,B10111101,B10000001,B01000010,B00111100};
// sad face
byte sf[8]= {B00111100,B01000010,B10100101,B10000001,B10011001,B10100101,B01000010,B00111100};

void setup() {
  lc.shutdown(0,false);
  // Set brightness to a medium value
  lc.setIntensity(0,8);
  // Clear the display
  lc.clearDisplay(0);
}

void drawFaces(){
  // Display sad face
  lc.setRow(0,0,sf[0]);
  lc.setRow(0,1,sf[1]);
  lc.setRow(0,2,sf[2]);
  lc.setRow(0,3,sf[3]);
  lc.setRow(0,4,sf[4]);
  lc.setRow(0,5,sf[5]);
  lc.setRow(0,6,sf[6]);
  lc.setRow(0,7,sf[7]);
  delay(delaytime);

  // Display neutral face
  lc.setRow(0,0,nf[0]);
  lc.setRow(0,1,nf[1]);
  lc.setRow(0,2,nf[2]);
  lc.setRow(0,3,nf[3]);
  lc.setRow(0,4,nf[4]);
  lc.setRow(0,5,nf[5]);
  lc.setRow(0,6,nf[6]);
  lc.setRow(0,7,nf[7]);
  delay(delaytime);

  // Display happy face
  lc.setRow(0,0,hf[0]);
  lc.setRow(0,1,hf[1]);
  lc.setRow(0,2,hf[2]);
  lc.setRow(0,3,hf[3]);
  lc.setRow(0,4,hf[4]);
  lc.setRow(0,5,hf[5]);
  lc.setRow(0,6,hf[6]);
  lc.setRow(0,7,hf[7]);
  delay(delaytime);
}

void loop(){
  drawFaces();
}
Working Explanation
Interface 8×8 Dot Matrix MAX7219 with Arduino UNO in a way described in the circuit diagram. Copy the above-mentioned code and paste it into the Arduino IDE. Upload the code in Arduino UNO. Finally, you will see the happy, neutral, and sad faces with some delay between the faces.
Code Explanation
- First download the ledControl library for MAX7219. Also, download the binary library. You can download the libraries from:
https://github.com/wayoda/LedControl
- Include both the libraries. Now, define the pins of an Arduino that are connected with the module by using LedControl( ). Then, give the delay time to display different smiley faces. Then, define the bytes to make happy, neutral, and sad faces.
- In the void setup, to turn ON the display use the command lc.shutdown(0, false). Use lc. setIntensity( ) to set the brightness of a display. Clear the display by using lc.cleardisplay( ) command. Now, make the program to draw different faces. Use lc.setRow(add, row, value) to set the dimension so that it would make the sad, neutral, and happy faces. Make sure to provide some delay between the faces.
- in the void loop, call the function drawfaces( ) to see the faces on a display.