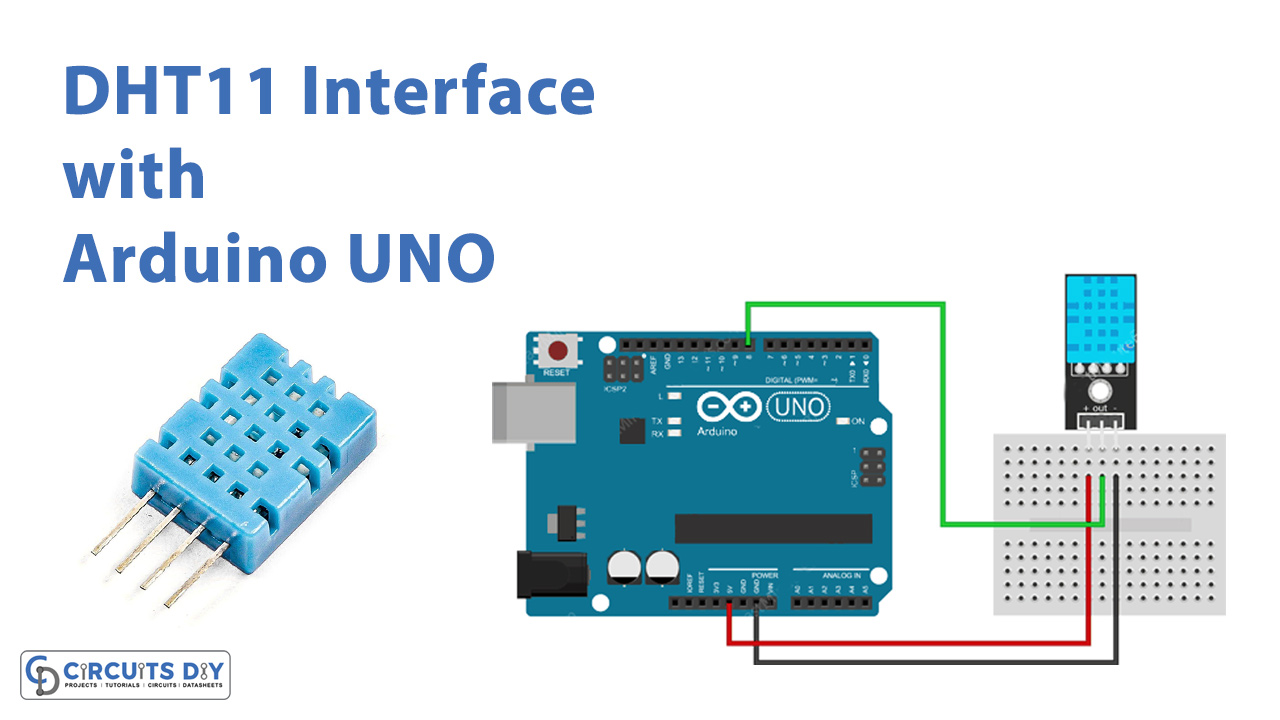
Introduction
Every one of us knows how necessary is to measure environmental temperature and humidity. But, the more significant aspect is to measure these factors with low cost and higher reliability. So, the designers have designed many temperature sensors for this purpose. Certainly, DHT11 is one of the most promising and inexpensive sensors in the electronics market. Therefore, In this tutorial, we are going to interface “DHT11 Module with Arduino UNO”.
How temperature Sensor Works?
The sensor has two electrodes. And, there is a moisture substrate sandwiched between those electrodes. when this substrate released the ions, the conductivity gets increases between the electrodes. Hence, the change of resistance is inversely proportional to the relative humidity around. The higher the humidity, the lower the resistance. Similarly, the lower humidity would increase resistance.
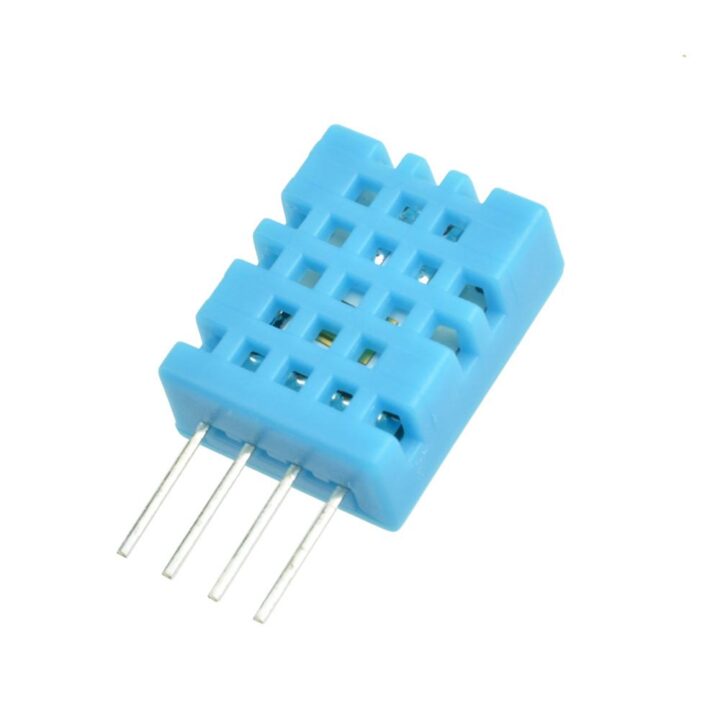
Brief Overview about DHT11 Sensor
The DHT11 sensor holds thermal resistance. Practically, it’s a resistance that changes with temperature. Hence, the term Negative resistance coefficient (NTC) is associated with this. NTC means that resistance decreases with the increment of the temperature. Also, the sensor includes the small PCB inside which estimates the analog signal, converts the analog signals into digital, and gives the digital output. Moreover, the sensor doesn’t require any initial calibration.
Hardware Required
Circuit Diagram
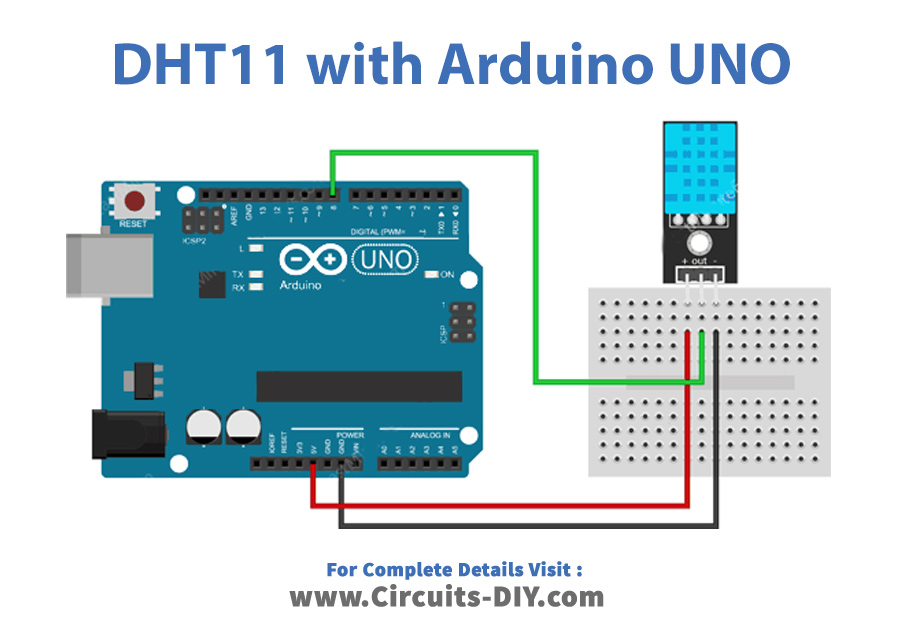
Connection Table
| Arduino | DHT11 Module |
|---|---|
| GND | GND |
| 5V | VCC |
| D8 | Vout |
Arduino Code
#include <dht.h>	// Include library
#define outPin 8	// Defines pin number to which the sensor is connected

dht DHT;			// Creates a DHT object

void setup() {
	Serial.begin(9600);
}

void loop() {
	int readData = DHT.read11(outPin);

	float t = DHT.temperature;	// Read temperature
	float h = DHT.humidity;		// Read humidity

	Serial.print("Temperature = ");
	Serial.print(t);
	Serial.print("°C | ");
	Serial.print((t*9.0)/5.0+32.0);	// Convert celsius to fahrenheit
	Serial.println("°F ");
	Serial.print("Humidity = ");
	Serial.print(h);
	Serial.println("% ");
	Serial.println("");

	delay(2000); // wait two seconds
}
Working Explanation
Interface DHT11 Module With Arduino UNO according to the schematic above. Copy the above-mentioned code and paste it into your Arduino IDE. After that, upload the code in Arduino. Now, open the serial monitor. Examine the reading on the monitor. Use a device other than the room temperature and observe the different readings.
Code Explanation
- To make the code,first you need to download the DHT11 library. You can download the library from:
https://github.com/adafruit/DHT-sensor-library
- Include the download DHT11 library. Define the Arduino pin that is connected with the out pin of the sensor. After that, create the object DHT to access different functions.
- In the void setup, initialize the serial monitor by using Serial. begin( ).
- In the void loop, use the function to read the data coming from the sensor. Give the functions DHT.Temperature and DHT.Humidity to read the temperature and humidity reading. Print the readings by using Serial.Print functions. Also, formulate the programming to return the Celsius readings into Fahrenheit. Give some delay time to get different readings.
Application and Uses
- Most importantly, it is used to estimate the temperture and humidity of the enviroonment.
- Also, in the wether statiin projects.
- Moreover, in environmental monittorin system.
- Further, in automatic climate control systems.
- Similarly, in agricultural devices.