Introduction
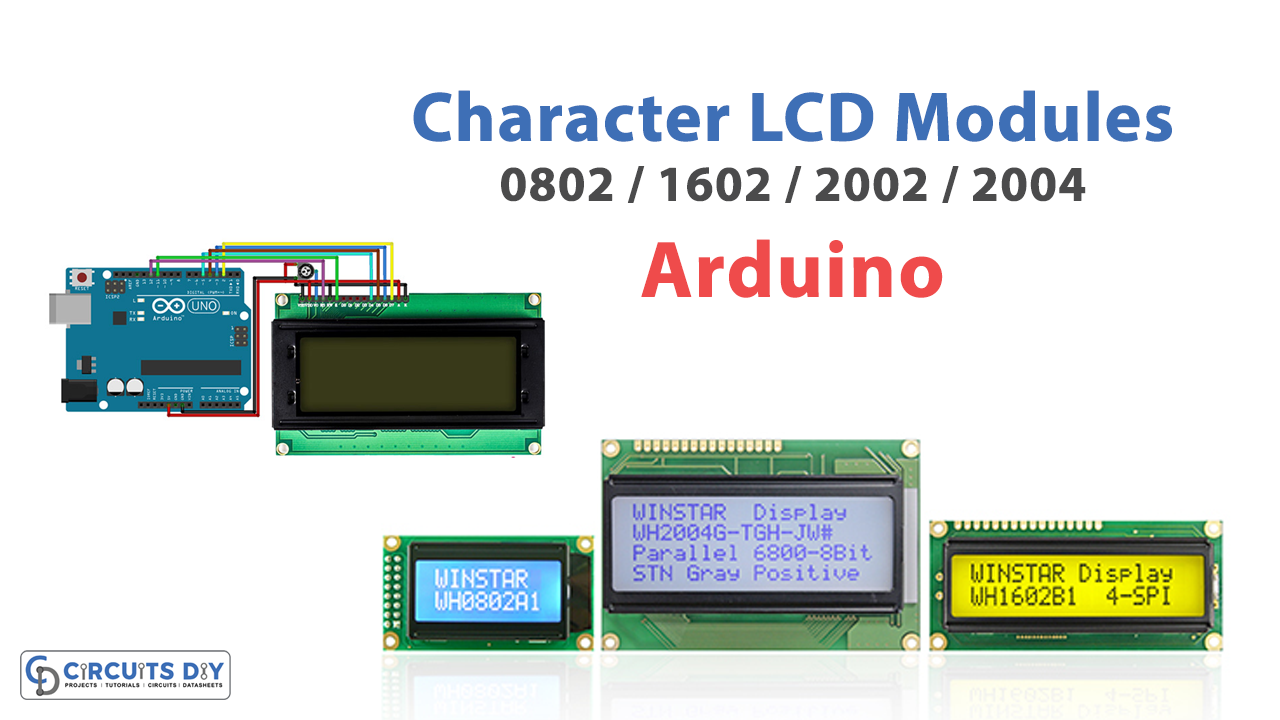
Character LCD modules are popular for displaying text and other information in various applications. These modules come in different sizes, such as 0802, 1602, 2002, and 2004, and can be interfaced with an Arduino microcontroller. This article will cover the steps required to interface an Arduino with a character LCD module and provide examples of how to display text and other information on the module.
At first, connecting a character LCD module to an Arduino can seem challenging, but it’s easy once you know the basics. For the module to interface with the Arduino, it needs a certain number of data pins, which must be connected to specific pins on the Arduino. By understanding these primary connections and the code required to communicate with the module, you can create various projects that utilize a character LCD module and an Arduino.
What is Character LCD?
Character LCD provides a library of methods for quickly displaying text on one, two, or four lines of LCDs. The component offers application programming interfaces (APIs) that allow you to design either horizontal or vertical bar graphs, or you may create and display your own unique characters.

Hardware Components
You will require the following hardware for Interfacing Character LCD Modules with Arduino.
| S.no | Component | Value | Qty |
|---|---|---|---|
| 1. | Arduino UNO | – | 1 |
| 2. | Character LCD Blue | 20×4 | 1 |
| 3. | Character LCD Green | 20×4 | 1 |
| 4. | Character LCD Blue | 16×2 | 1 |
| 5. | Character LCD Blue | 8×2 | 1 |
| 6. | Character LCD Green | 8×2 | 1 |
| 7. | Character LCD Blue | 20×2 | 1 |
| 8. | Potentiometer | 10kΩ | 1 |
| 9. | Breadboard | – | 1 |
| 10. | Jumper Wires | – | 1 |
Character LCD Modules with Arduino
Now follow the given steps to interface LCD Modules with Arduino:
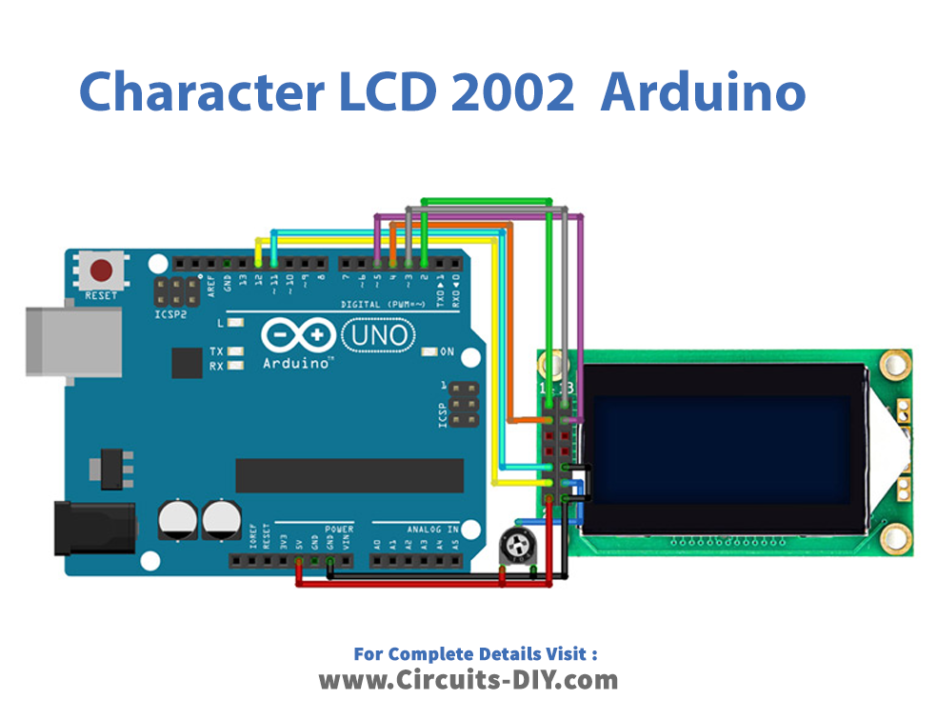
Schematic
Make connections according to the circuit diagram given below.

Installing Arduino IDE
First, you need to install Arduino IDE Software from its official website Arduino. Here is a simple step-by-step guide on “How to install Arduino IDE“.
Installing Libraries
Before you start uploading a code, download and unzip the following libraries at /Progam Files(x86)/Arduino/Libraries (default), in order to use the sensor with the Arduino board. Here is a simple step-by-step guide on “How to Add Libraries in Arduino IDE“.
Code
Now copy the following code and upload it to Arduino IDE Software.
For 0802
#include <LiquidCrystal.h>

// initialize the library with the numbers of the interface pins
LiquidCrystal lcd(12, 11, 5, 4, 3, 2);

void setup() {
  // set up the LCD's number of columns and rows:
  lcd.begin(8, 2);
}

void loop() {
  // set the cursor to (0,0):
  lcd.setCursor(0, 0);
  // print from 0 to 8:
  for (int thisChar = 0; thisChar < 9; thisChar++) {
    lcd.print(thisChar);
    delay(50);
  }
    // set the cursor to (0,1):
  lcd.setCursor(0, 1);
  // print from 0 to 8:
  for (int thisChar = 0; thisChar < 9; thisChar++) {
    lcd.print(thisChar);
    delay(50);
  }


  delay(500);
   // clear screen for the next loop:
  lcd.clear();
}
Arduino Code 1602
#include <LiquidCrystal.h>

// initialize the library with the numbers of the interface pins
LiquidCrystal lcd(12, 11, 5, 4, 3, 2);

void setup() {
  // set up the LCD's number of columns and rows:
  lcd.begin(16, 2);
}

void loop() {
  // set the cursor to (0,0):
  lcd.setCursor(0, 0);
  // print from 0 to 9:
  for (int thisChar = 0; thisChar < 10; thisChar++) {
    lcd.print(thisChar);
    delay(500);
  }

  // set the cursor to (16,1):
  lcd.setCursor(16, 1);
  // set the display to automatically scroll:
  lcd.autoscroll();
  // print from 0 to 9:
  for (int thisChar = 0; thisChar < 10; thisChar++) {
    lcd.print(thisChar);
    delay(500);
  }
  // turn off automatic scrolling
  lcd.noAutoscroll();

  // clear screen for the next loop:
  lcd.clear();
}
For 2004
#include <LiquidCrystal.h>

// initialize the library with the numbers of the interface pins
LiquidCrystal lcd(12, 11, 5, 4, 3, 2);

void setup() {
  // set up the LCD's number of columns and rows:
  lcd.begin(20, 4);
}

void loop() {
  // set the cursor to (0,0):
  lcd.setCursor(0, 0);
  // print from 0 to 20:
  for (int thisChar = 0; thisChar < 15; thisChar++) {
    lcd.print(thisChar);
    delay(50);
  }
    // set the cursor to (0,1):
  lcd.setCursor(0, 1);
  // print from 0 to 20:
  for (int thisChar = 0; thisChar < 15; thisChar++) {
    lcd.print(thisChar);
    delay(50);
  }
    // set the cursor to (0,2):
  lcd.setCursor(0, 2);
  // print from 0 to 20:
  for (int thisChar = 0; thisChar < 15; thisChar++) {
    lcd.print(thisChar);
    delay(50);
  }
    // set the cursor to (0,3):
  lcd.setCursor(0, 3);
  // print from 0 to 20:
  for (int thisChar = 0; thisChar < 15; thisChar++) {
    lcd.print(thisChar);
    delay(50);
  }

  delay(500);
   // clear screen for the next loop:
  lcd.clear();
}
Let’s Test It
Upload the code to the Arduino board by clicking on the “Upload” button in the Arduino IDE. Observe the LCD module; the code will run and display the desired result on the screen.
Working Explanation
Let’s dive into the codes.
For Module 0802
This code is designed to be simple and easy to understand for beginners; it’s a basic example of how to interface an Arduino with a character LCD module and display numbers on it, you can use this as a starting point to create more complex projects using character LCD modules and Arduino.
- The first thing we see is the line “#include <LiquidCrystal.h>“. This line is called a “library,” It is used to give the Arduino access to a set of pre-written code that makes interfacing with the LCD module easier.
- Next, we see a line that says “LiquidCrystal LCD (12, 11, 5, 4, 3, 2);”. This line creates an “object” of the LiquidCrystal library and tells the Arduino which pins on the microcontroller will be connected to the LCD module. The Arduino pins 12, 11, 5, 4, 3 and 2 will be connected to the LCD module.
- The code then goes into the “void setup“, where we set up the LCD module. The “Lcd.begin(8, 2);” line tells the Arduino how many columns and rows the LCD module has. In this case, the LCD module has 8 columns and 2 rows.
- After that, the code goes into the “void loop” function, which will run repeatedly. In the loop function, we first set the cursor position on the LCD using “lcd.setCursor(0, 0);”. The first number, 0, sets the column position, and the second number, 0, sets the row position. So this code sets the cursor to the first column and the first row. Then we use a “for loop” to print numbers from 0 to 8, with a delay of 50 milliseconds between each number. This will make the numbers appear one by one on the first row of the LCD. Then we again set the cursor to the first column and the second row and repeat the same process. Finally, we use the “lcd.clear();” to clear the screen for the next loop.
For 1602
This code is similar to the previous example, with a few differences.
- The first difference is in the “setup” function, where the line “lcd.begin(16, 2);” is used. This tells the Arduino that the LCD module has 16 columns and 2 rows.
- In the “loop” function, we again use the “lcd.setCursor(0, 0);” to set the cursor position to the first column and the first row. Then we use a for loop to print numbers from 0 to 9, with a delay of 500 milliseconds between each number. This will make the numbers appear one by one on the first row of the LCD.
- Then we set the cursor to the 17th column and the second-row using “lcd.setCursor(16, 1);”. Then we use “lcd.autoscroll(),” which turns on the automatic scrolling feature. This will make the text scroll automatically when it reaches the end of the screen.
For 2004
This code is similar to the previous examples, but it’s designed to work with a larger LCD module with 4 rows and 20 columns. It will print numbers from 0 to 14 on the first and second rows.
- The first difference is in the “setup” function, where the line “lcd.begin(20, 4);” is used. This tells the Arduino that the LCD module has 20 columns and 4 rows.
- In the “loop” function, we again use the “lcd.setCursor(0, 0);” to set the cursor position to the first column and the first row. Then we use a for loop to print numbers from 0 to 14, with a delay of 50 milliseconds between each number. This will make the numbers appear one by one on the first row of the LCD.
- Then we set the cursor to the first column and the second row using “lcd.setCursor(0, 1);”. Then we again use a for loop to print numbers from 0 to 14, with a delay of 50 milliseconds between each number.
Applications
- Medical device
- Car and home audio
- Toys, etc
Conclusion.
We hope you have found this Interfacing Character LCD Modules 0802 / 1602 / 2002 / 2004 with Arduino Circuit very useful. If you feel any difficulty in making it feel free to ask anything in the comment section.