Introduction
Are you tired of being tethered to your Arduino projects with cords and cables? The HC-06 Bluetooth Wireless Module is here to help you break free and take your projects to the next level!
With this handy little device, you can easily connect your Arduino board to various Bluetooth-enabled devices, such as smartphones, tablets, and laptops. This opens up a world of possibilities for remote control and data transmission, all wirelessly and from the comfort of your device.
In this blog, we’ll dive deep into the world of the HC-06 Bluetooth module and explore all of its impressive capabilities. From setting it up and connecting it to your Arduino board to using it to transmit data wirelessly, we’ve got you covered. So grab your Arduino board, and let’s get started on your next wireless project adventure!
What is HC-06 Bluetooth Wireless Module?
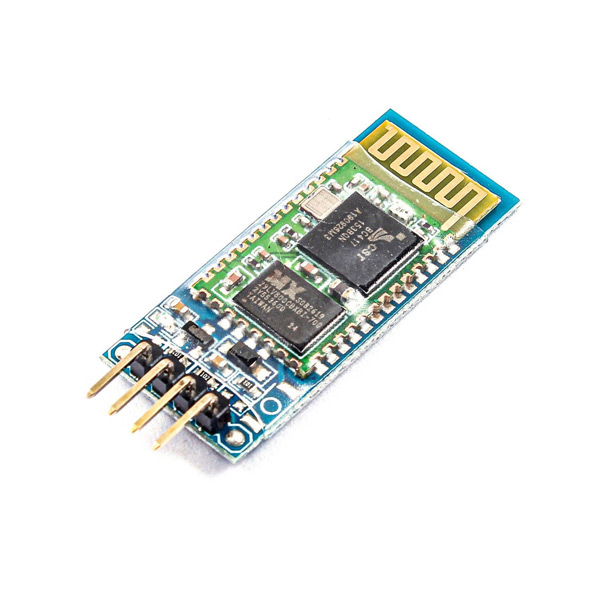
The HC-06 Bluetooth Wireless Module is an affordable, low-cost Bluetooth device for short-range wireless data transmission. It is commonly used in projects involving home automation, robotics, and Internet of Things (IoT) applications. The HC-06 is a slave-only device and can be connected to an Arduino or any other microcontroller. It is an easy-to-use device that makes it simple to create wireless connections between devices.
Hardware Components
You will require the following hardware for Interfacing Adafruit Bluefruit LE SPI Friend with Arduino.
| S.no | Component | Value | Qty |
|---|---|---|---|
| 1. | Arduino UNO | – | 1 |
| 2. | Bluetooth Serial Wireless Module | HC-06 | 1 |
| 3. | Breadboard | – | 1 |
| 4. | Jumper Wires | – | 1 |
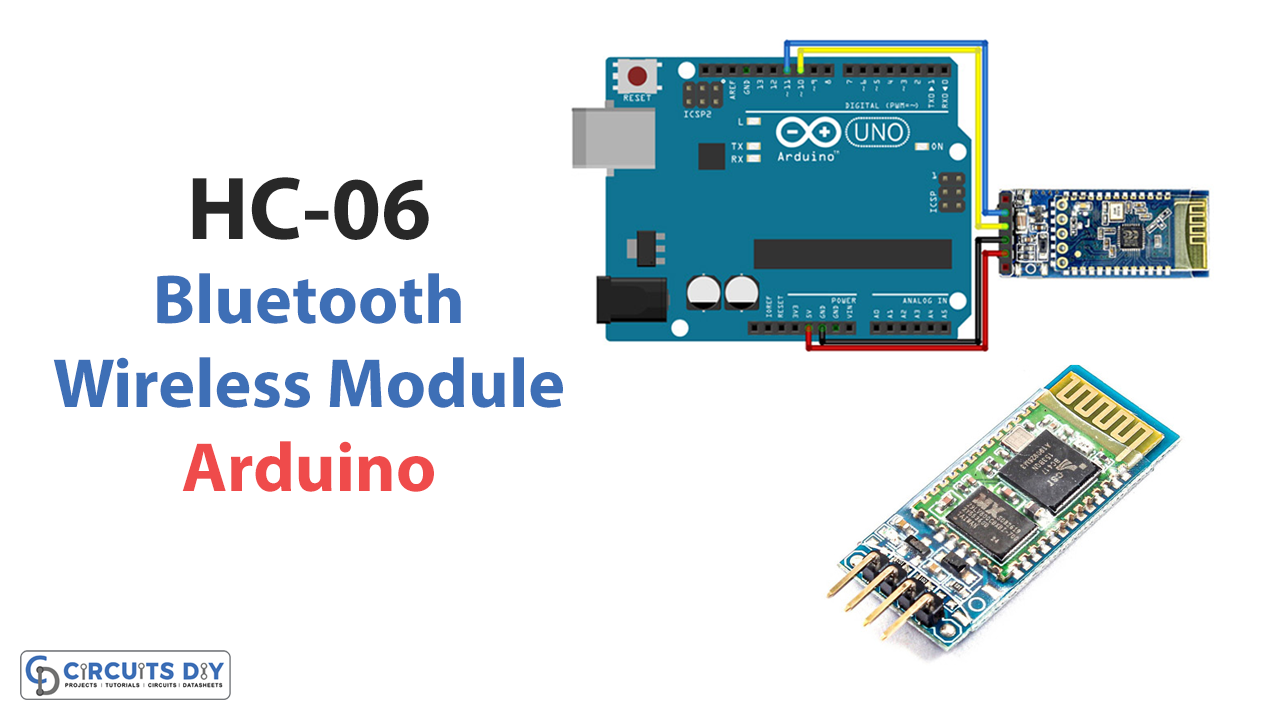
HC-06 Bluetooth Module with Arduino
Here are some steps to help you interface the HC-06 Bluetooth Wireless Module with Arduino:
Schematic
Make connections according to the circuit diagram given below.
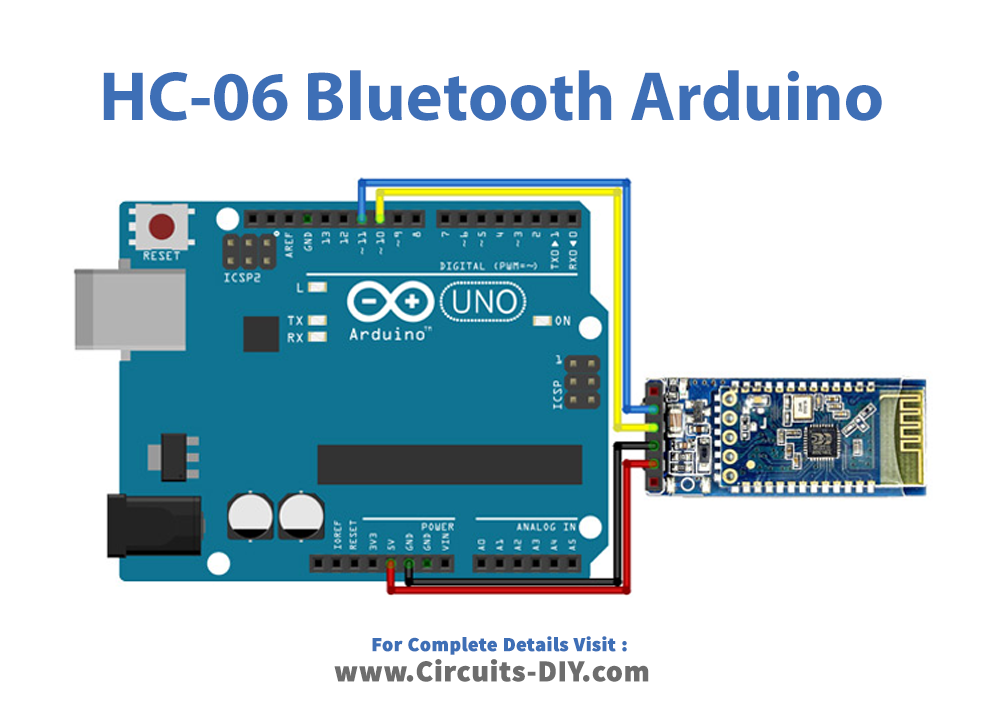
Wiring / Connections
| Arduino | Bluetooth Module |
|---|---|
| 5V | VCC |
| GND | GND |
| D10 | TX |
| D11 | DX |
Installing Arduino IDE
First, you need to install Arduino IDE Software from its official website Arduino. Here is a simple step-by-step guide on “How to install Arduino IDE“.
Installing Libraries
Before you start uploading a code, download and unzip the following libraries at /Progam Files(x86)/Arduino/Libraries (default), in order to use the sensor with the Arduino board. Here is a simple step-by-step guide on “How to Add Libraries in Arduino IDE“.
Code
Now copy the following code and upload it to Arduino IDE Software.
   /*
  Modified on March 09, 2021
  Modified by MohammedDamirchi from https://github.com/PaulStoffregen/SoftwareSerial
  Home
*/


#include <SoftwareSerial.h>

SoftwareSerial mySerial(10, 11); // RX, TX

void setup() {
Open serial communications and wait for the port to open:
  Serial.begin(9600);
  while (!Serial) {
    ; // wait for serial port to connect. Needed for native USB port only
  }

  // set the data rate for the SoftwareSerial port
  mySerial.begin(9600);
}

void loop() { // run over and over
  if (mySerial.available()) {
    Serial.write(mySerial.read());
  }
  if (Serial.available()) {
    mySerial.write(Serial.read());
  }
Let’s Test It
It’s now time to test the circuit. Once you upload the code, this code makes the two serial communication interfaces communicate, so whatever is sent to one will be received by the other and vice versa.
Working Explanation
To understand the working of the circuit, you need to know how the code works:
- This code uses the SoftwareSerial library, which allows for serial communication on any two digital pins of a microcontroller. The library is being used to create a new SoftwareSerial object, named “mySerial,” that uses digital pins 10 and 11 for receiving (RX) and transmitting (TX) data, respectively.
- In the setup() function, the code first sets the baud rate (data transfer rate) for the built-in Serial communication to 9600 baud and waits for the serial port to be ready. Then it also sets the baud rate for the “mySerial” object to 9600.
- The loop() function runs repeatedly and checks for incoming data on the “mySerial” object and the built-in Serial communication. If there is data available on “mySerial,” the code reads the data and writes it to the built-in Serial communication. Similarly, if data is available on the built-in Serial communication, the code reads it and corresponds it to the “mySerial” object. This is done via Serial.write(mySerial.read()) and mySerial.write(Serial.read()) statements.
Applications
- Wireless automation systems
- Remote control devices, etc
Conclusion.
We hope you have found this Interfacing Adafruit Bluefruit LE SPI Friend with Arduino Circuit very useful. If you feel any difficulty in making it feel free to ask anything in the comment section.